My Astrophotography Journey: The ZWO Electronic Autofocuser
One of my main goals in starting out in astrophotography is to avoid the need to spend all night outside in the cold watching the telescope. The requirement of long exposures and multiple images where you can’t actually see what’s happening is not that appealing to me. I have been looking into methods for automating the acquisition of images without actually sitting in the dark by the telescope. This series of posts follows me in my journey towards an automated astrophotography setup that can be used at home or elsewhere without breaking my budget.
In this post I cover integrating the ZWO EAF autofocus motor with the ASIair Plus mini computer system and Sky Watcher EVOLUX 62ED refractor telescope.
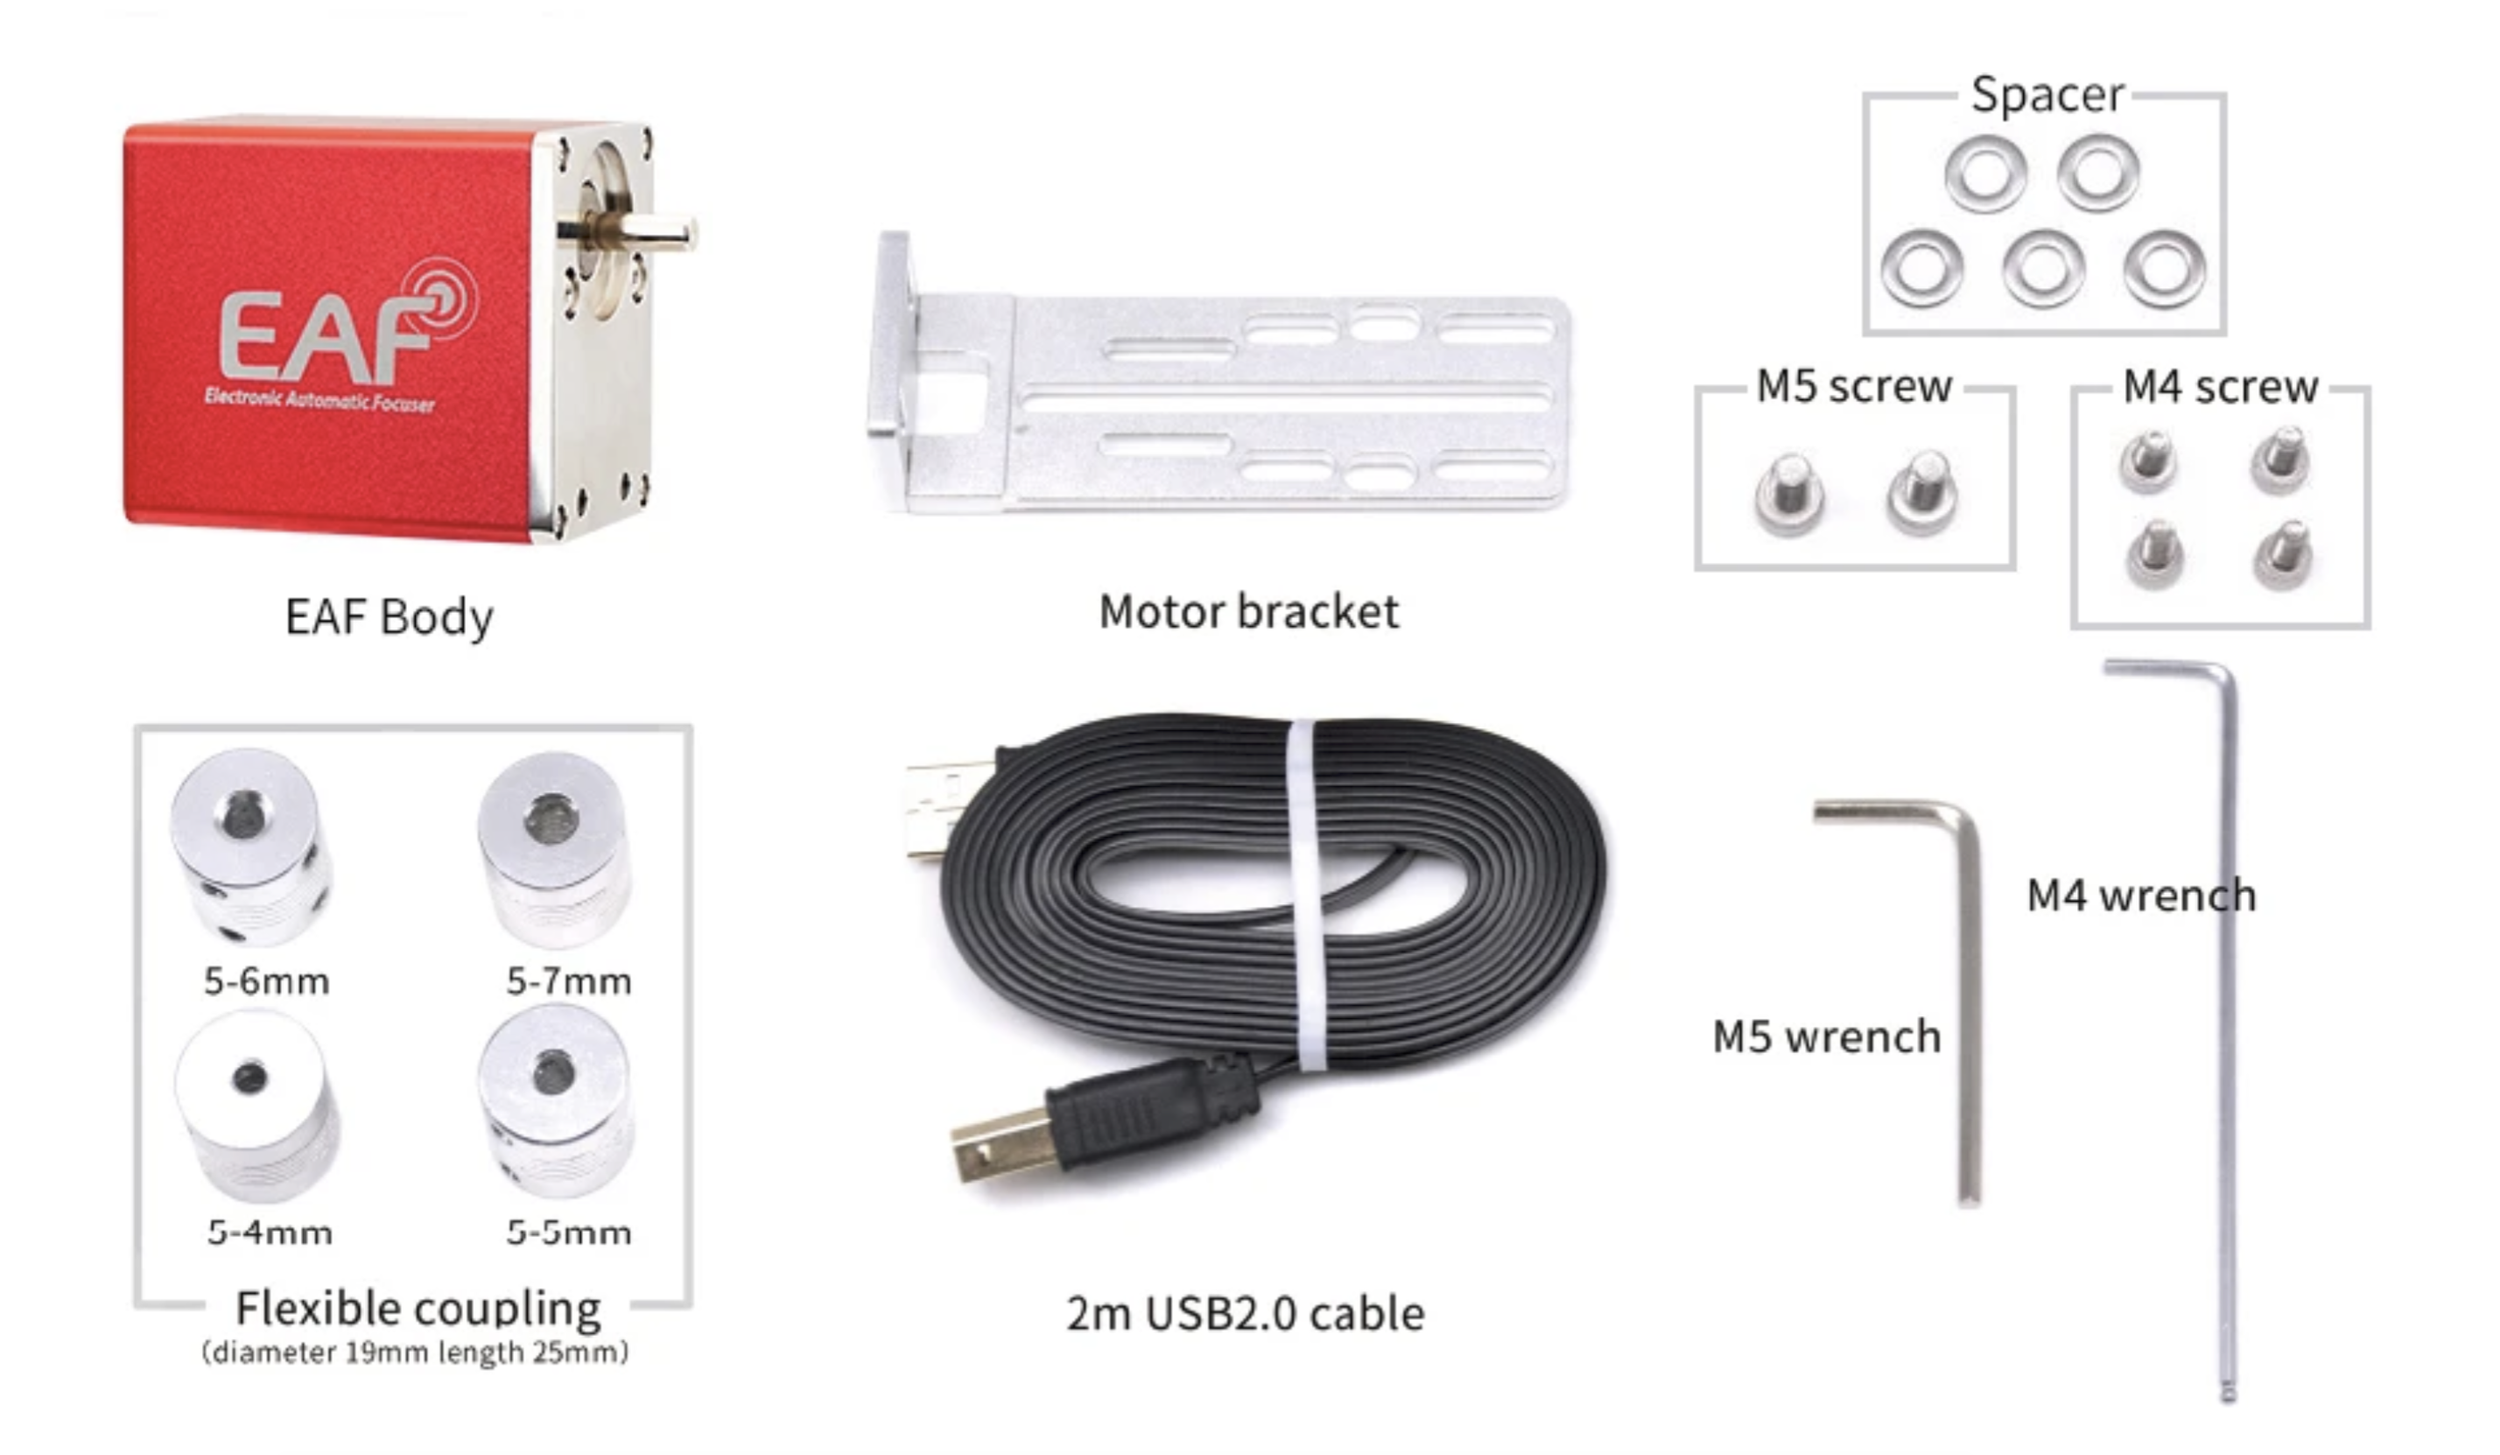
The ZWO EAF kit comes with everything needed to fit the autofocuser onto the Sky Watcher EVOLUX 62ED telescope.
Contrary to what I had read on the internet forums the standard ZWO EAF kit fits perfectly onto the Evolux 62ED without the need to grind down the flexible couplings, remove the fine focus gearbox or use the special Takahashi mounting bracket. The following images show the steps you will need to follow to fit the autofocus motor and bracket onto the telescope.
You will need the following items from the EAF kit:
EAF Body
Motor Bracket
5mm - 6mm Flexible Coupling
4 x M4 screws
M4 and M5 wrenches
Mounting the EAF to the Sky Watcher EVOLUX 62ED Telescope
Begin by removing the vixen dovetail from the based of the telescope. There are four Allen bolts holding the dovetail in place that can be removed using the M5 wrench supplied with the EAF. Also remove the large silver “focus lock” thumbscrew at the bottom of the telescope (this is no longer needed) and lay the telescope upside down on a clean surface so the focuser assembly is accessible.
1. Turn the focus knob until the grub screw can be seen through the access hole.
2. Loosen and remove the grub screw and slide the focus knob from the focus housing. Its quite a small screw so you will need a small Allen wrench or screwdriver
3. The focus shaft. Note the shaft doesn't protrude much and the recess is too small for the flexible coupling to fit, but there is still enough shaft for the flexible coupling to fit securely.
4. Fit the flexible coupling onto the focus shaft and tighten the two grub screws using the supplied M4 Allen wrench. I used the 6mm to 5mm coupling (6mm to telescope shaft). Leave a slight gap to make sure that the flexible coupling doesn't scrape on the housing when turned.
5. Fit the EAF motor shaft into the flexible coupler and tighten the two grub screws using the M4 wrench. The shaft has a flat portion so make sure this lines up with one of the grub screws.
6. Rotate the EAF motor until it is correctly aligned
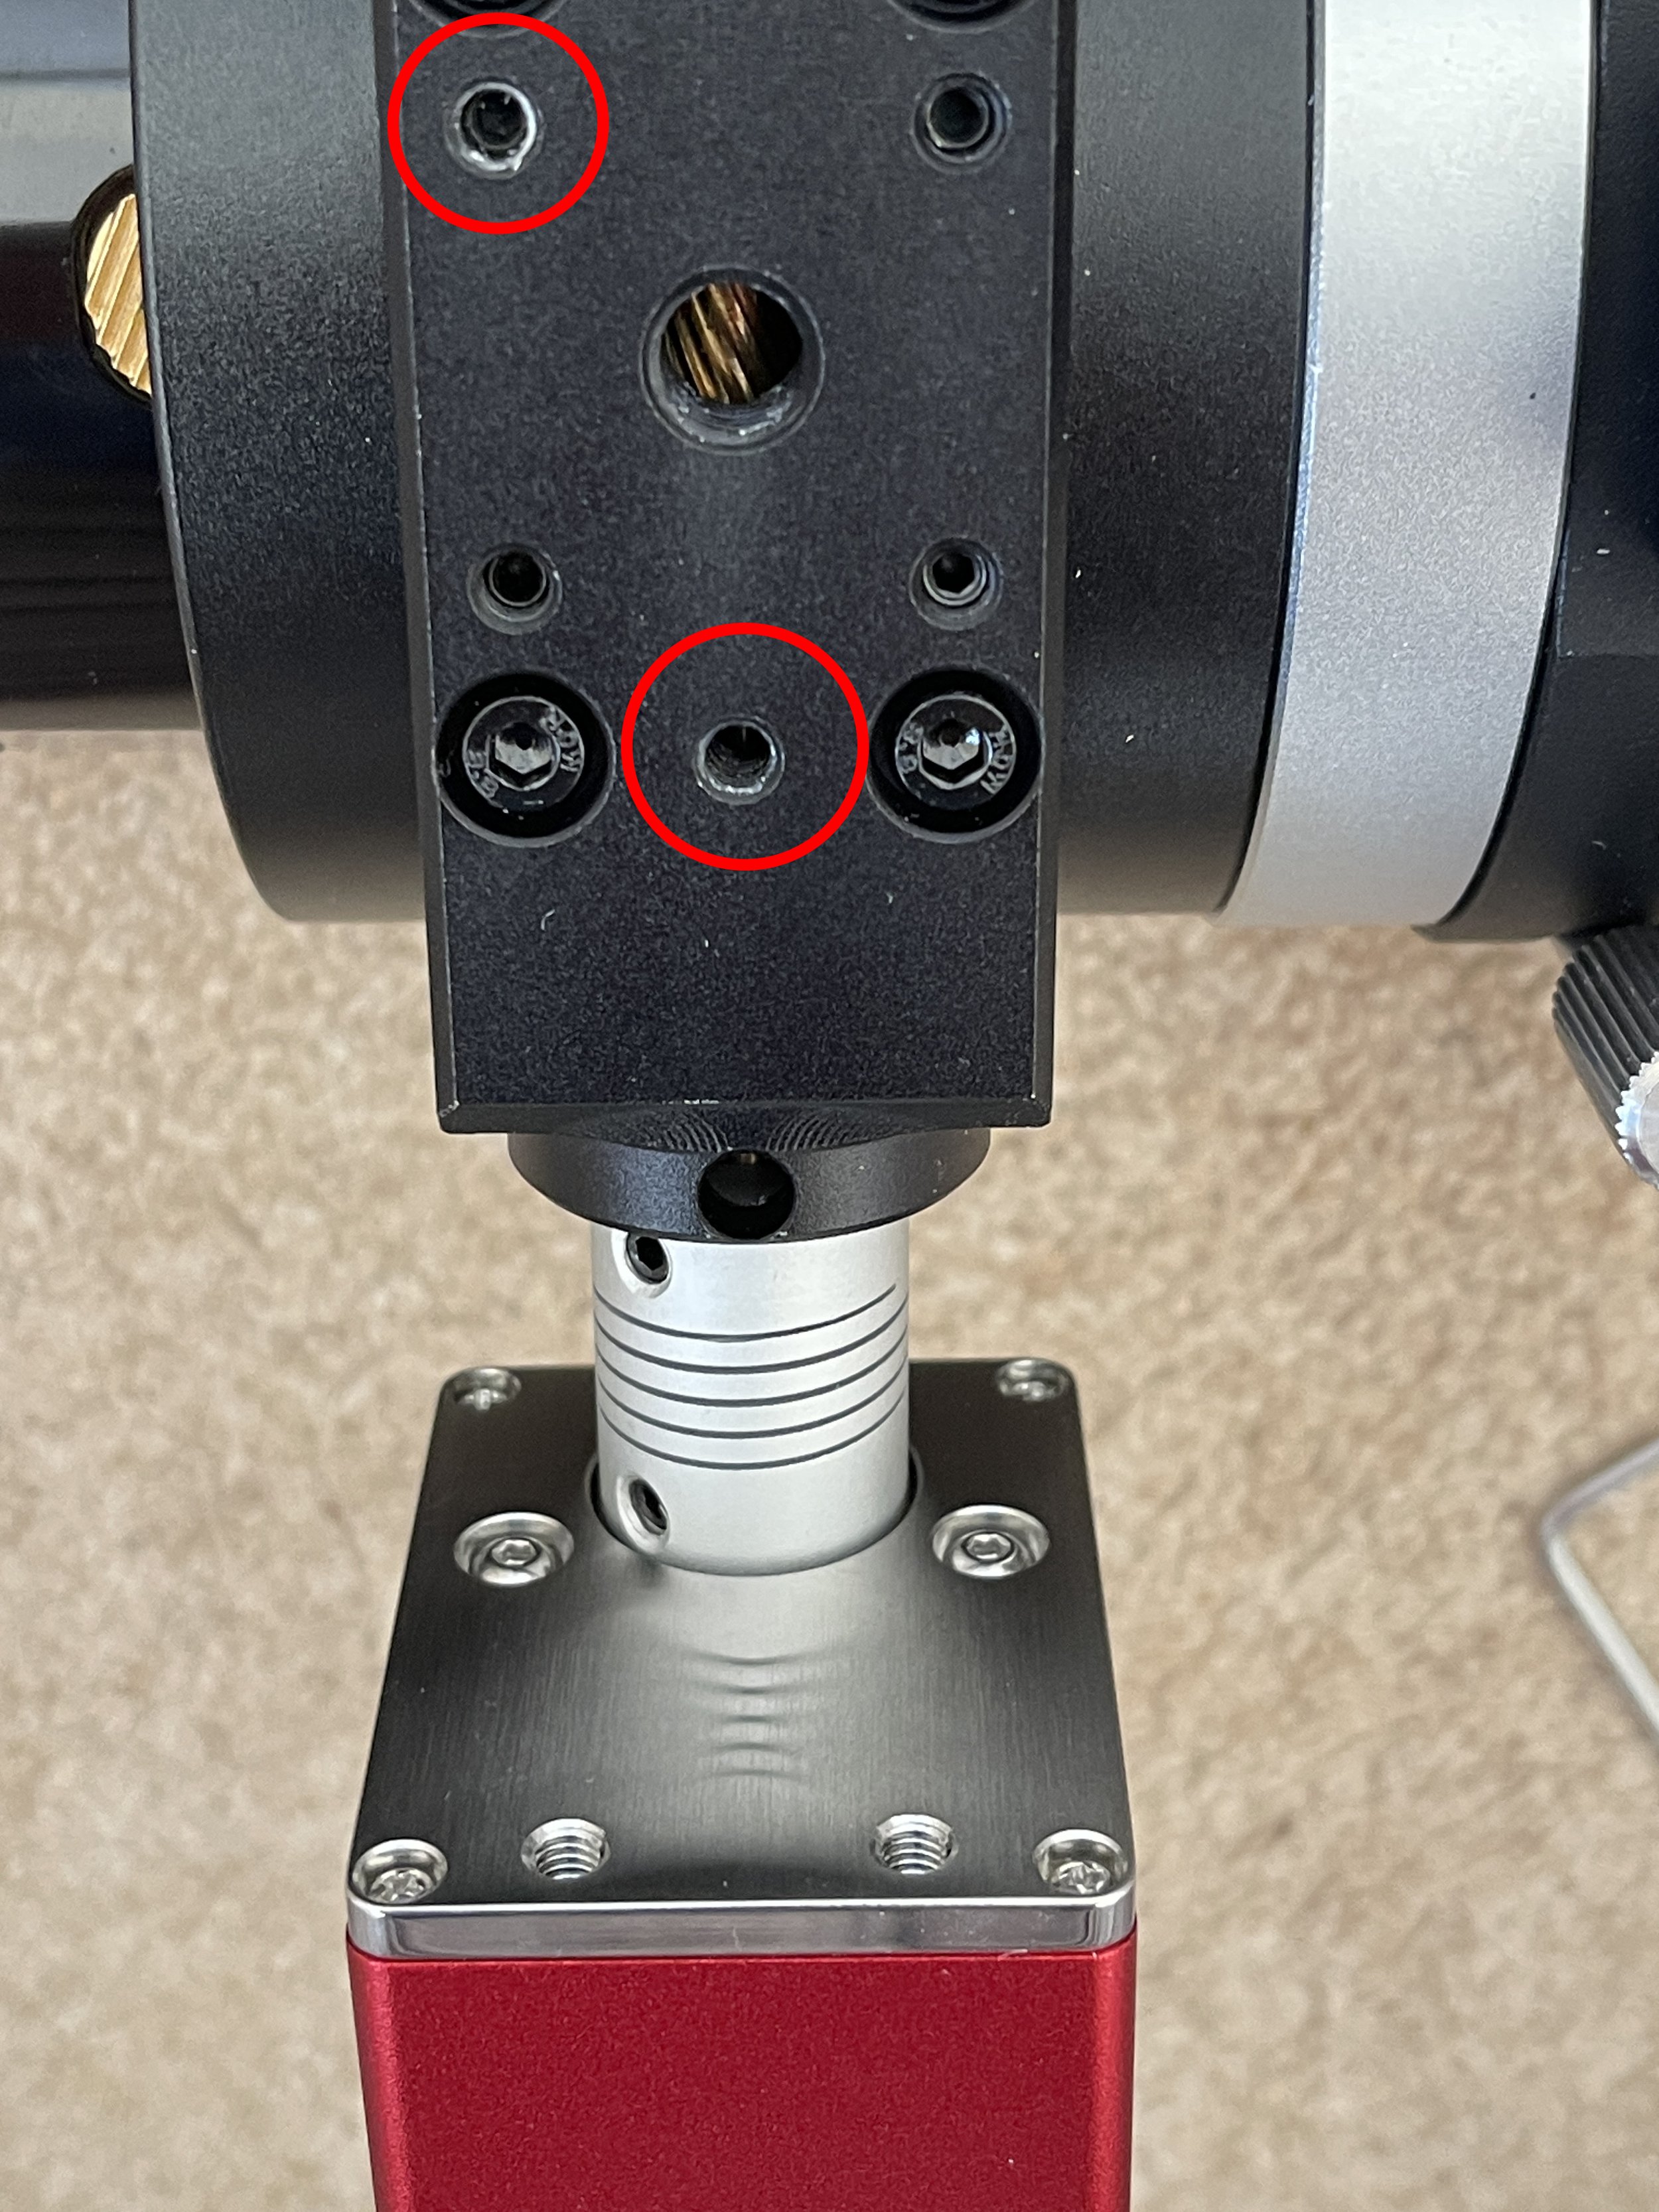
7. EAF correctly aligned. Note the position of the two screw holes (marked in red)chosen to mount the bracket. The M4 screws supplied with the kit fit perfectly.
8. Fit the motor bracket using two of the supplied M4 screws and washers. The bracket is fitted at a very slight angle using these screw holes but the flexible coupling will easily accommodate this slight offset.
9. Loosely tighten at this stage.
10. Fit the two M4 screws and washers through the motor bracket into the EAF housing
11. Fully tighten the screws holding the bracket to the EAF and telescope focus assembly
12. Refit the telescope dovetail.
Setting up the ZWO EAF Focus Limits using ASI Studio
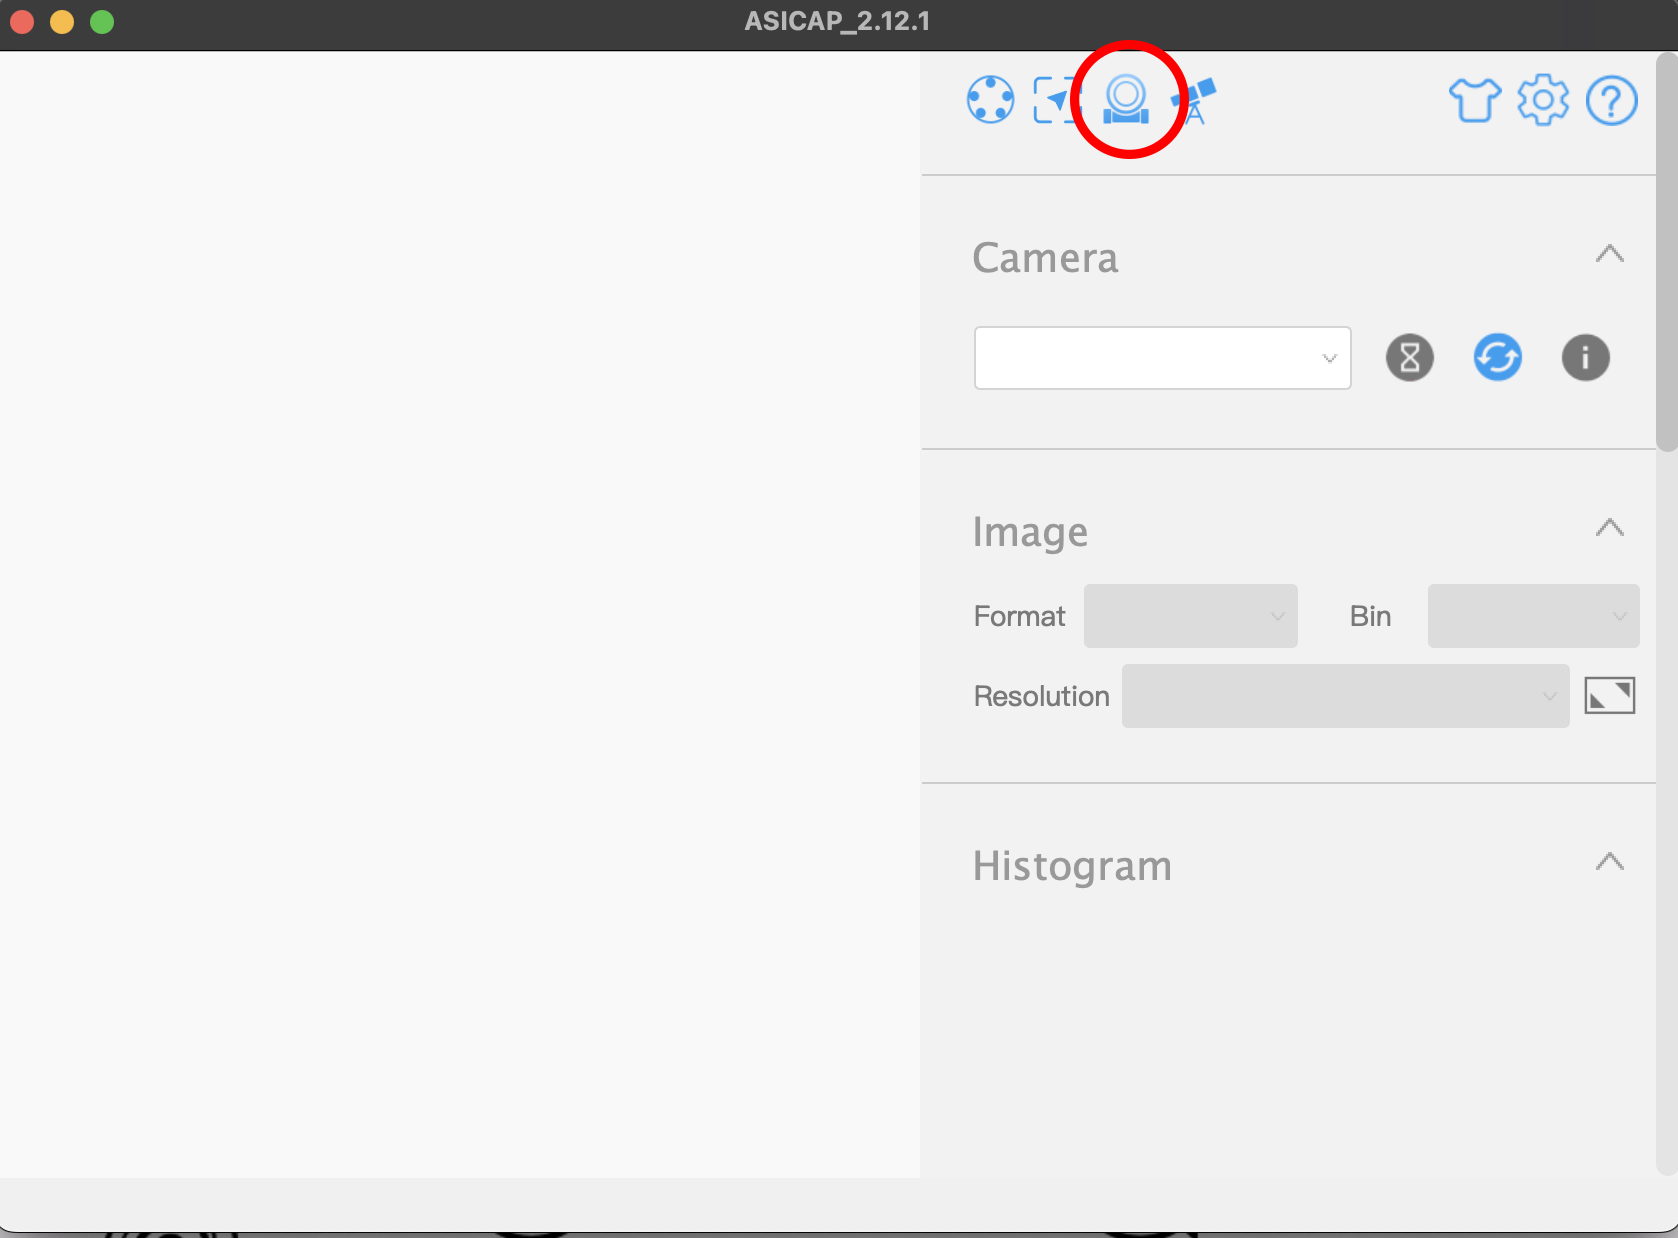
Connect the EAF to a computer using the supplied USB cable, run the ASI Studio program and then select ASI Cap.
1. Select the Focuser tab within ASI Cap
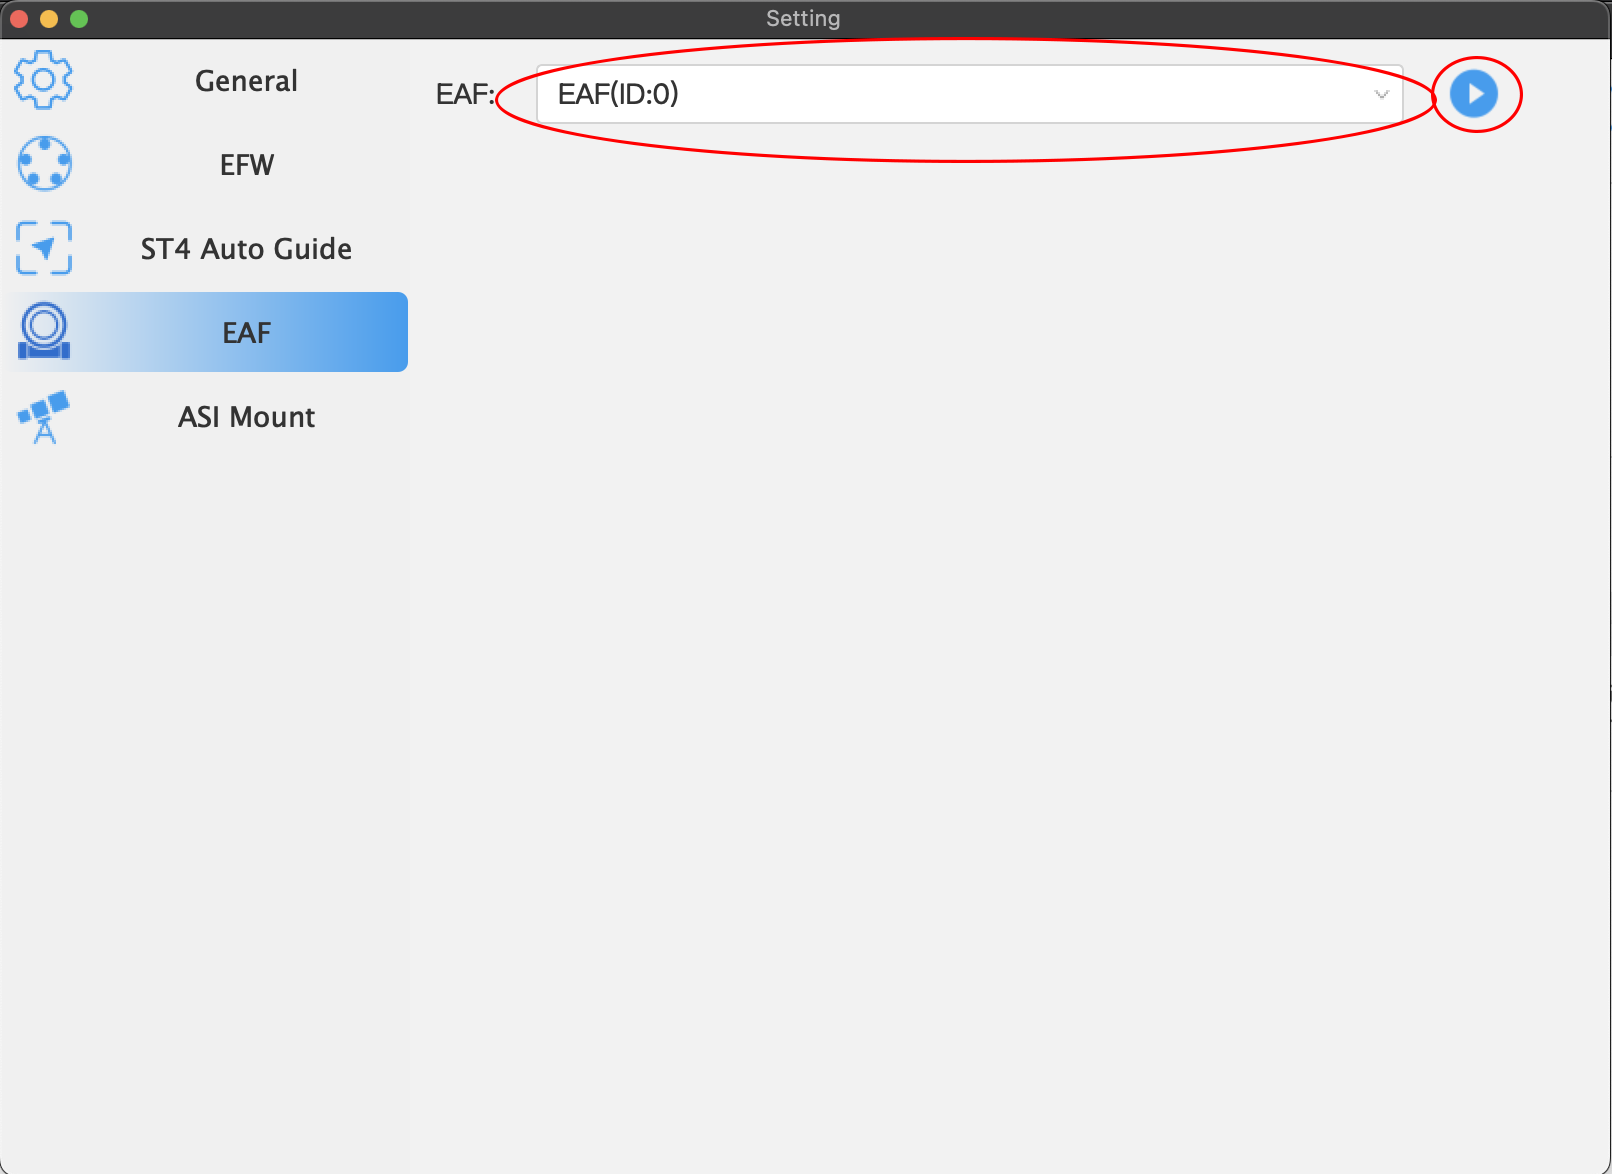
2. Select the EAF from the drop down list and click connect (play icon)
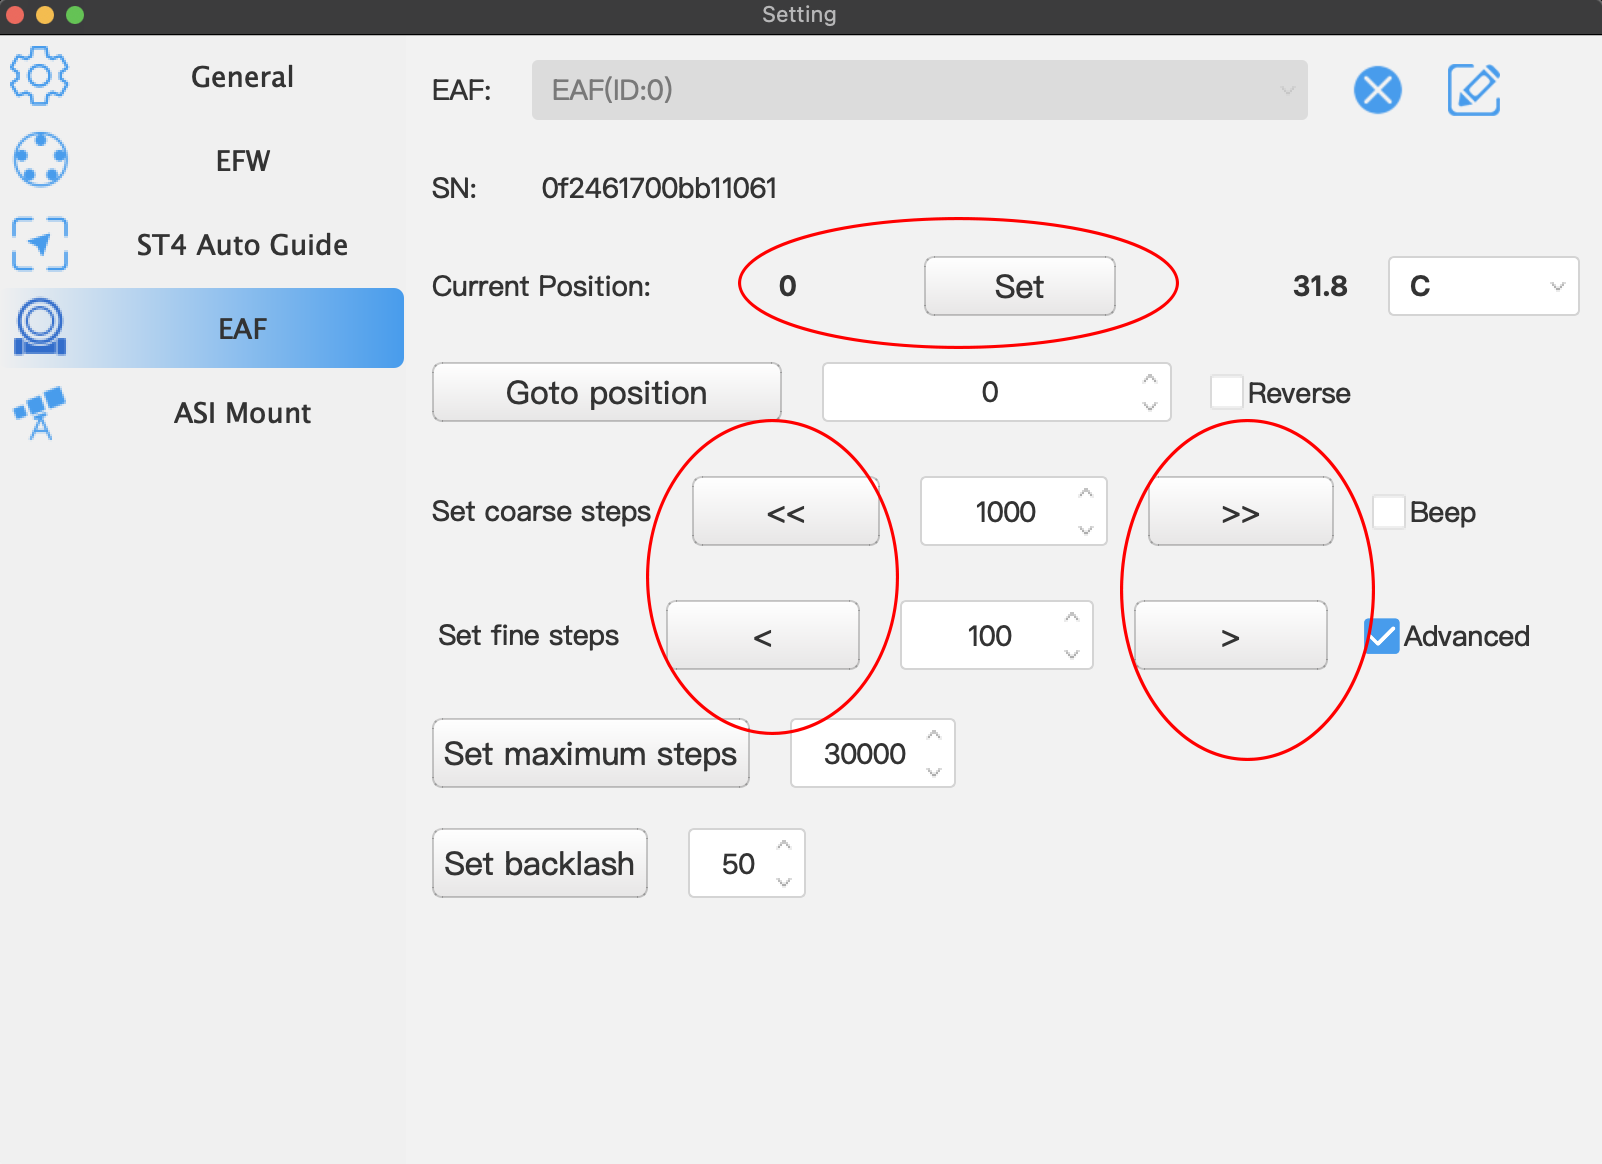
3. Make sure that the Advanced option is ticked. Using the coarse and fine arrows drive the focus motor so that the draw tube is in its fully retracted position and press Set to set this position to zero.
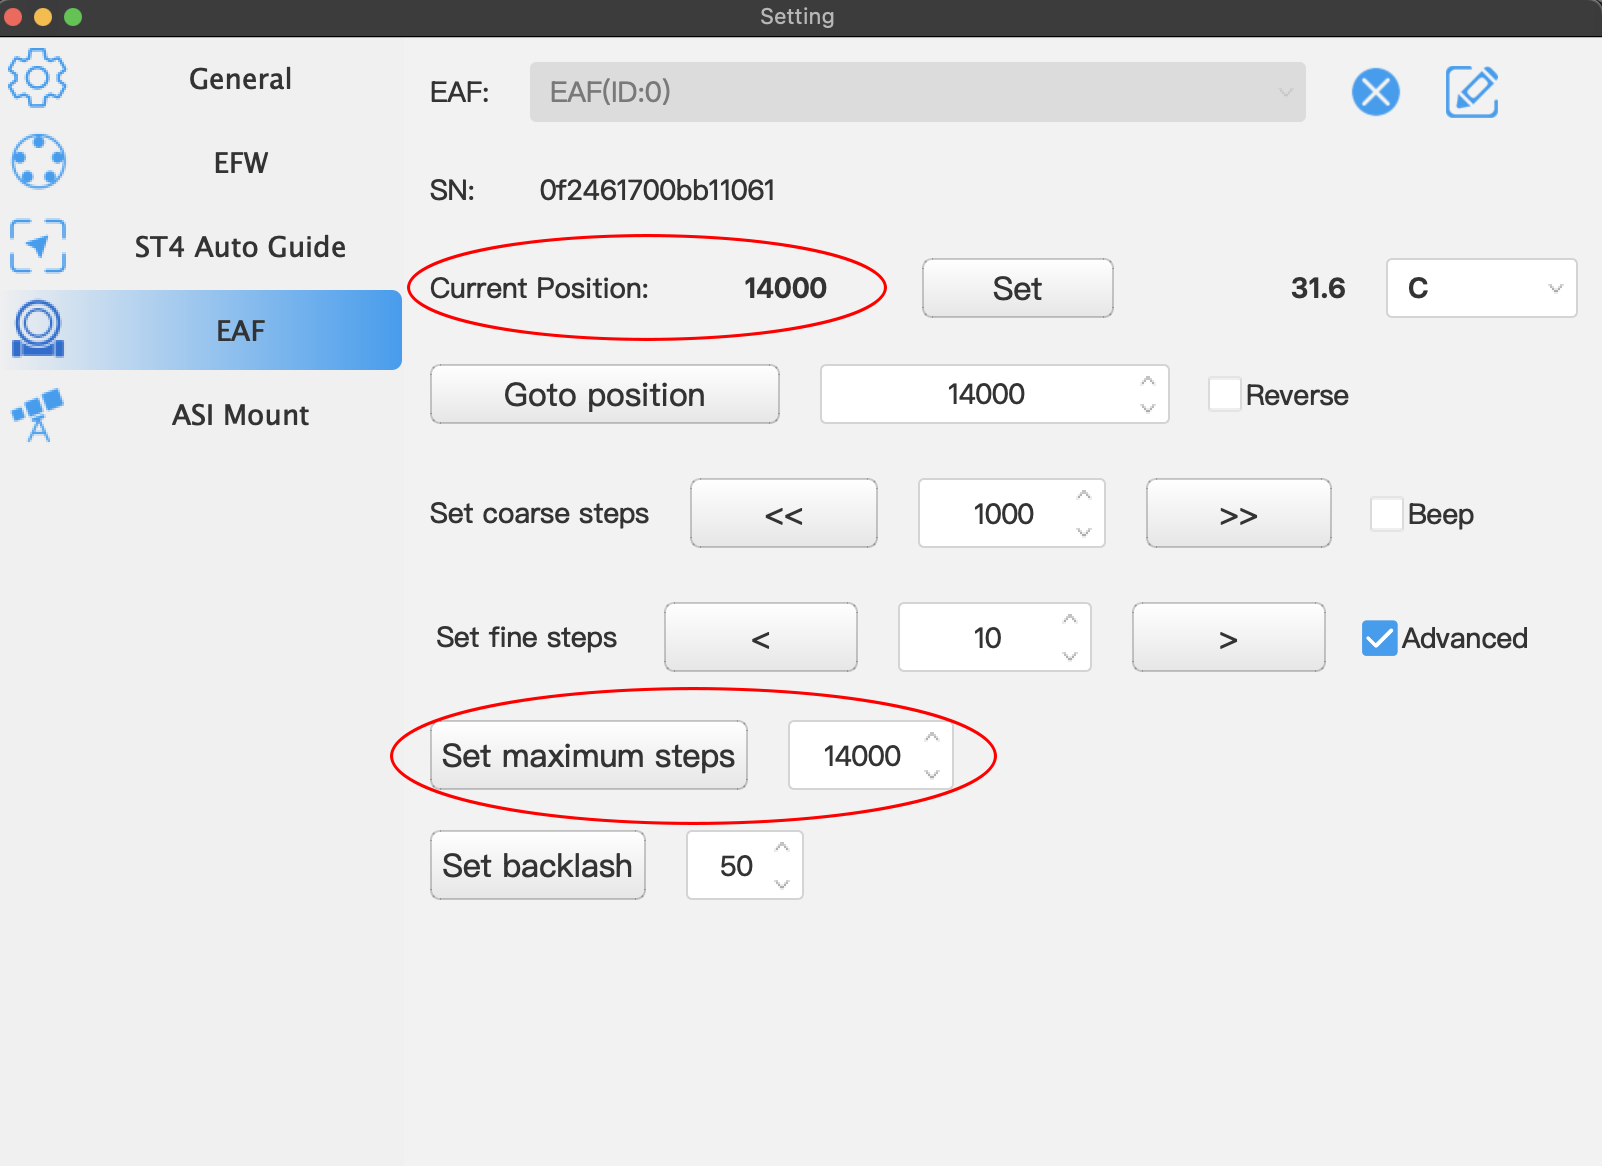
4. Now use the coarse and fine arrows to carefully drive the draw tube to its maximum extension, Once at the end of travel read the Current Position and set this value in the Set Maximum Steps entry. This is now the maximum the autofocuser will drive to.
Be careful driving the focus to its maximum as the EAF motor has enough torque to actually drive the rack and pinion mechanism past its stops and eject the draw tube (I know from experience !!!).
Setting up the ZWO EAF Focus Backlash using ASI Studio
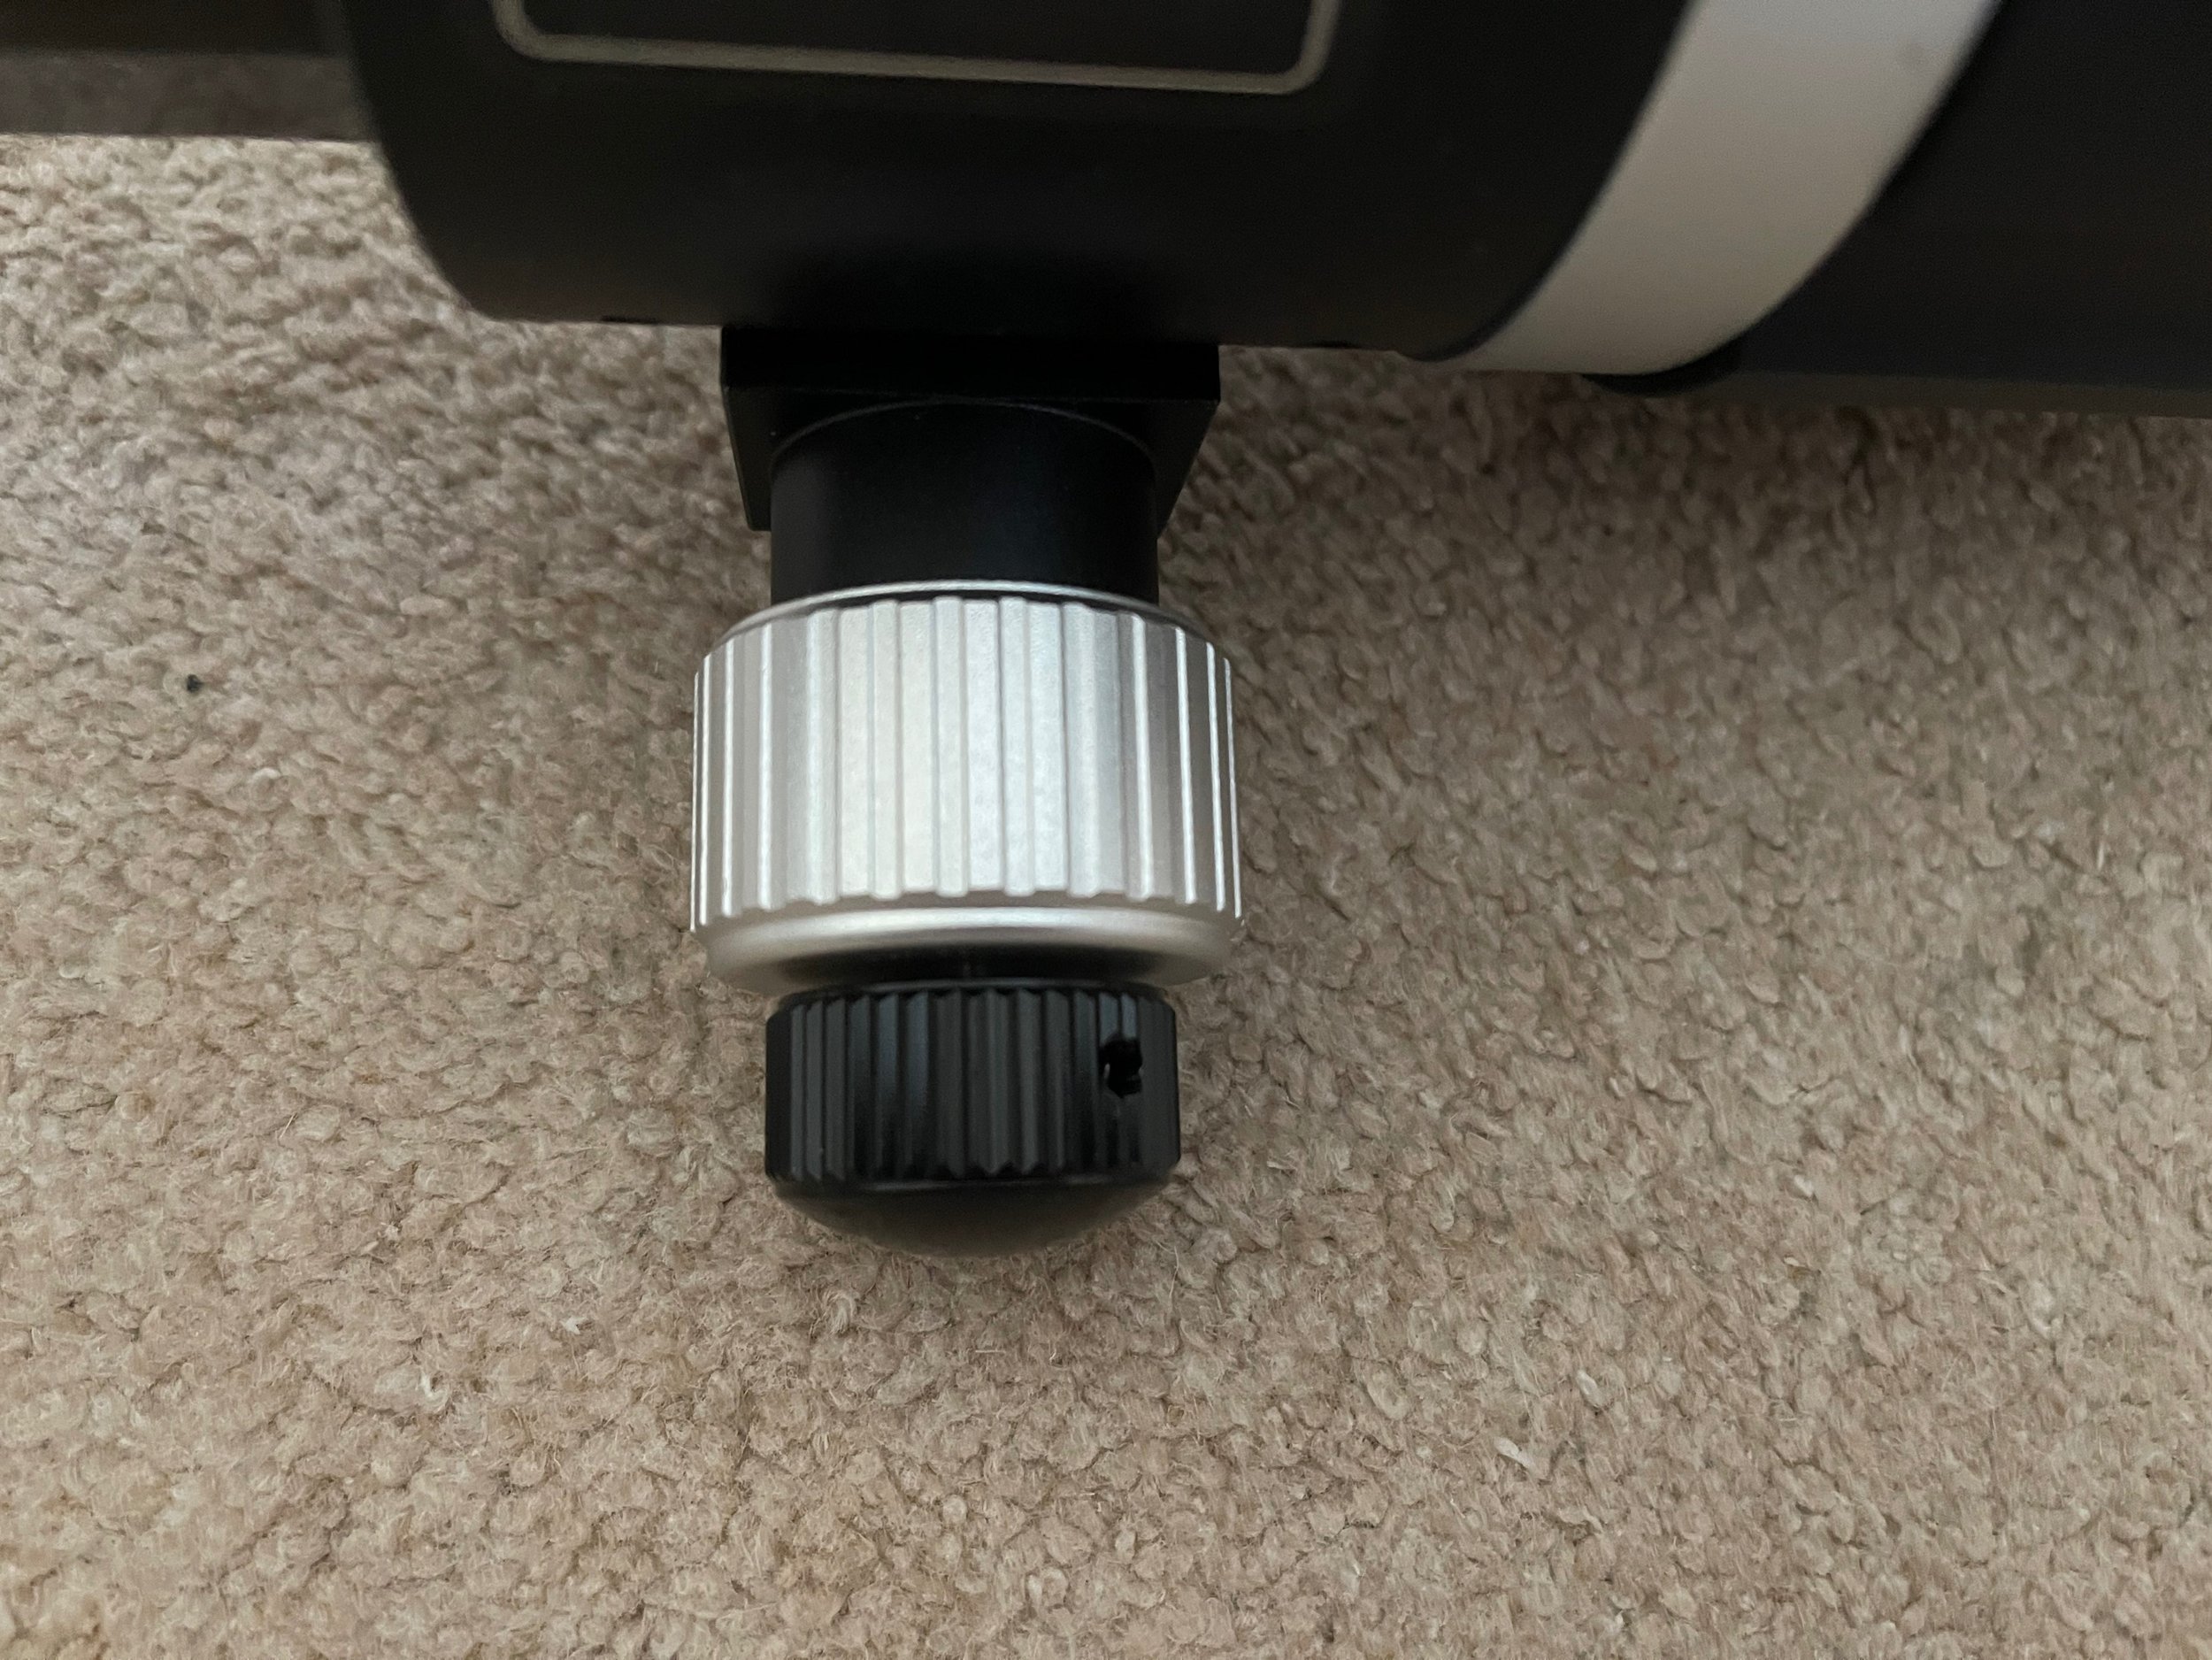
1. Use the fine focus arrows to set the grub screw hole in the fine tune knob to its top position or so that it lines up with something so you can check for reproducibility
2. Set the coarse step to 1000 and drive the focus three steps in the same direction (outward). Now drive the focus three steps in the opposite direction (inward). Check whether the grub screw hole is in the same position as before. Here the hole is about 45º out of position.
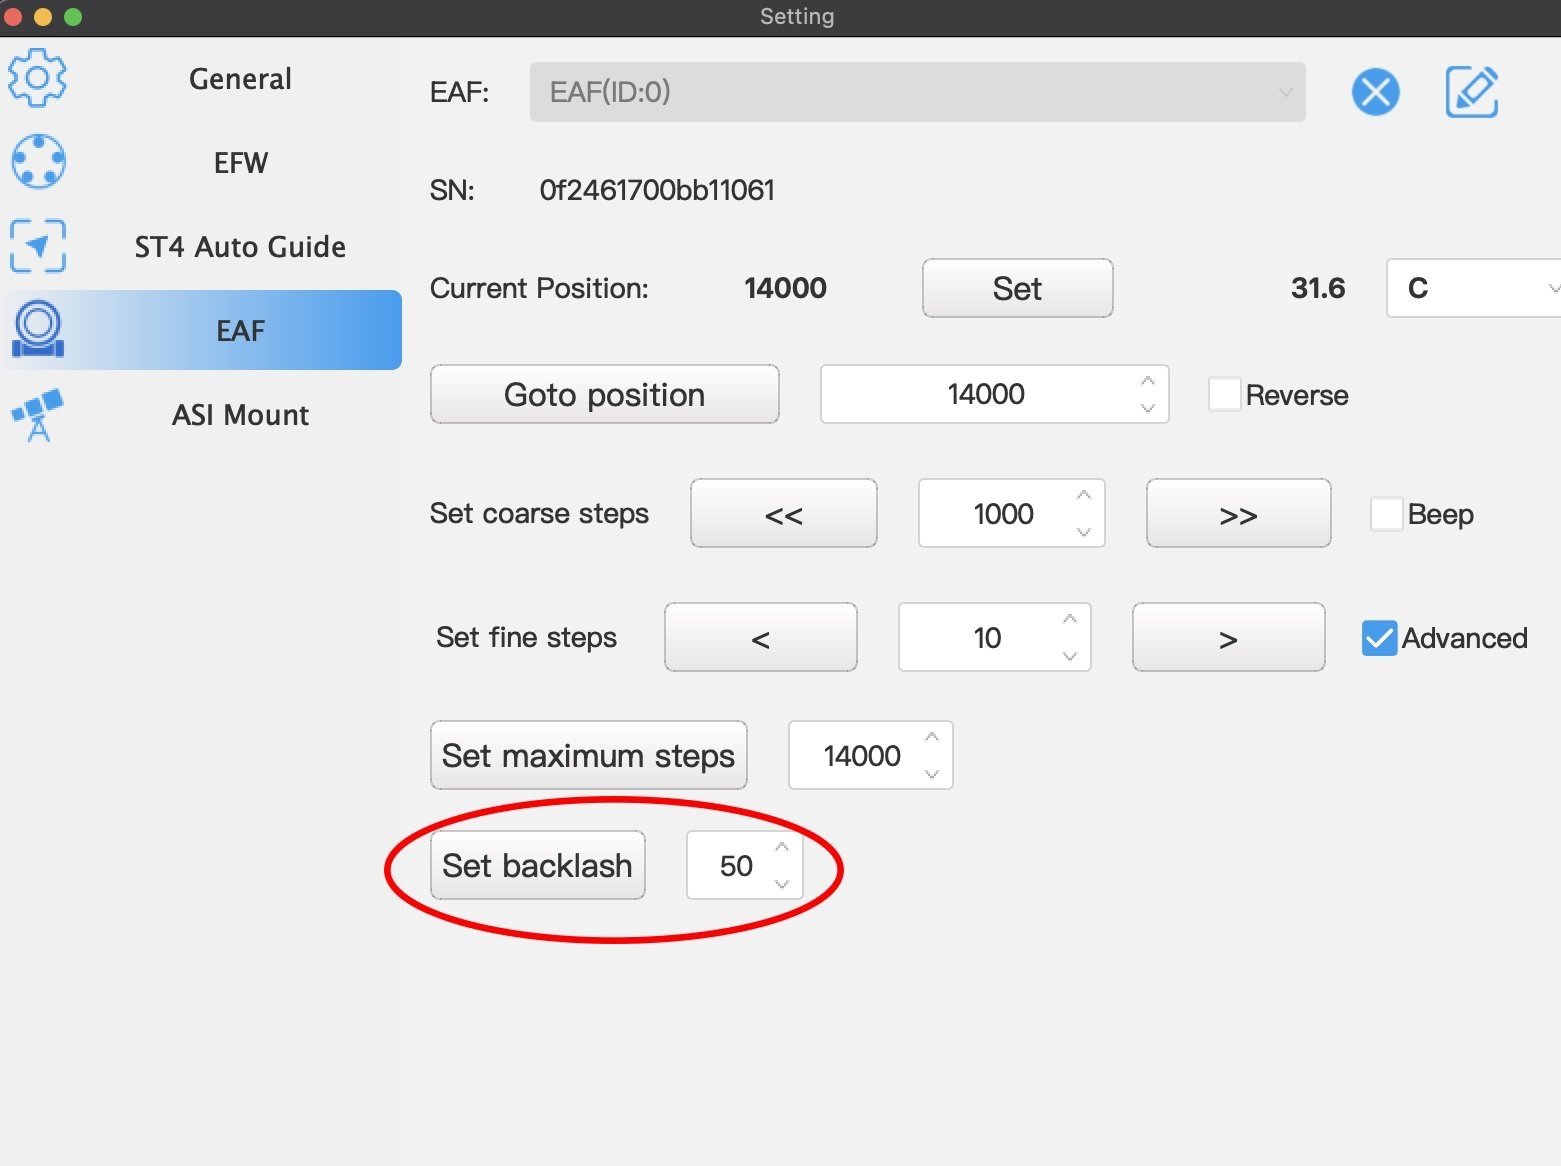
3. Set the fine focus step to 10 and count the number of inward clicks necessary to bring the grub screw hole back to the original position. In my case it took 5 clicks, each of 10 units. This gives a backlash value of 50.
4. Set the backlash setting to the value just calculated
5. Drive the focus tube three coarse (1000) steps in the outward direction and then three coarse steps in the opposite inward direction and check whether the grub screw hole returns to the same location
6. Here the grub screw returns to the same position so our backlash setting is correct.
Connecting the ZWO EAF to the ASIair Plus
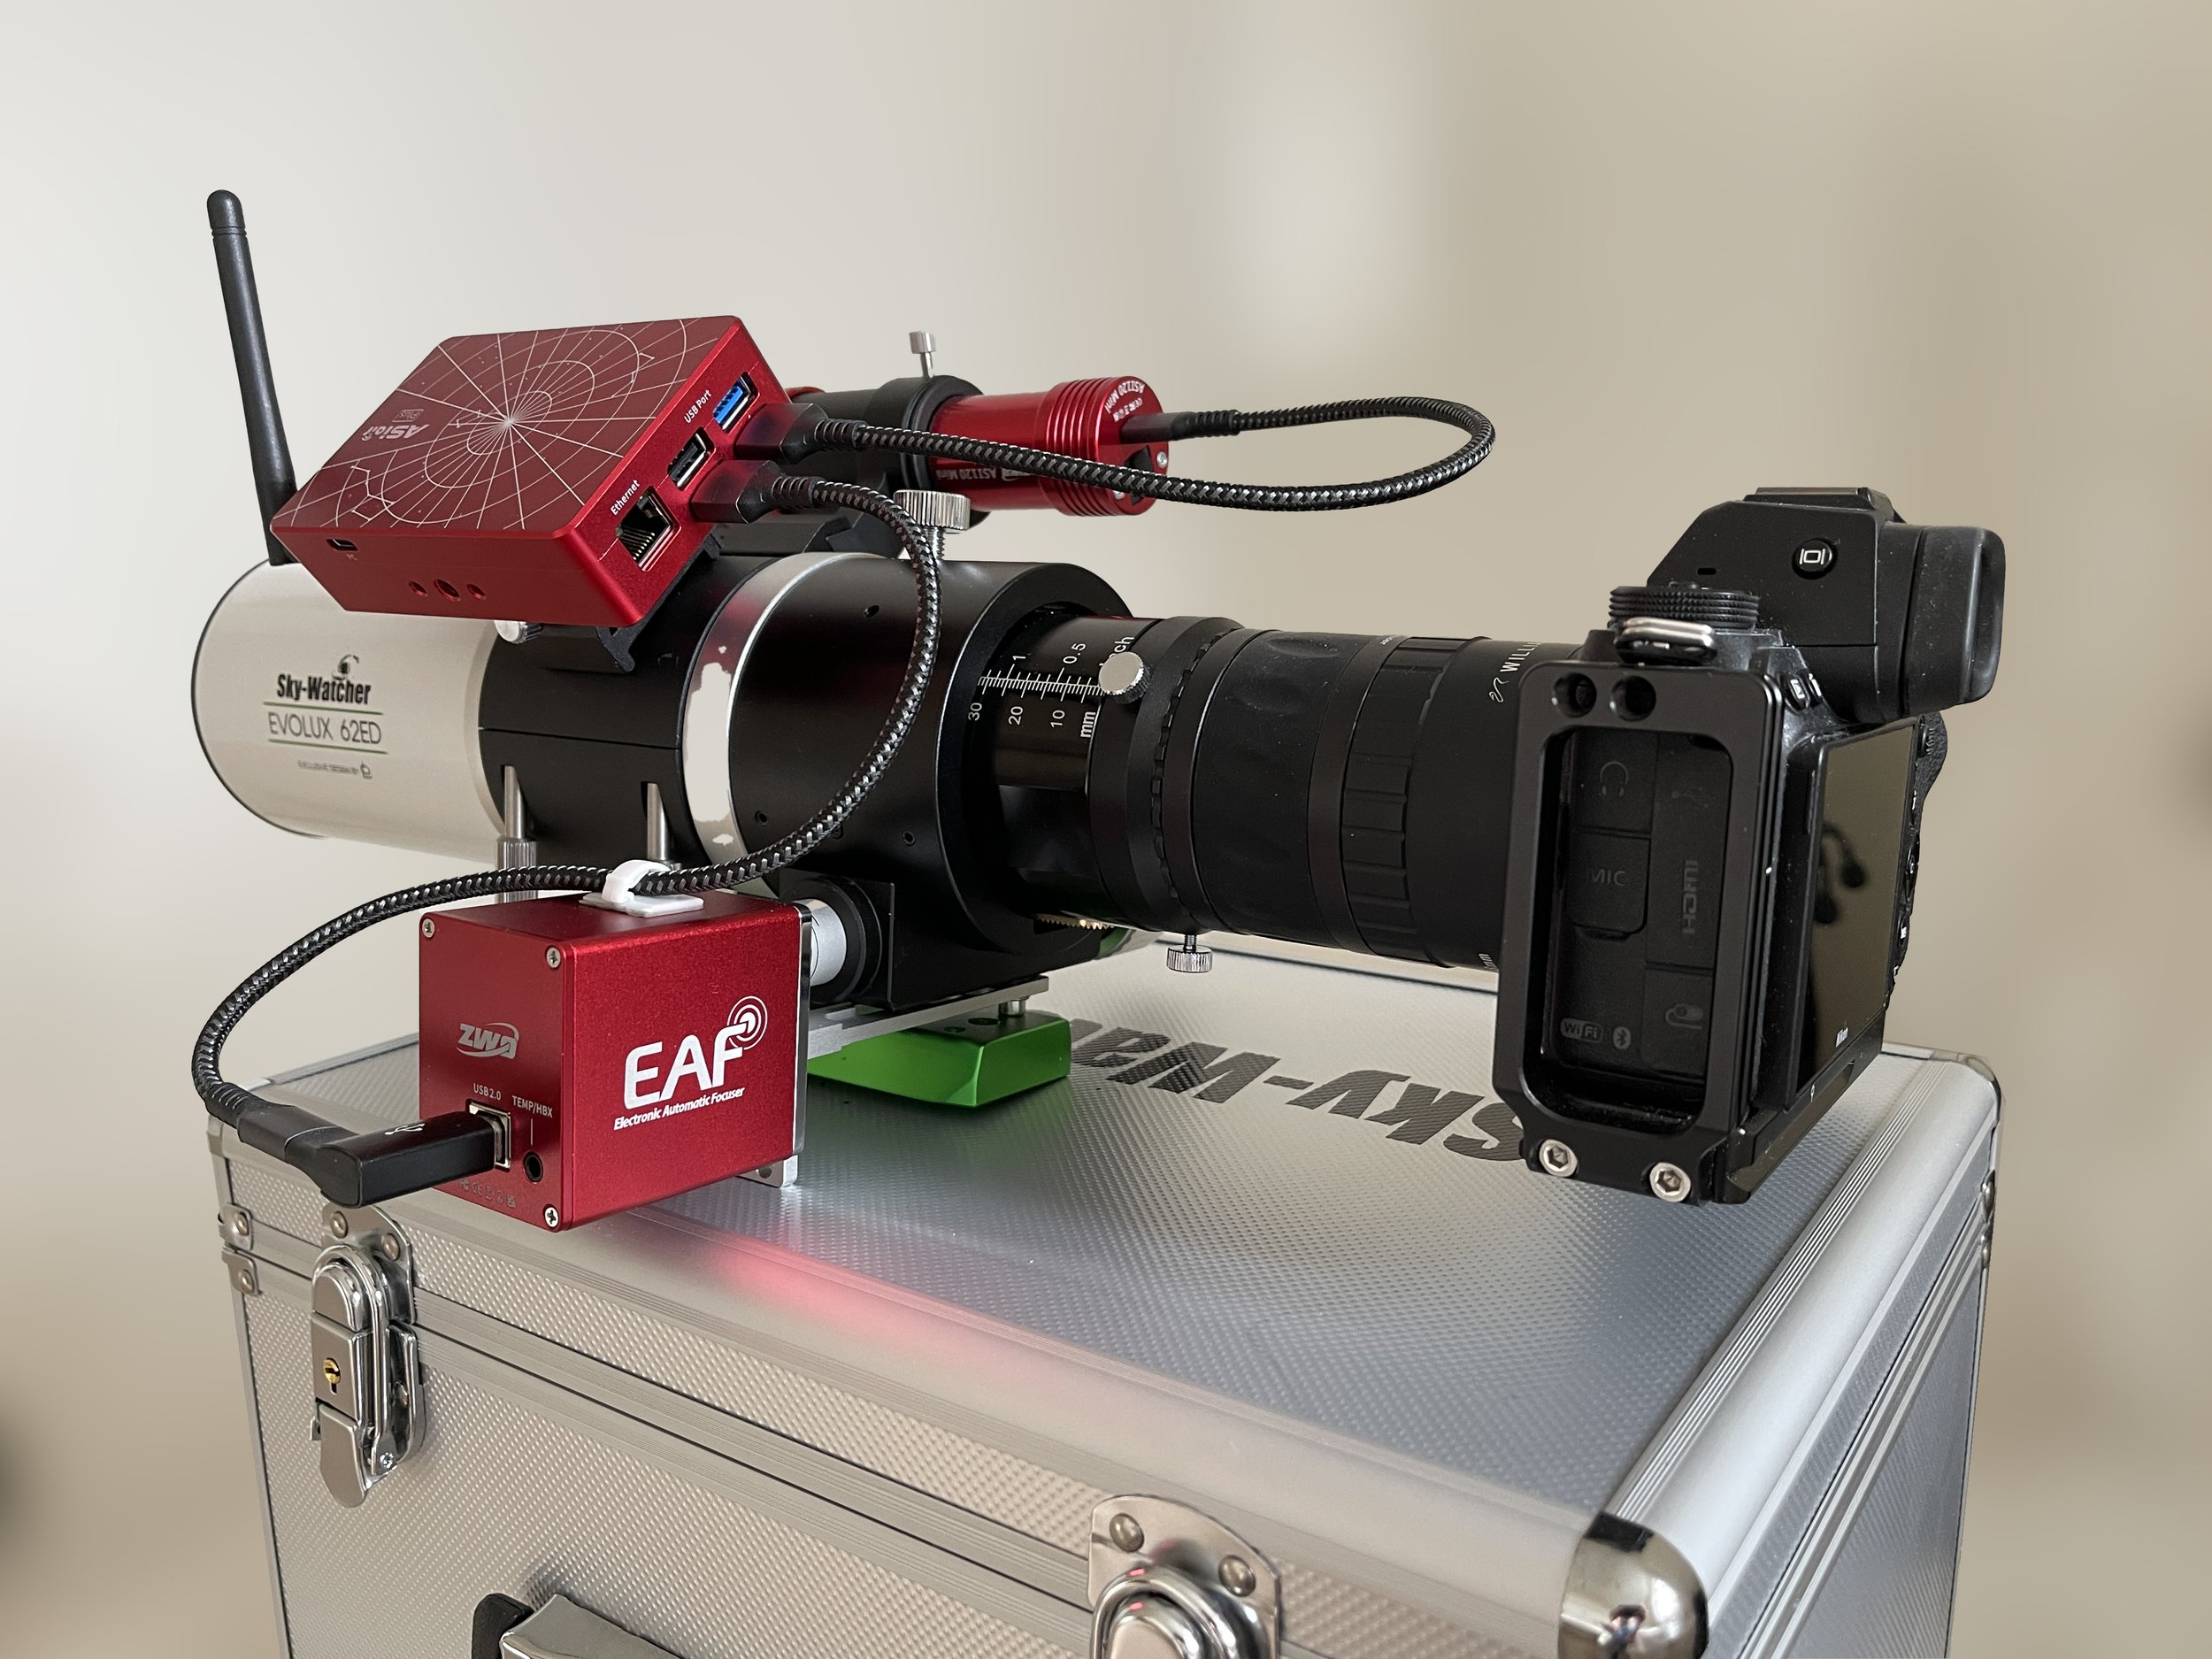
The 2m USB cable that comes with the ZWO EAF is quite long for use with the ASIair when mounted on my telescope. Rather than risk any snagging during slewing operations I changed this for a 30cm USB A to USB B cable. The image below shows the EAF, Guide scope, ASIair Plus and Nikon Z7ii mounted on my Sky Watcher Evolux 62ED refractor telescope.
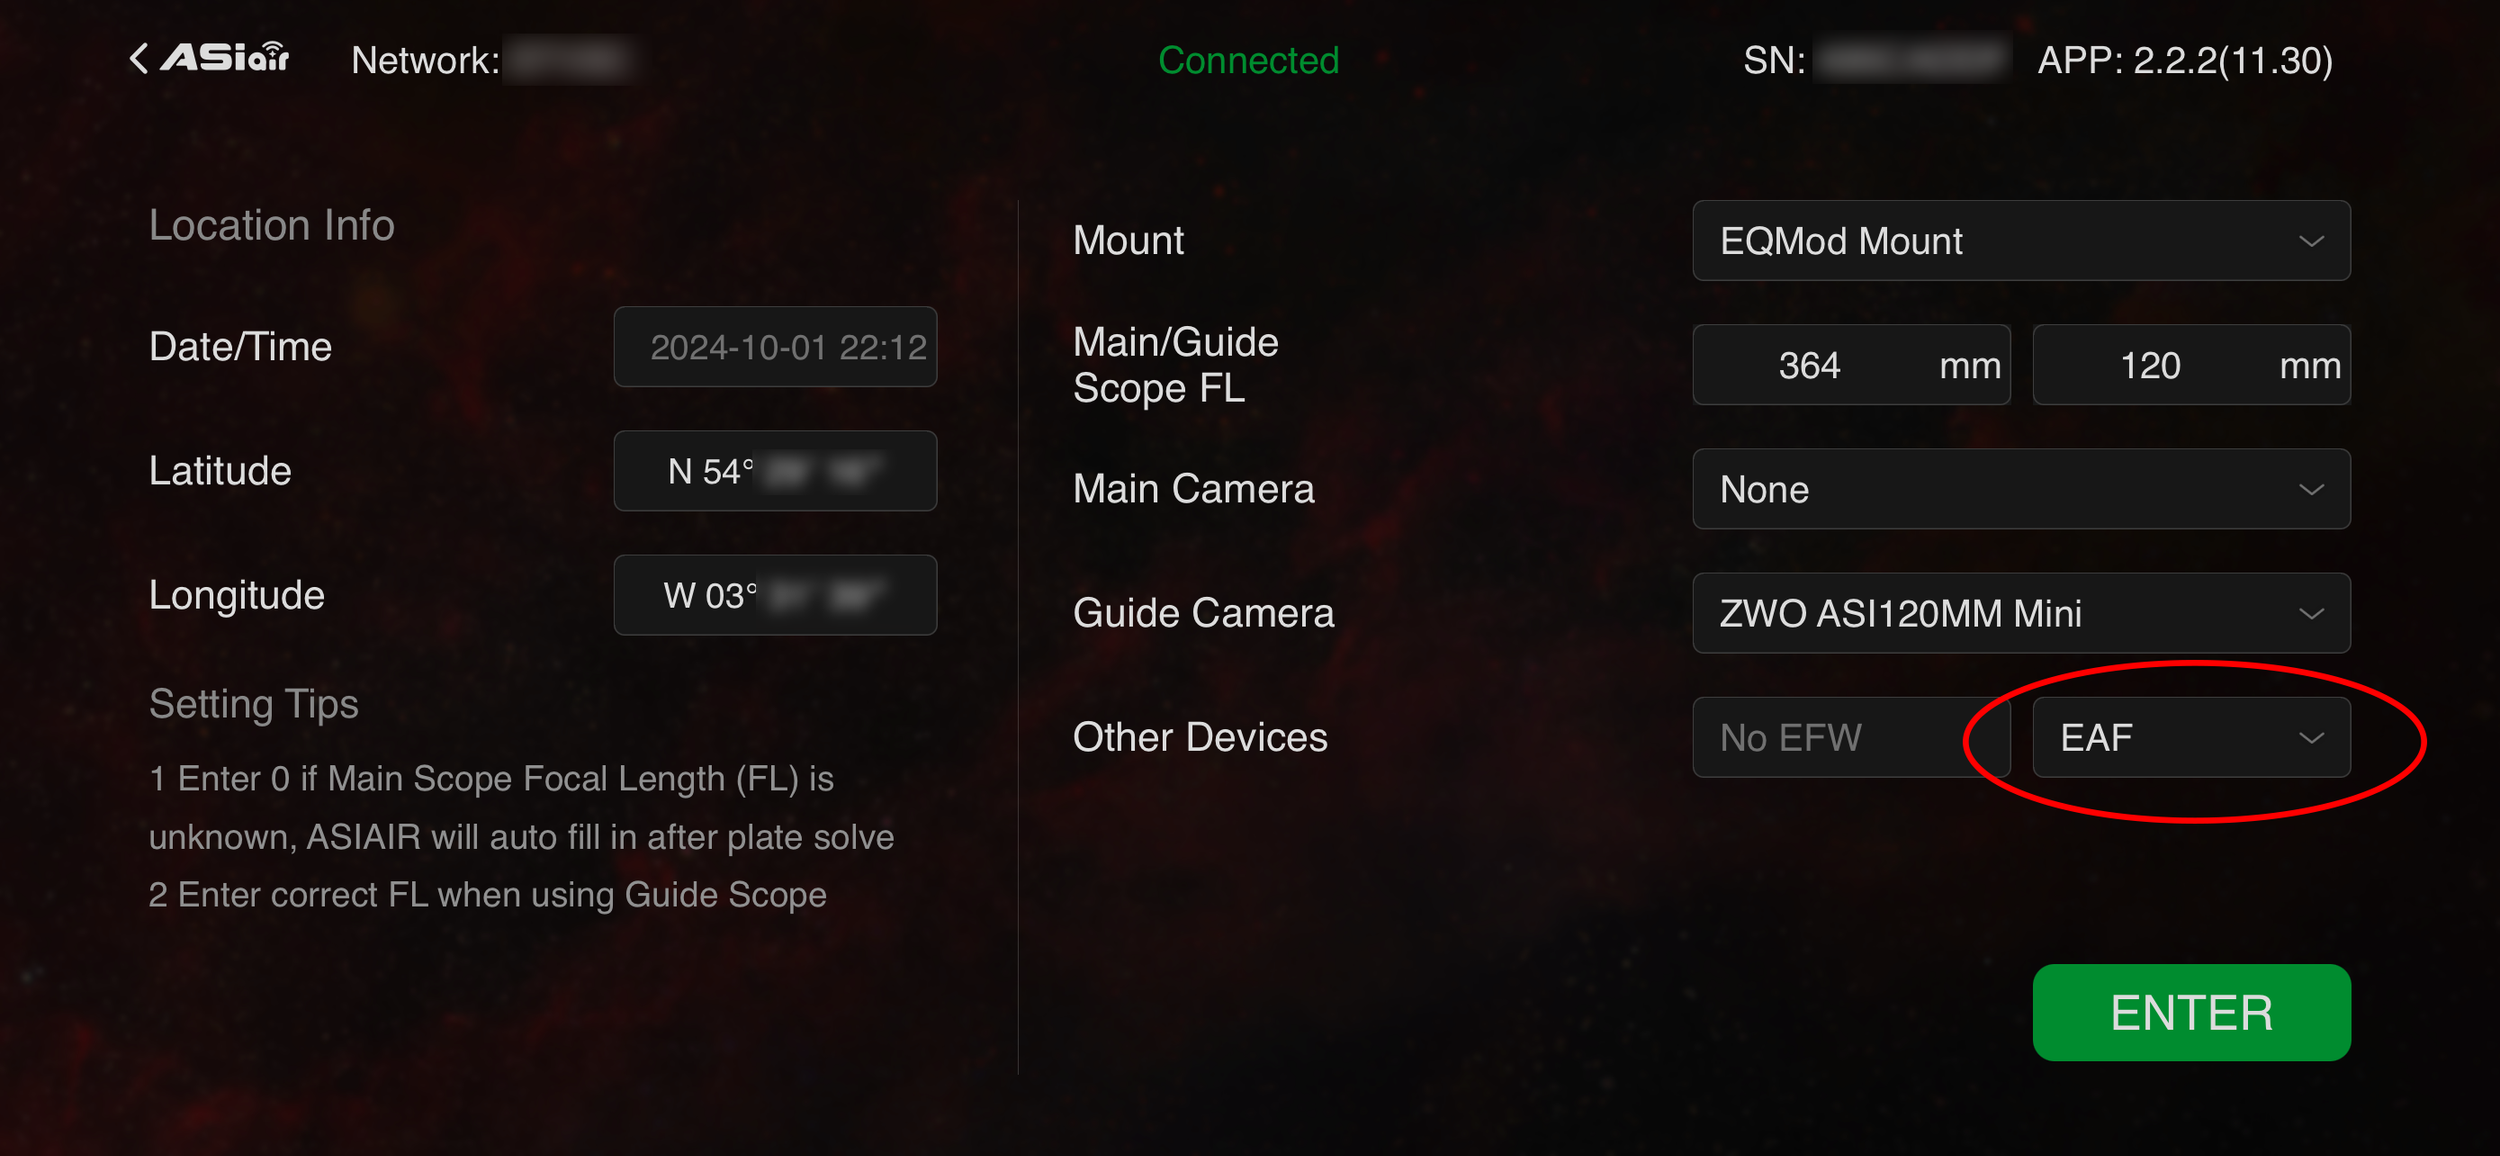
Start up the ASIair app and check that the system recognises the newly connected ZWO EAF. Enter the device and select the EAF settings tab on the main screen menu bar. The settings in the ASIair were automatically copied across from the setup in ASI Cap so they must be stored within the EAF itself.
Check that the start up screen correctly identifies the EAF
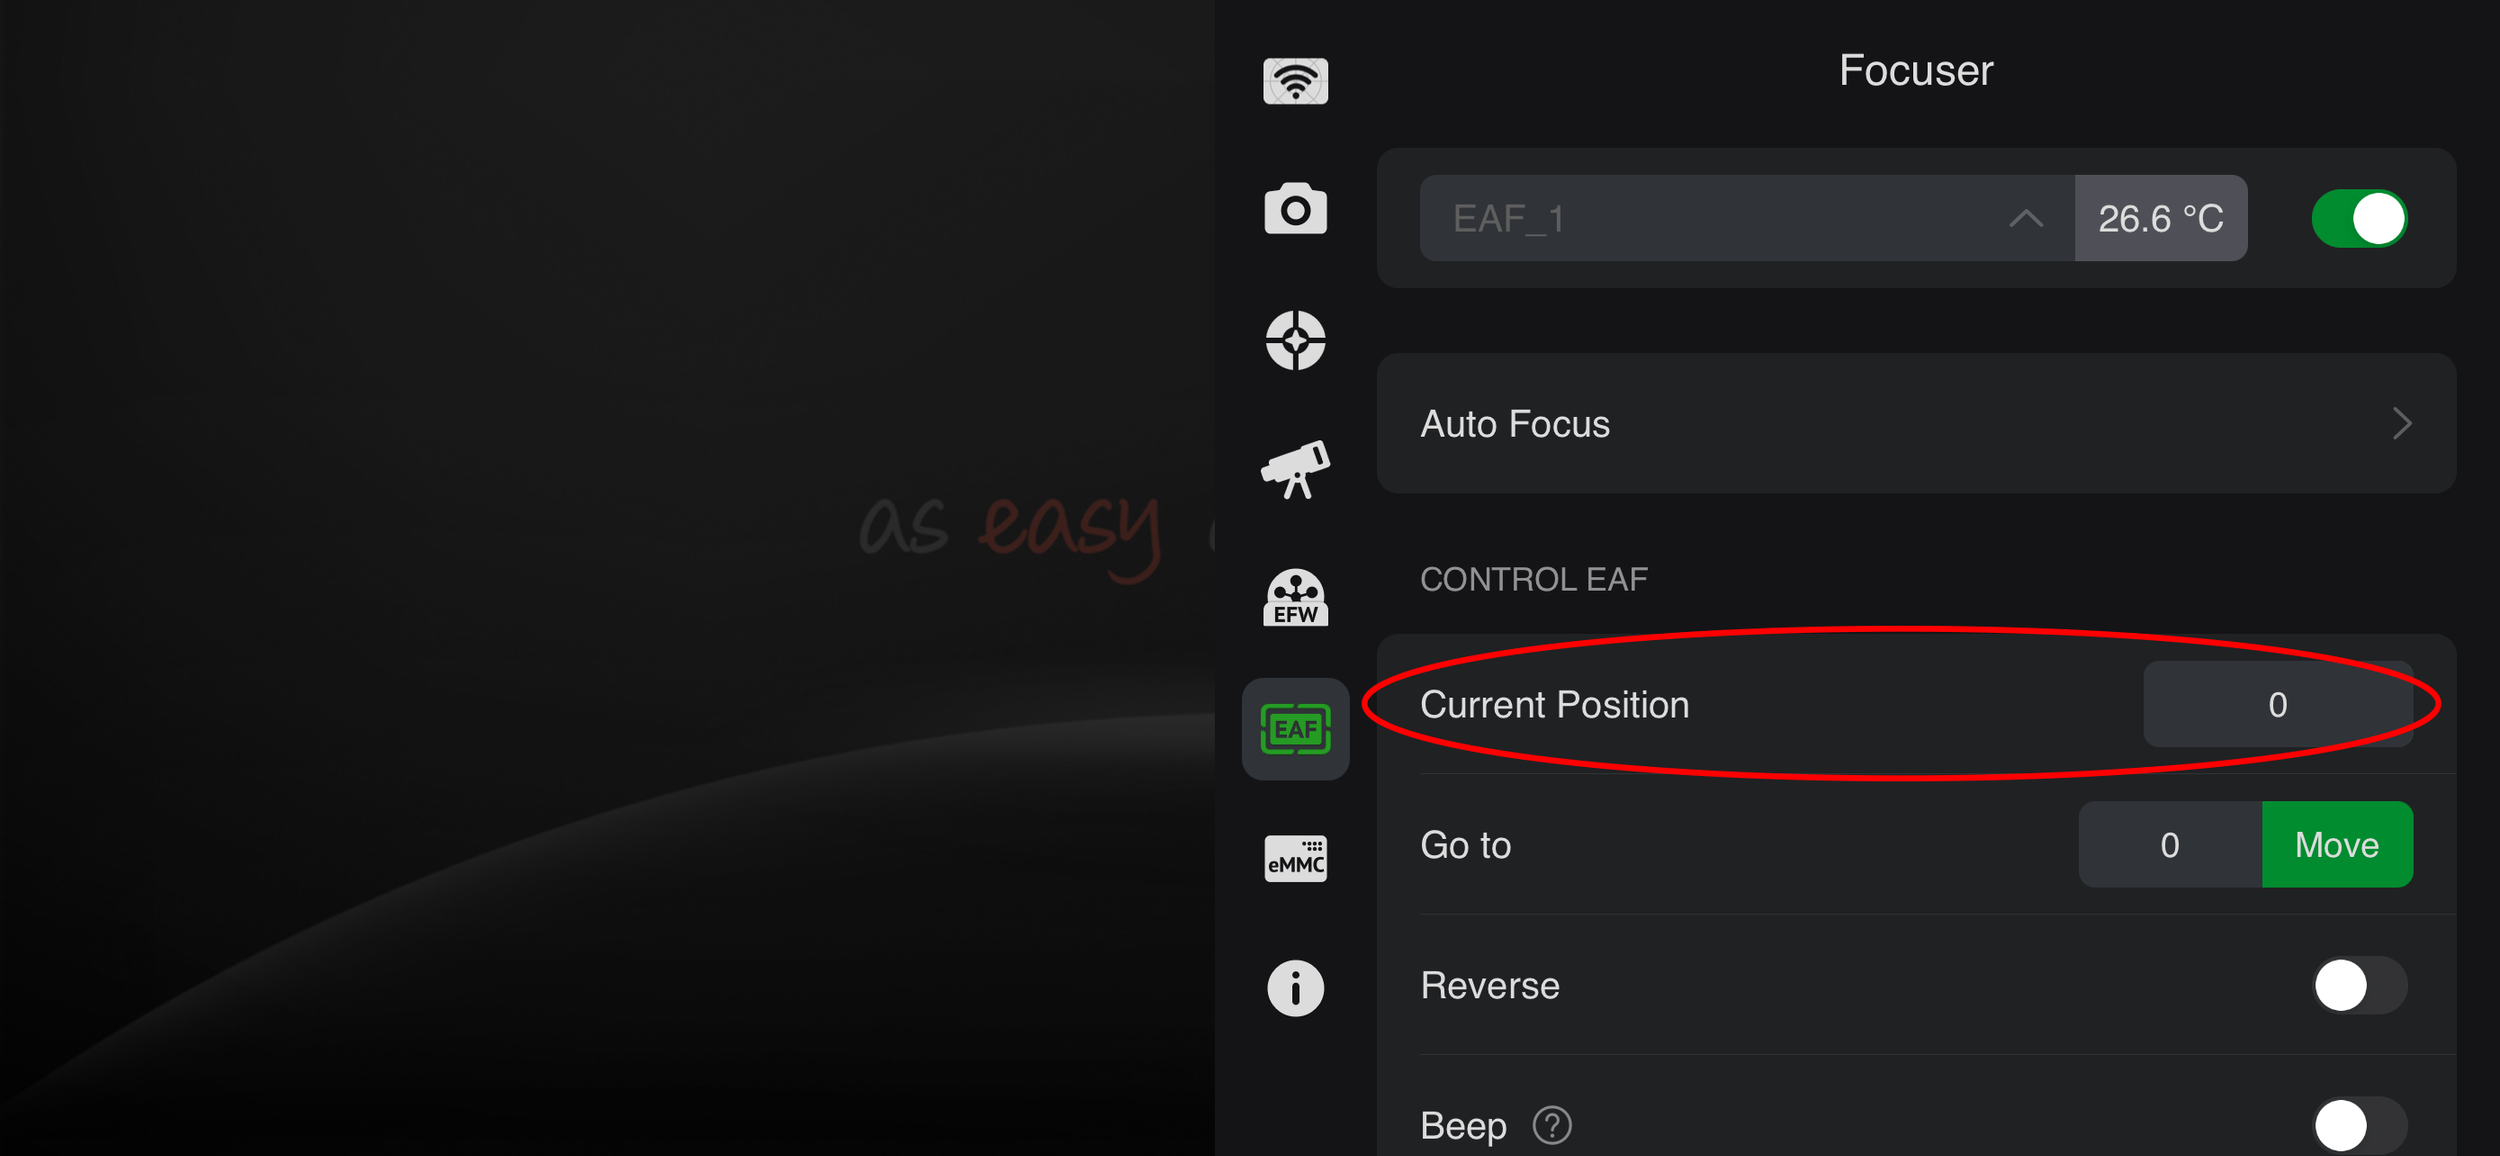
Choose the Focuser set up screen and check the current position (with the draw tube fully retracted) is correct
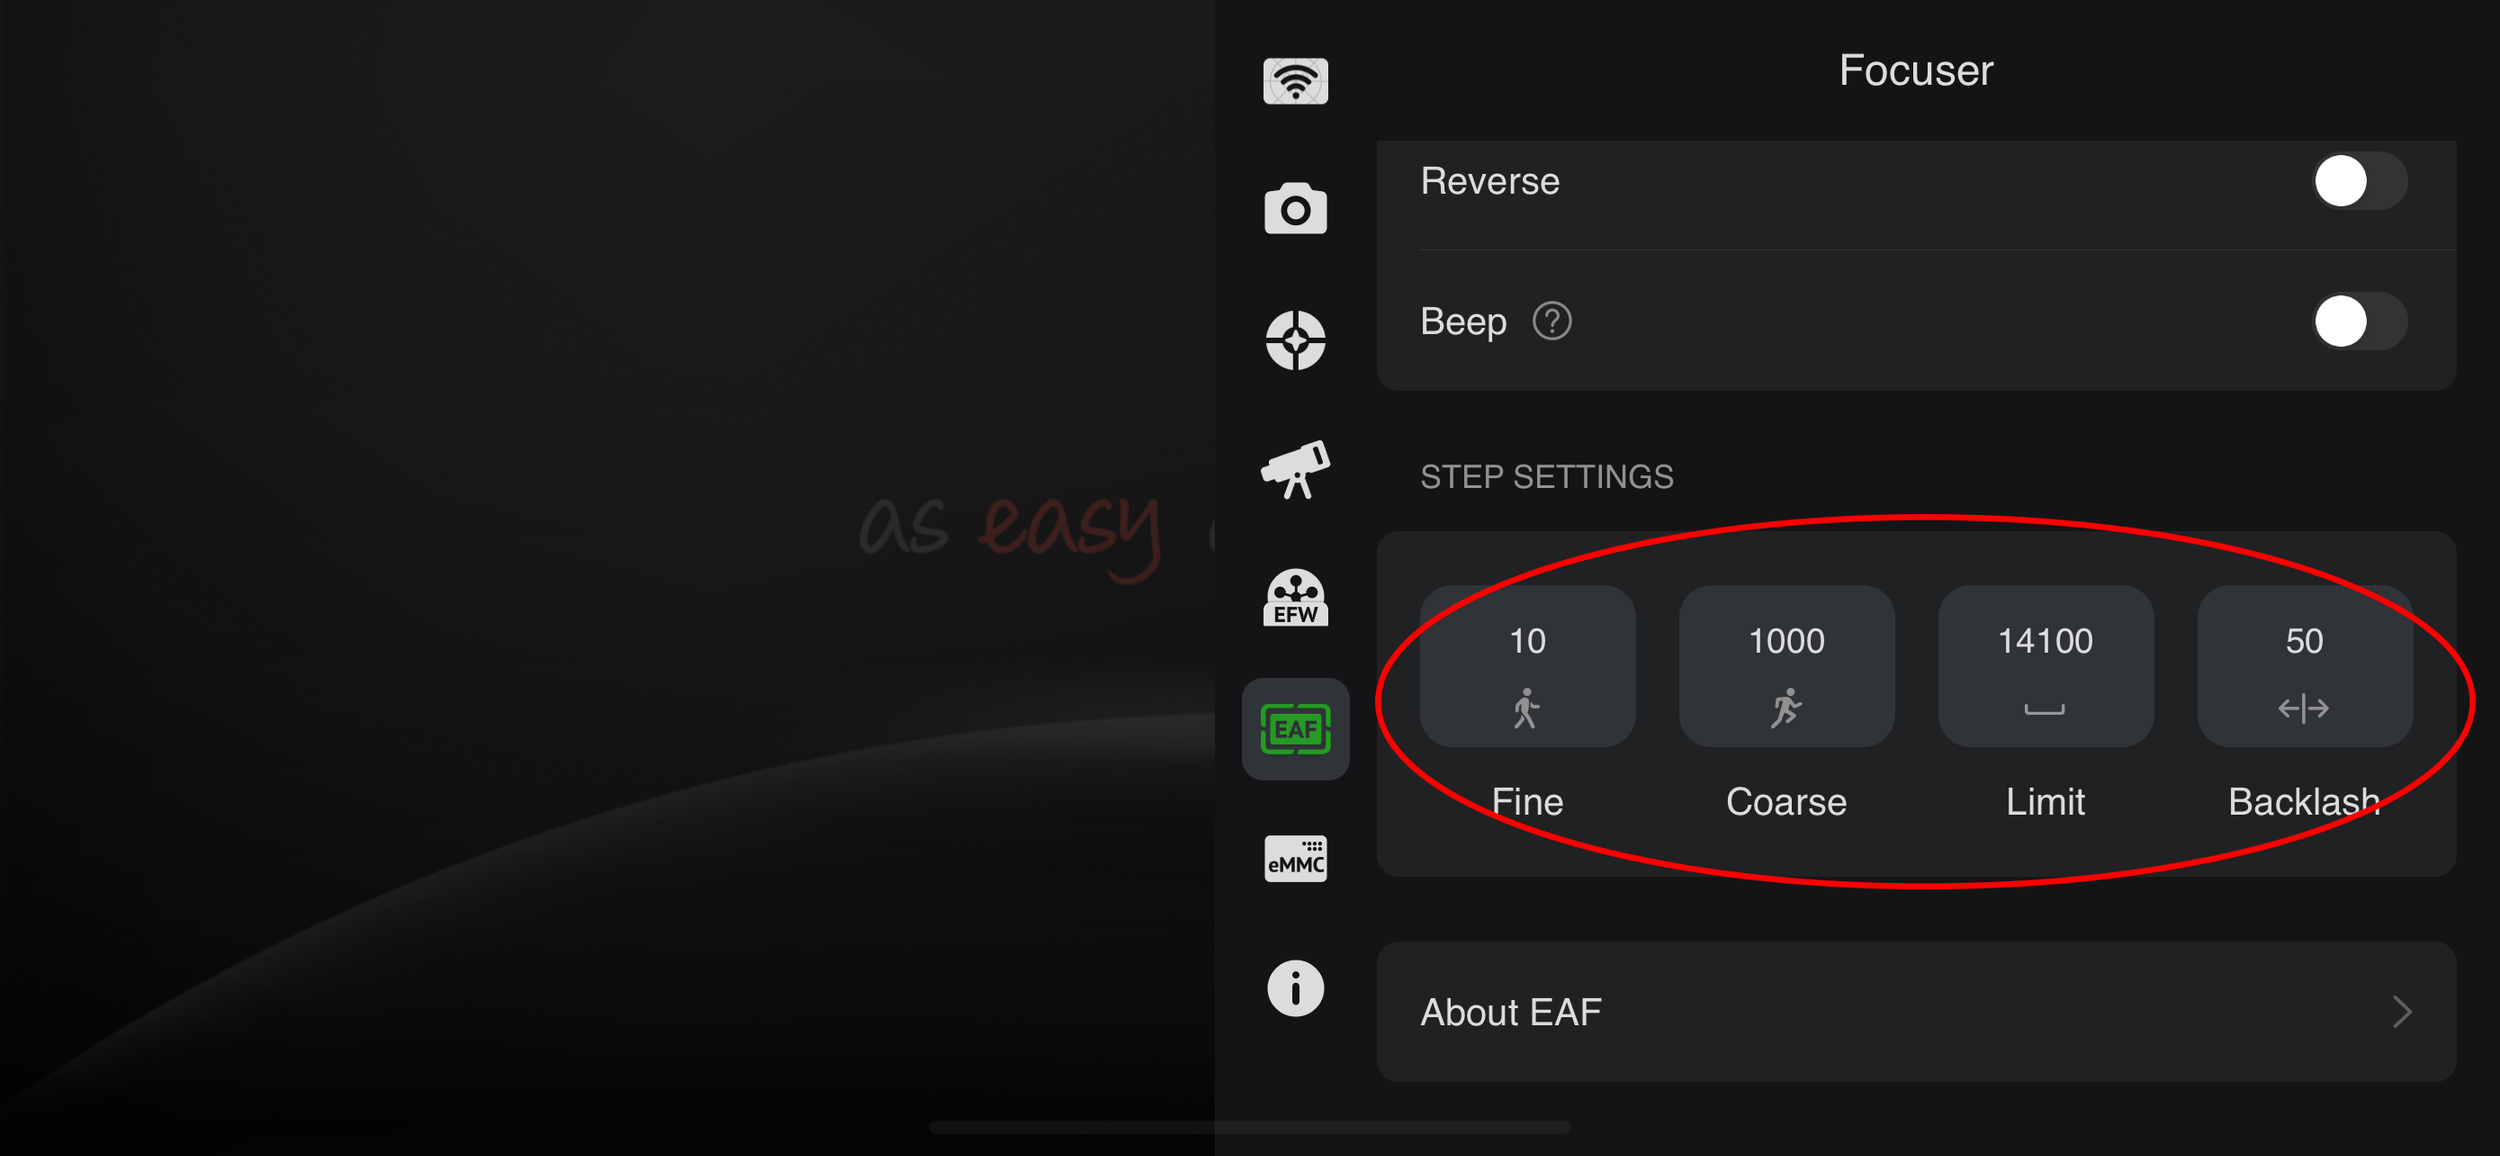
Check that the settings from ASI Cap have been copied across correctly - paying particular attention to the Limit setting (equivalent to the Maximum Step Size in ASI Cap)
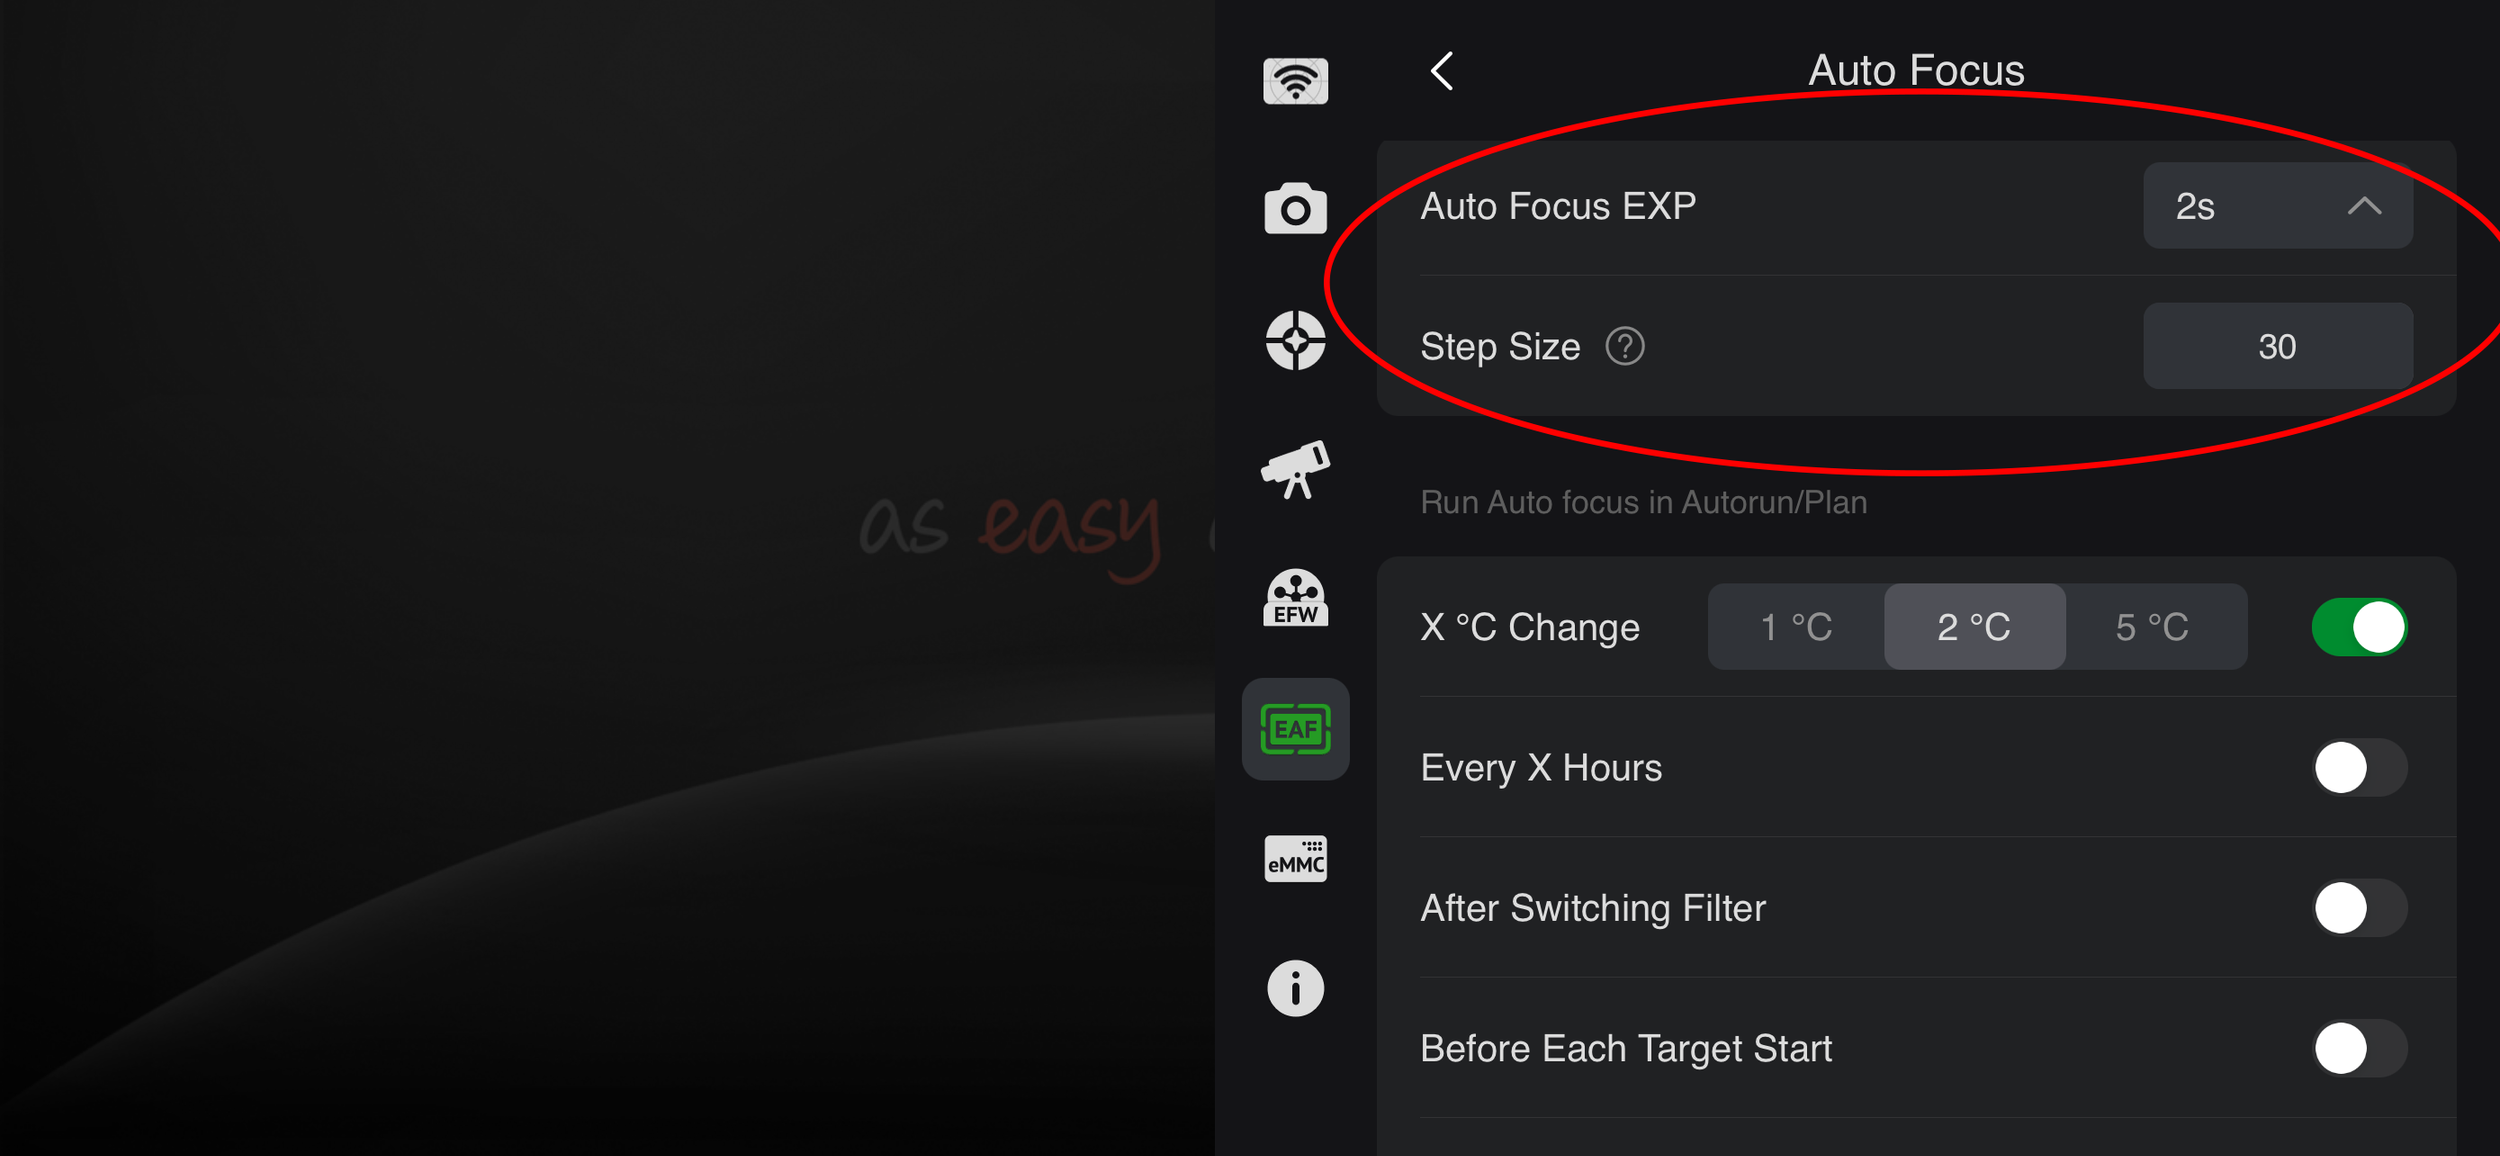
Click on the Auto Focus option to set the exposure time for autofocus images and the Step size used during autofocus. I leave these on the default values of 2s and 30 respectively.
Choose the settings for how the ASIair should trigger an autofocus process. Generally I would set for:
- every 2º temperature change
- before each target start
- after auto meridian flip
One issue I noticed during testing of the autofocus system using the ASIair was that the maximum steps seemed to be different. Using ASI Cap the focuser limits were set as 0 (draw tube fully retracted) to 14,100 (draw tube fully extended). With the ASIair these limits were 0 and 13,100. I had to adjust the Limit value in the ASIair Focuser settings to 13,000 to prevent the draw tube hitting the physical stops.
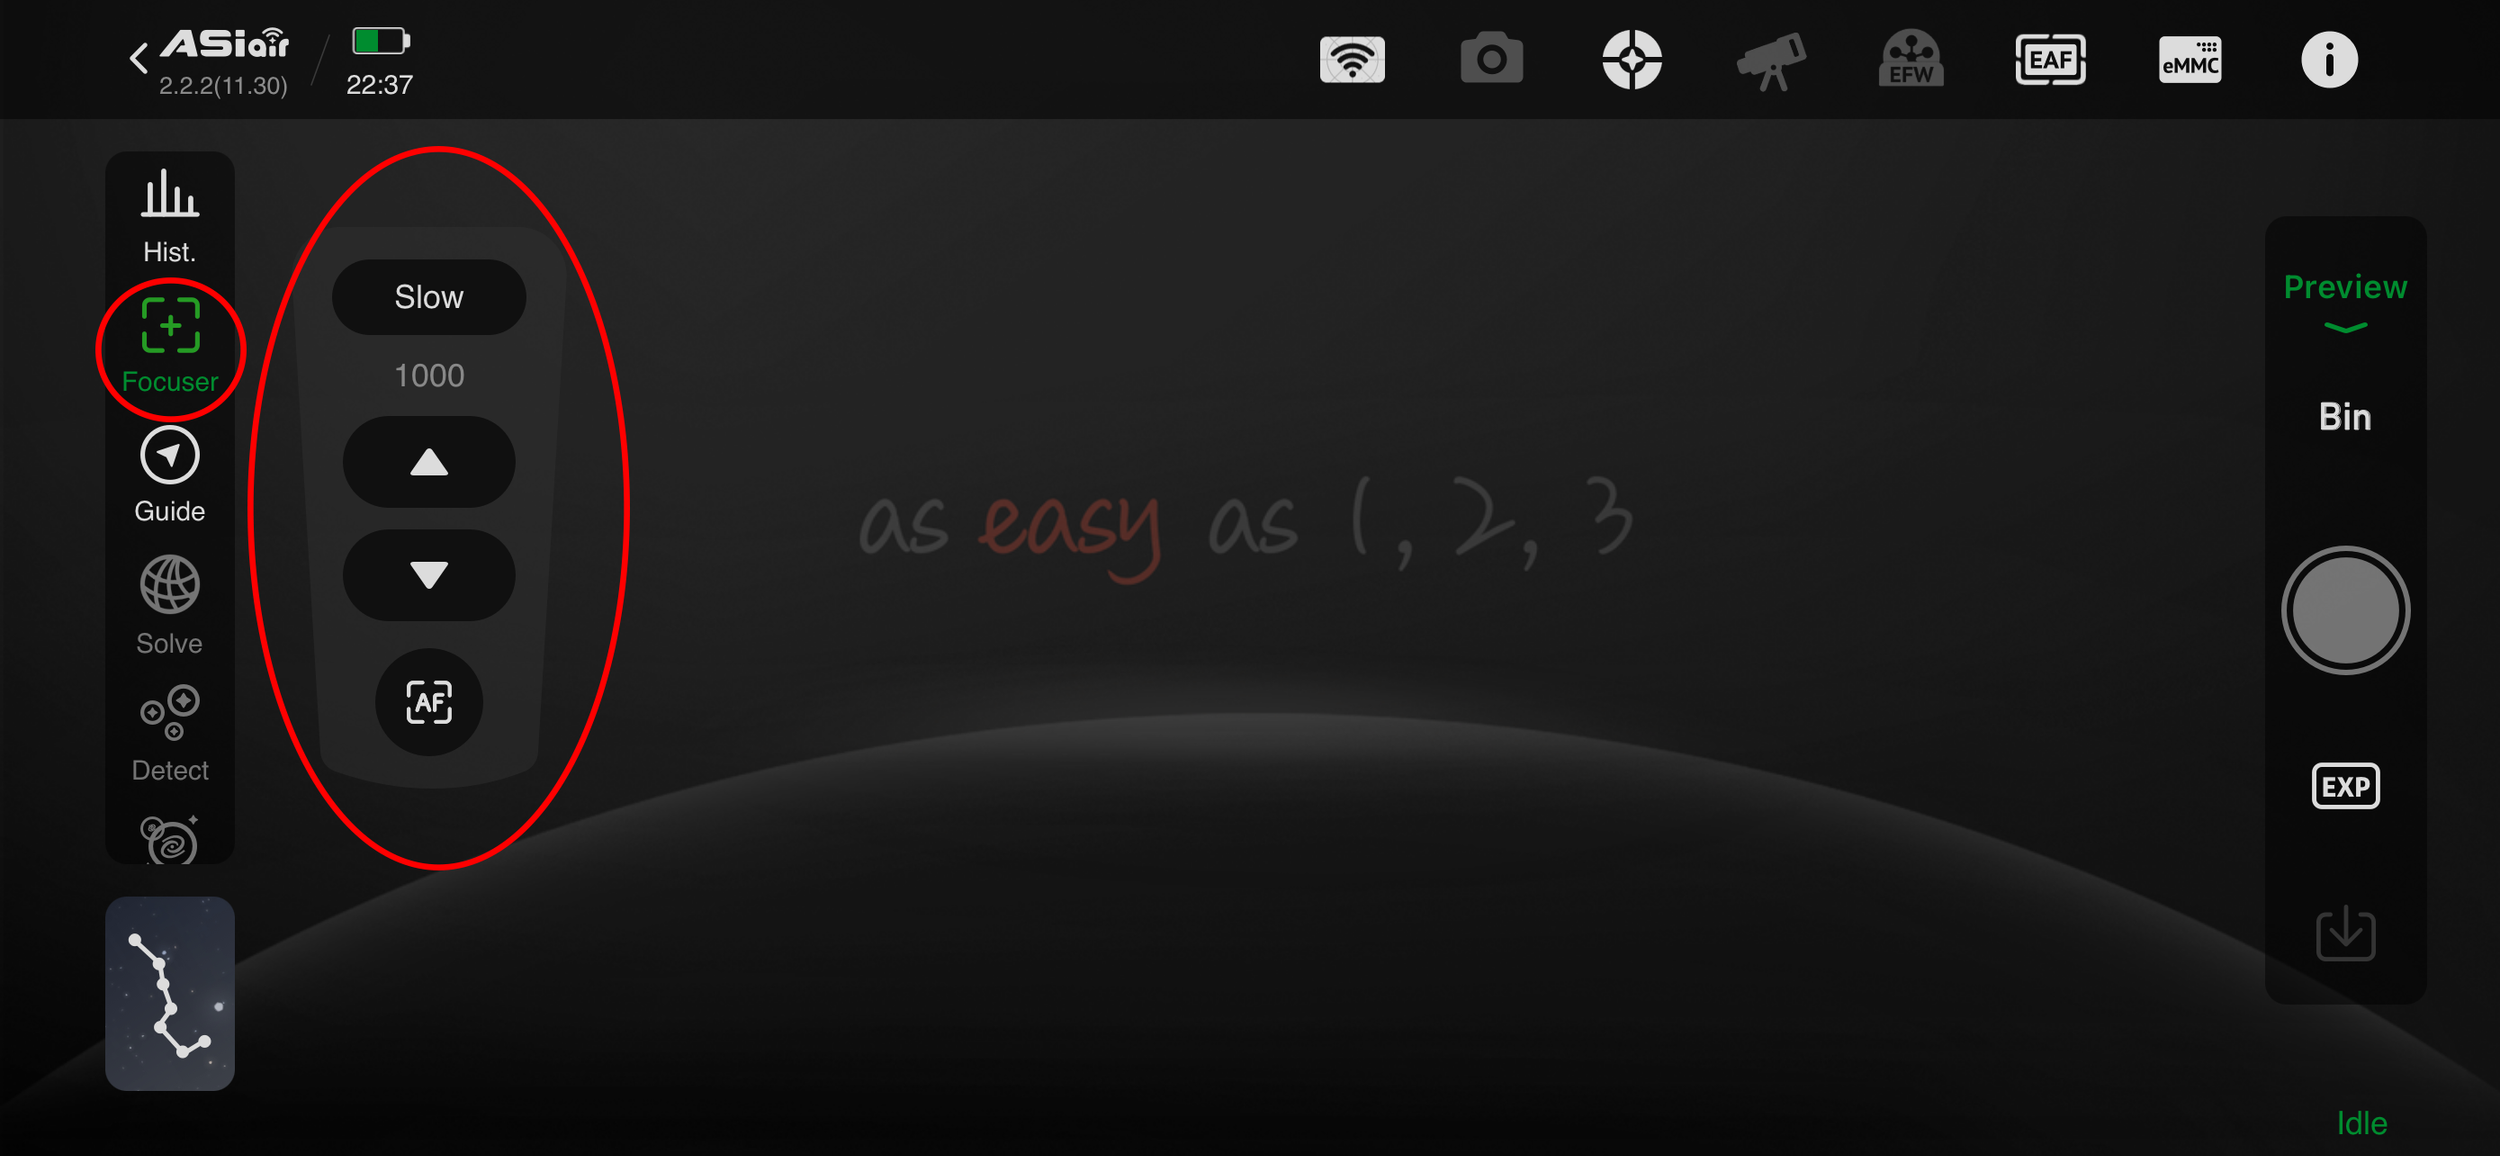
Once the EAF is correctly set up you can use the manual focus controls within the Preview mode. If the controls are not displayed click on the Focuser button to turn them on.
Select Slow or Fast (equivalent to fine or coarse in ASI Cap) to change how much the focuser moves or choose AF for autofocus.
Pressing on AF brings up the autofocus routine. Click on the play button to start the sequence
The ASIair will vary the focus and determine the size of the stars, plotting a graph of star size against EAF position. The characteristic V curve its then used to determine which EAF position gives the smallest star size.
Following the initial calibration the ASIair goes back and uses finer step sizes to finally determine the focus position - here at 7031.
Drawtube index marking (32mm) for focus position 7031
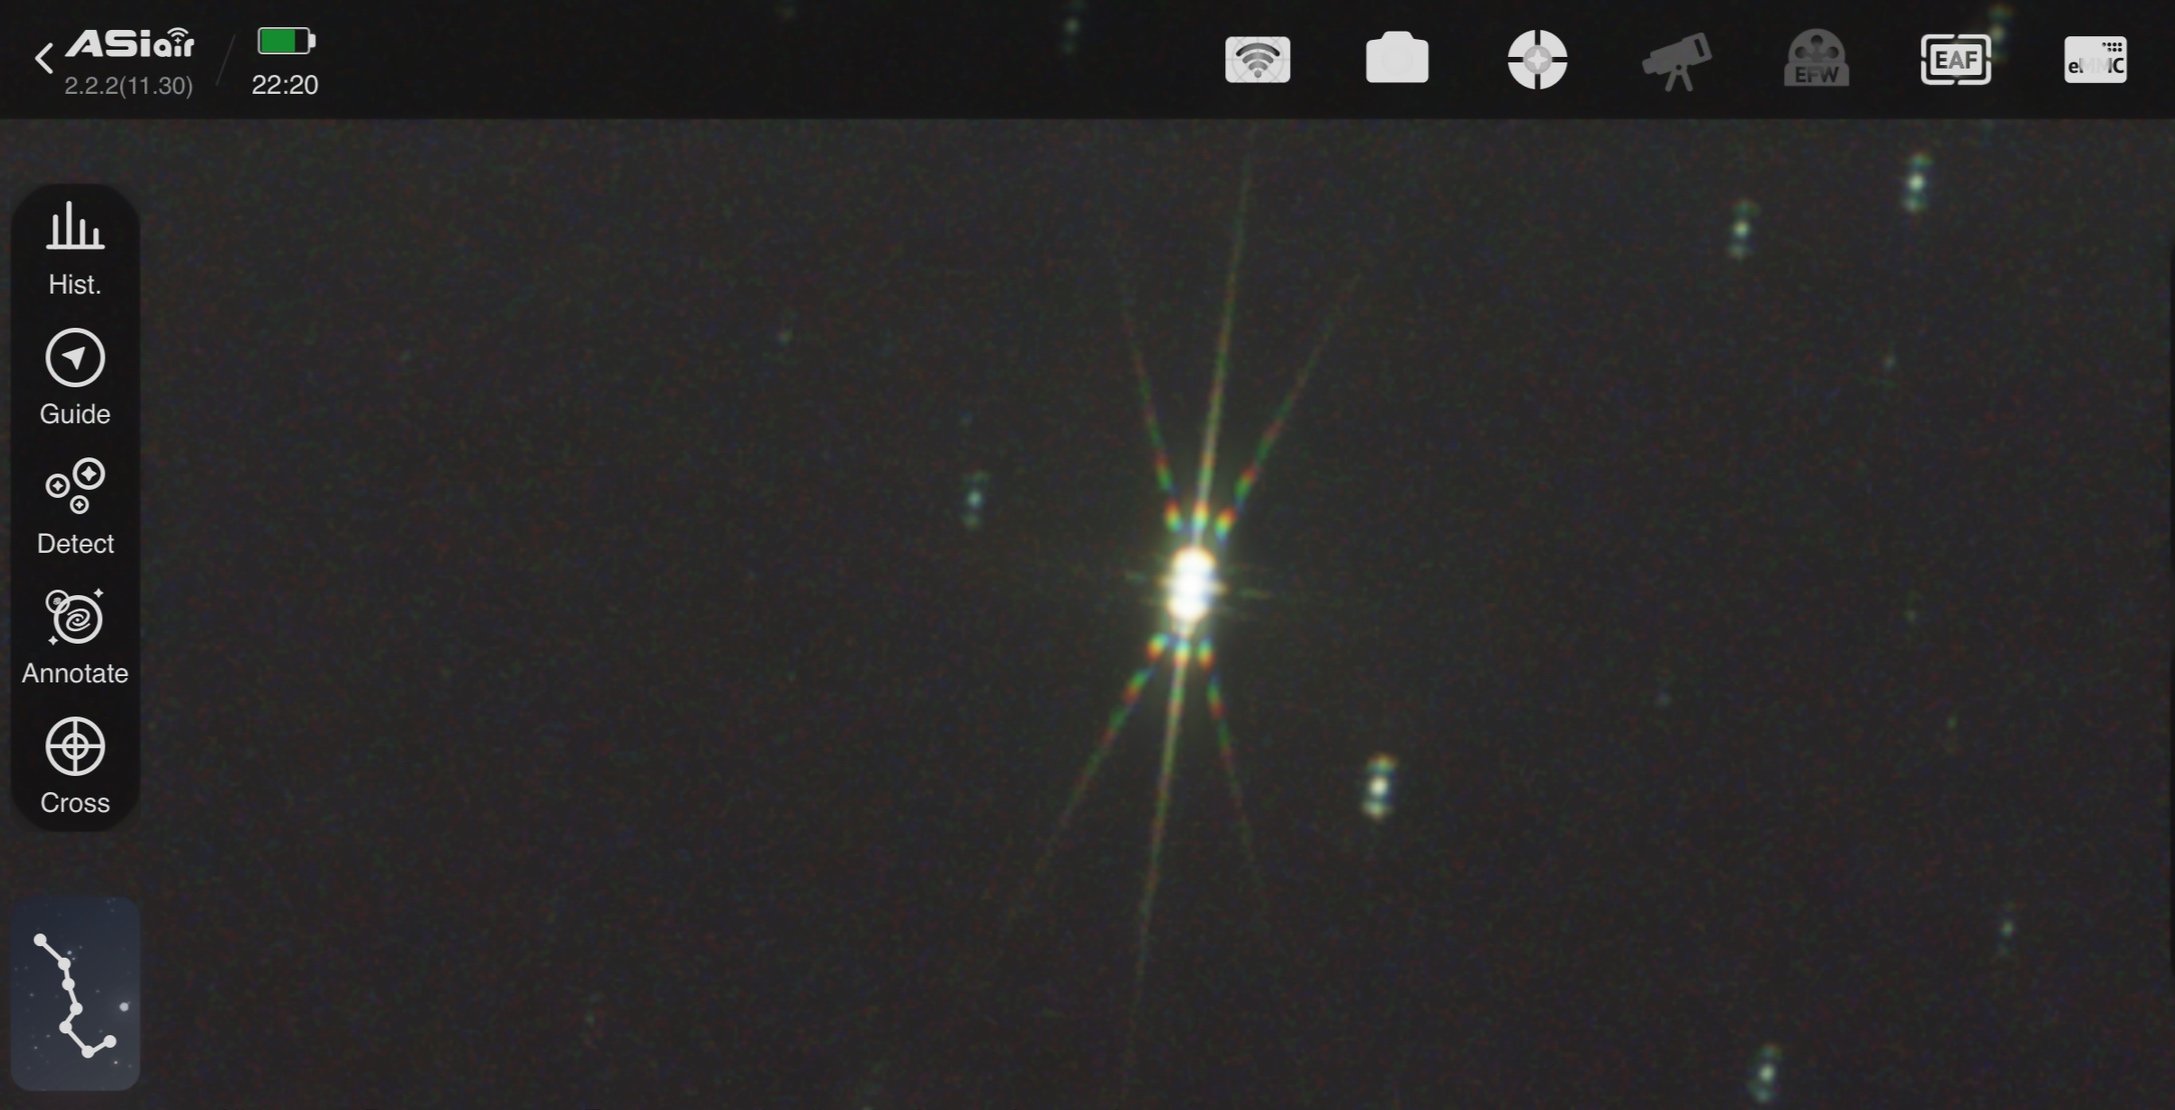
Just as a double check I decided to throw on a Bahtinov mask and see how good the focus was using the EAF and ASIair. As can be seen in the zoomed image above the spikes created by the mask seem to be nice and symmetrical indicating the system has calculated a good focus point.
(Image quality isn't great as there was quite a lot of cloud spoiling the view of the stars
Final Thoughts
As with everything else I’ve set up on my journey with the ASIair Plus, integrating the ZWO EAF autofocuser has been simplicity in itself. Physical installation of the device on the telescope was quick, taking less than 5 minutes. This was even for a telescope that was widely discussed on internet forums as being incompatible without additional equipment of physically modifying the flexible couplings and motor bracket.
Configuring and using the EAF from within the ASI Cap program or via the ASIair was also easy. The only issue I ran into, which admittedly was concerning at the time, was that the motor had sufficient torque to drive the rack and pinion focuser so that the draw tube was completely ejected past the end of the rack. Trying to get the rack to re-engage with the pinion gear was not simple and took a bit of adjusting afterwards.
On a similar note, the Maximum Steps in ASI Cap and Limit in ASIair were not consistent. Setting up the EAF in ASI Cap determined a Maximum Step of 14,100 but this was equivalent to 13,100 in ASIair. Generally you wouldn’t use one program to set up another so this won’t be a problem for most - it was just a little disconcerting to see the EAF try to eject the draw tube for a second time !
So, in summary, the EAAF installation and operation was smooth, easy and quick, exactly how things should be.
Clear Skies !

