My Astrophotography Journey: The ZWO ASIAir Plus
One of my main goals in starting out in astrophotography is to avoid the need to spend all night outside in the cold watching the telescope. The requirement of long exposures and multiple images where you can’t actually see what’s happening is not that appealing to me. I have been looking into methods for automating the acquisition of images without actually sitting in the dark by the telescope. This series of posts follows me in my journey towards an automated astrophotography setup that can be used at home or elsewhere without breaking my budget.
In this post I cover the ASIair Plus mini computer system.
The ASIair Plus from ZWO is the latest revision to its series of astrophotography tools that started with a Raspberry Pi system released in 2018. The latest Plus version aims to replace your laptop or mini-pc at the telescope, and eliminate the need for additional software, USB hubs, power supplies, and wifi router. It can be used for DSO Imaging and Planetary Imaging, and is a fully automated solution so that you can image through the night unmanned (while you sleep).
ZWO markets the ease of use of the ASIair as a primary function of the unit, proudly displaying “as easy as 1, 2, 3” on its display screen. Let’s face it, astrophotography isn’t easy, and any device or software that can improve the experience is a win-win for everyone. The best part is you control it from any smartphone or tablet by downloading the free ASIair app.
The ASIair Plus 256GB is effectively the fourth generation of ASIair devices. ZWO has moved from the Raspberry Pi boards of the previous generations into a completely new purpose designed controller board and software. The ASIair PLUS is a smart WiFi device with a lightweight power management module, two USB3 and two USB2 interfaces, and a dovetail mounting bracket. The ASIair App is used to control the device from a smartphone or tablet allowing the whole procedure, from device integration to image capture, to be run remarkably smoothly. The device also contains, as its name suggests, 256GB of storage, removing the need for add in SD card support.
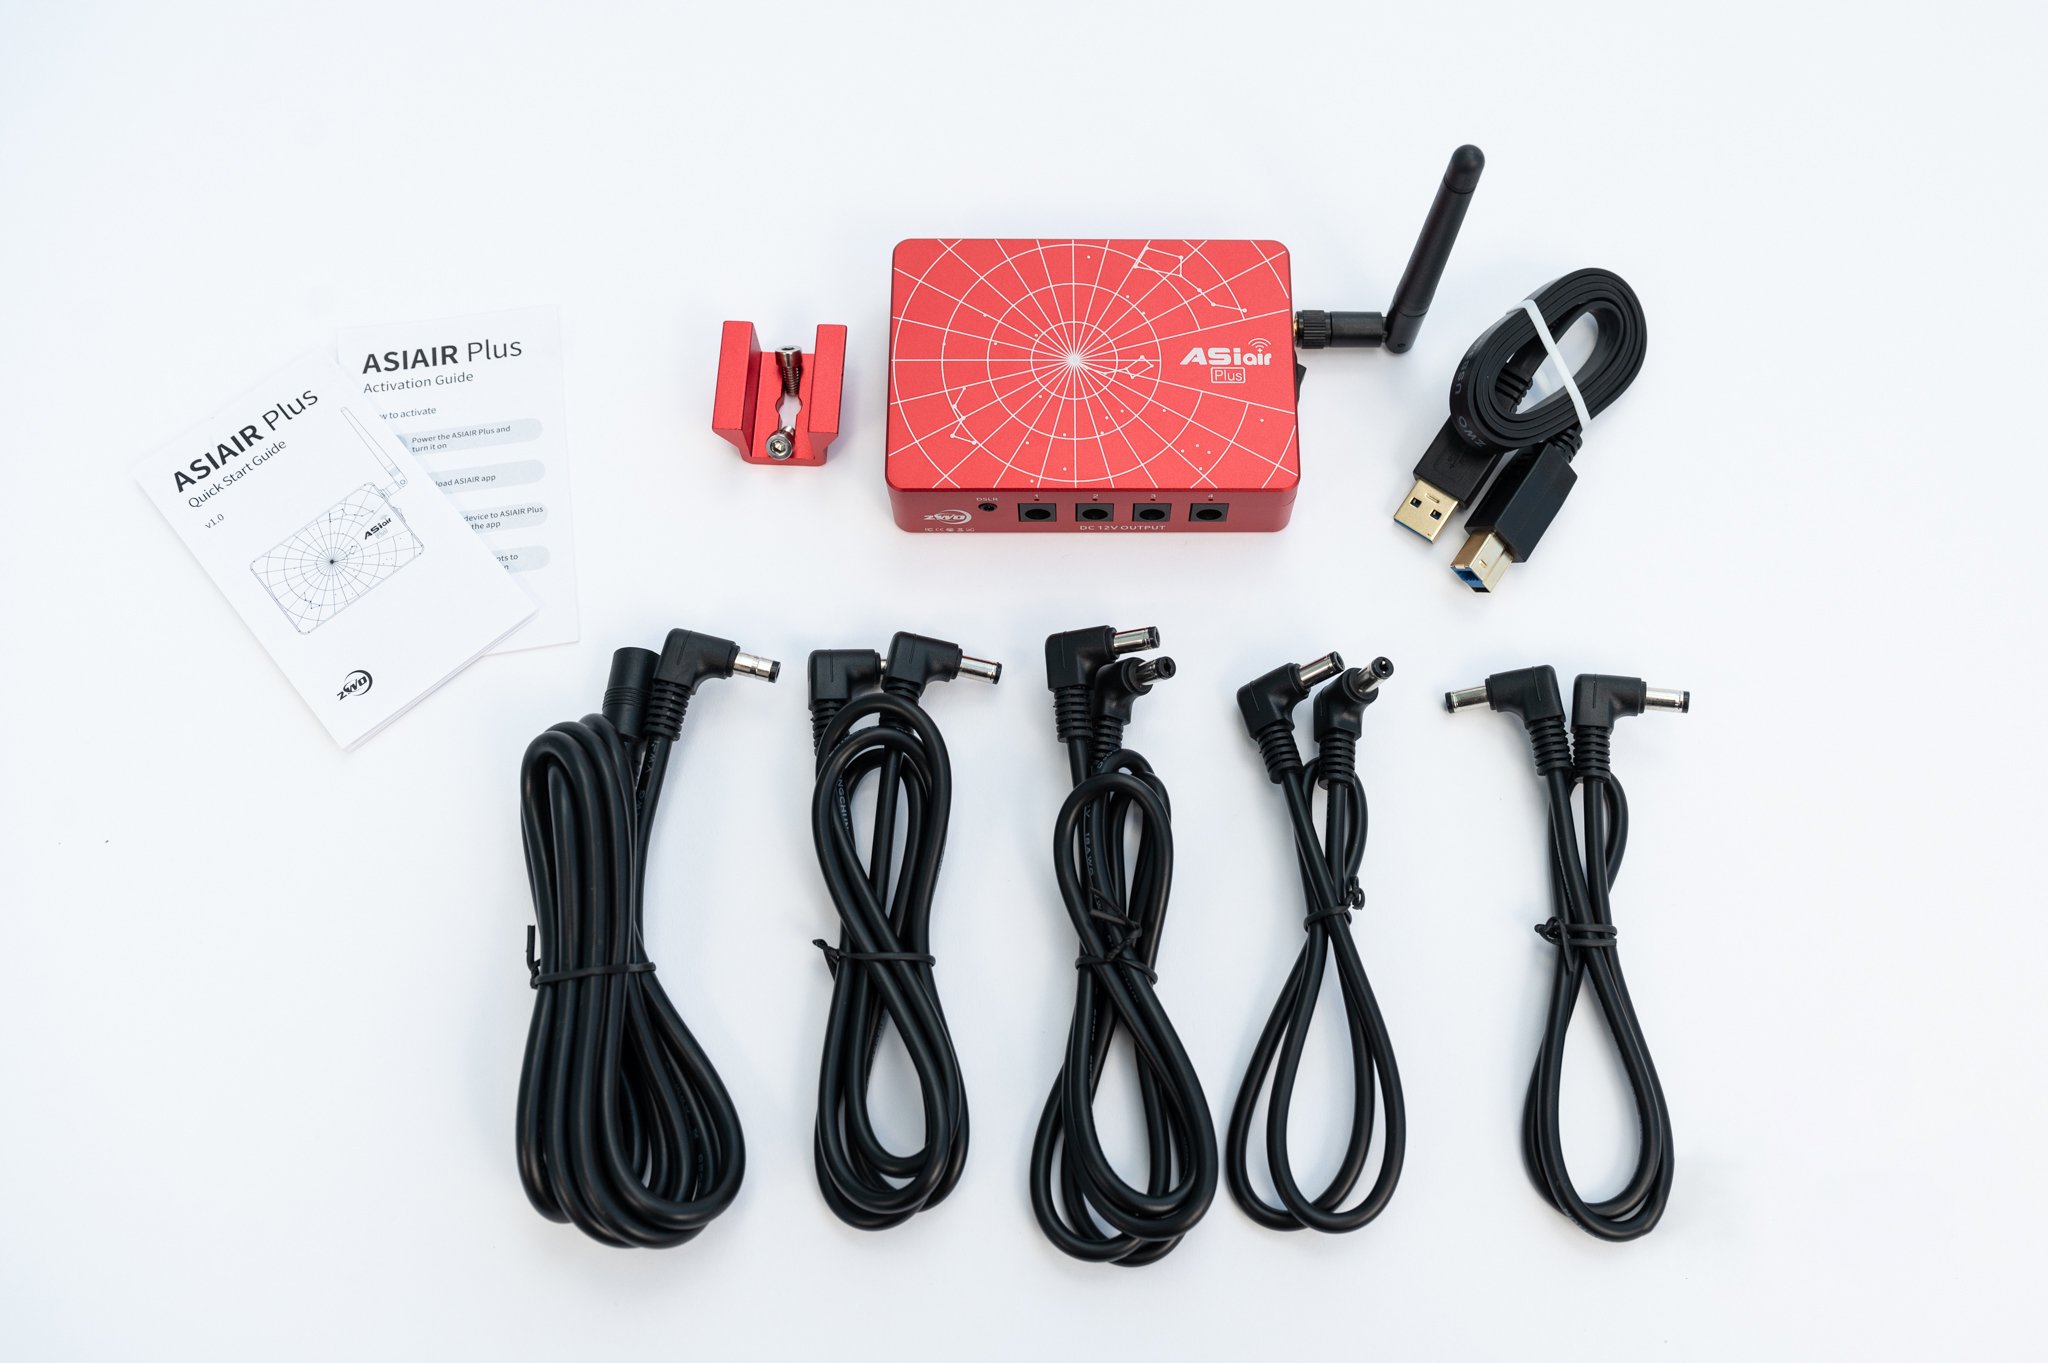
ASIair Plus Box contains the ASIair Plus device and mounting bracket along with a USB 3 A-B cable and a variety of power leads
ASIair Plus 256GB
Features include:
Power input - DC 12v @ 5A (min voltage 11.5V, max current 6A).
Power outputs - 4x 12v / 3A DC output ports, 2.1*5.5mm centre positive.
eMMC Storage - 256GB
Improved Mounting - A redesigned case makes the ASIAIR PLUS easier to mount using your scope's dovetail bar.
New CNC Aluminium Case - New metal case is much stronger and better at dissipating heat with minimal impact on the WiFi signal.
Pro Software Features - Live stacking, automated meridian flip and more features
Built In Wifi Antenna - Greatly increased wifi signal strength and range up to 20m
More Portable Than Ever - 24% thinner and 13% lighter than previous ASIAir Pro
Gigabit Ethernet Port
Going through the device in detail:
Build Quality
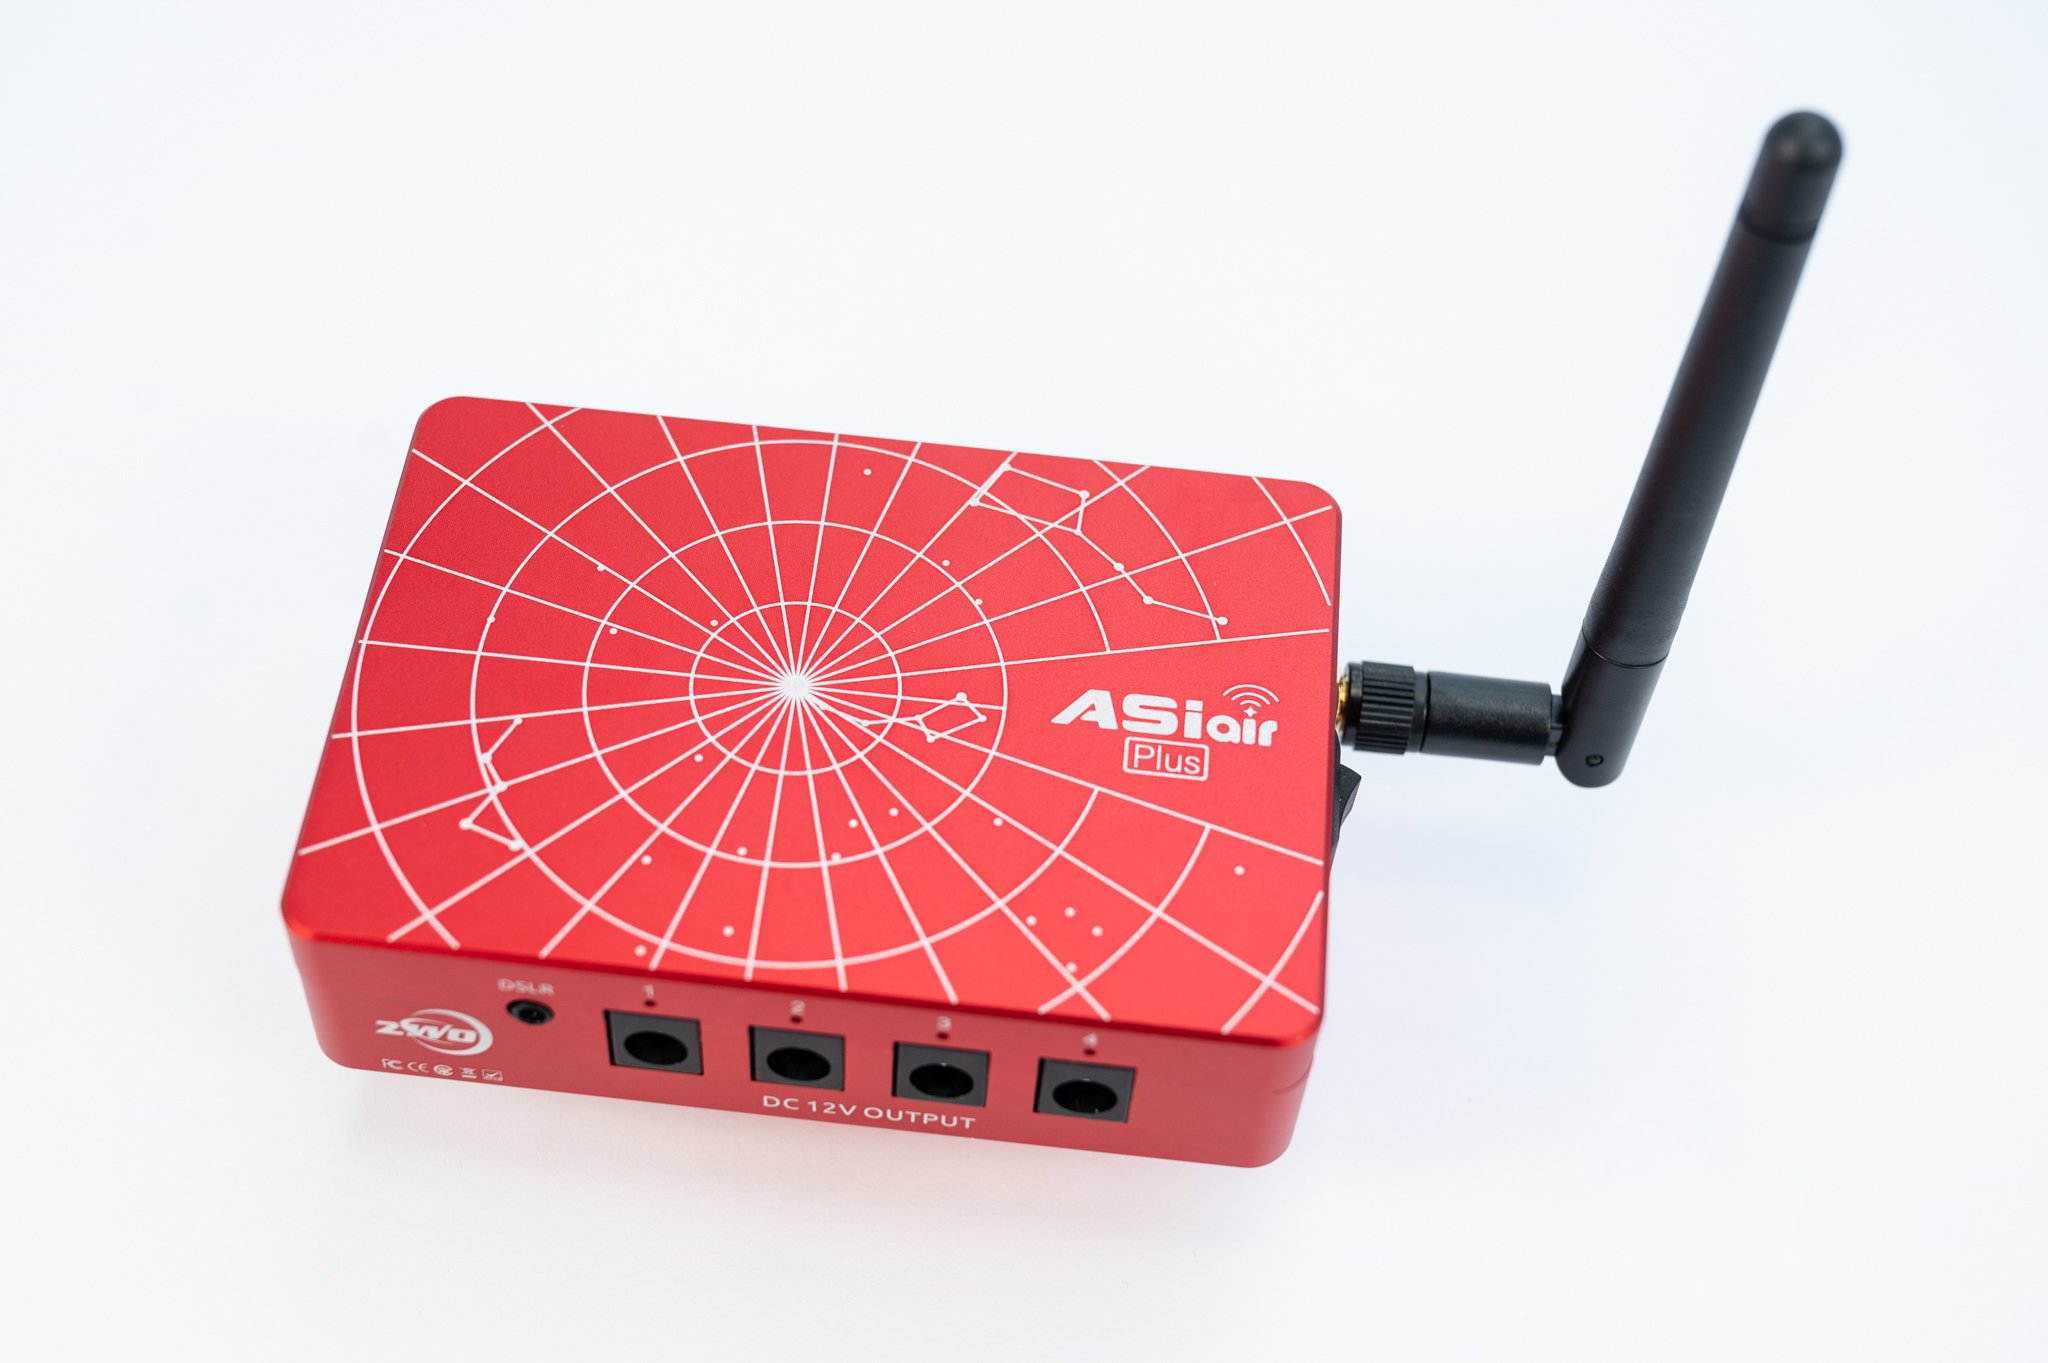
The ASIair Plus has a solid tactile feel to it and is heavier than it first looks. The shell is made of CNC manufactured and anodised aluminium. The device measures 92 x 67 x 35 mm, making its size and 240g weight ideal for mounting onto a telescope assembly. The unit is finished in ZWO’s standard red colouring with a polarscope reticle logo featuring Polaris, Ursa Major, Ursa Minor and Octans star patterns.
The ASIair Plus has holes fitted on its base and one side to allow the supplied Synta style dovetail bracket to be mounted in a number of orientations. There are also standard ¼” x 20 threaded holes to allow an arca swiss plate or tripod fitting. These options allow numerous ways of mounting the ASIair onto your astrophotography rig.
Connectivity
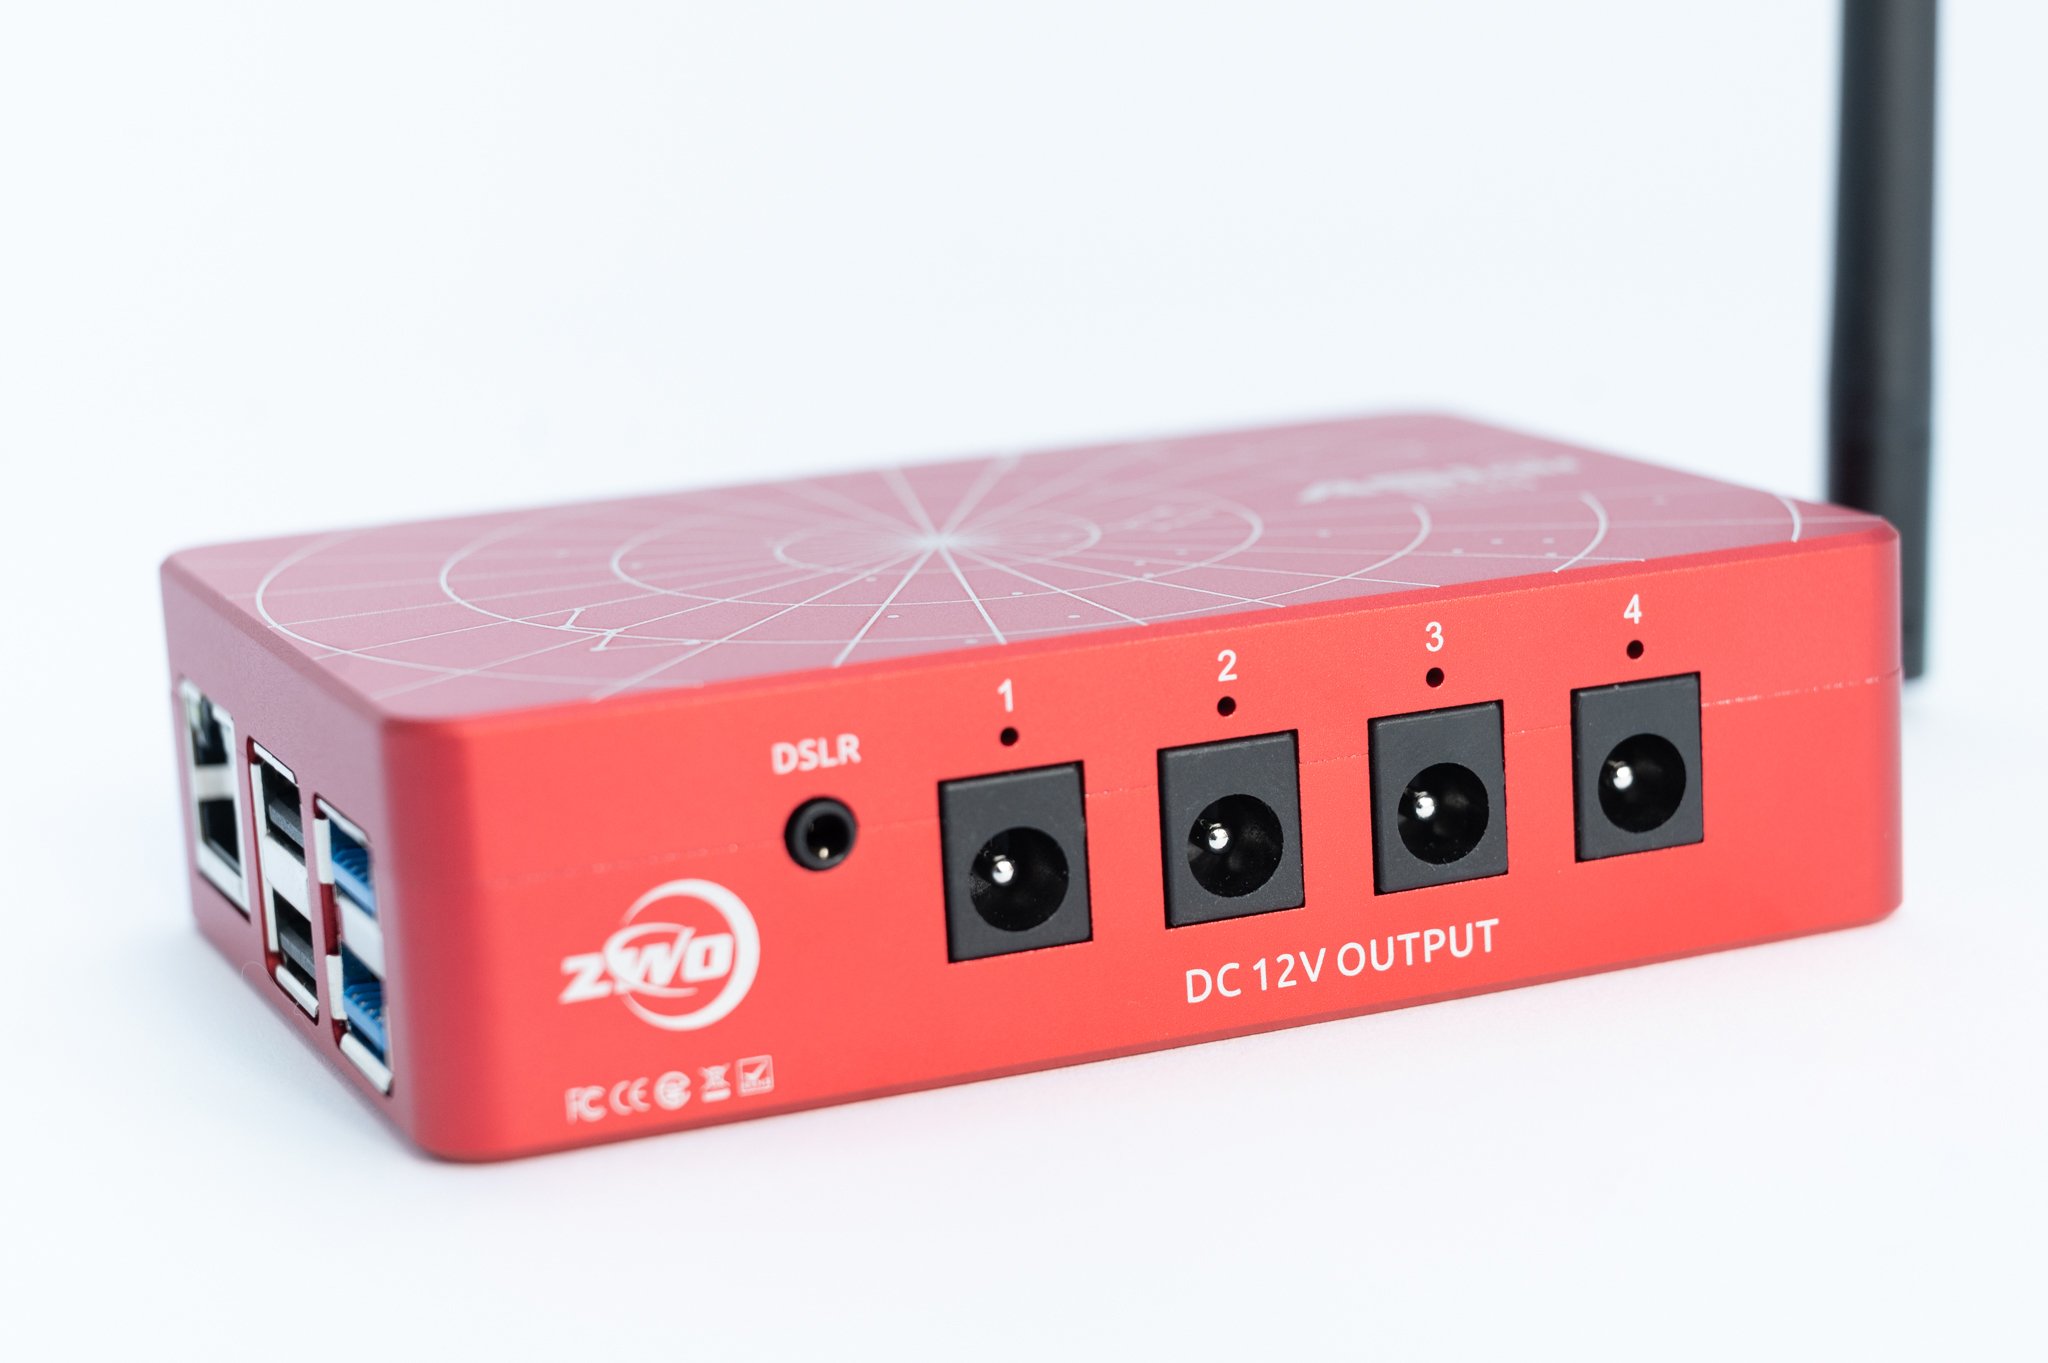
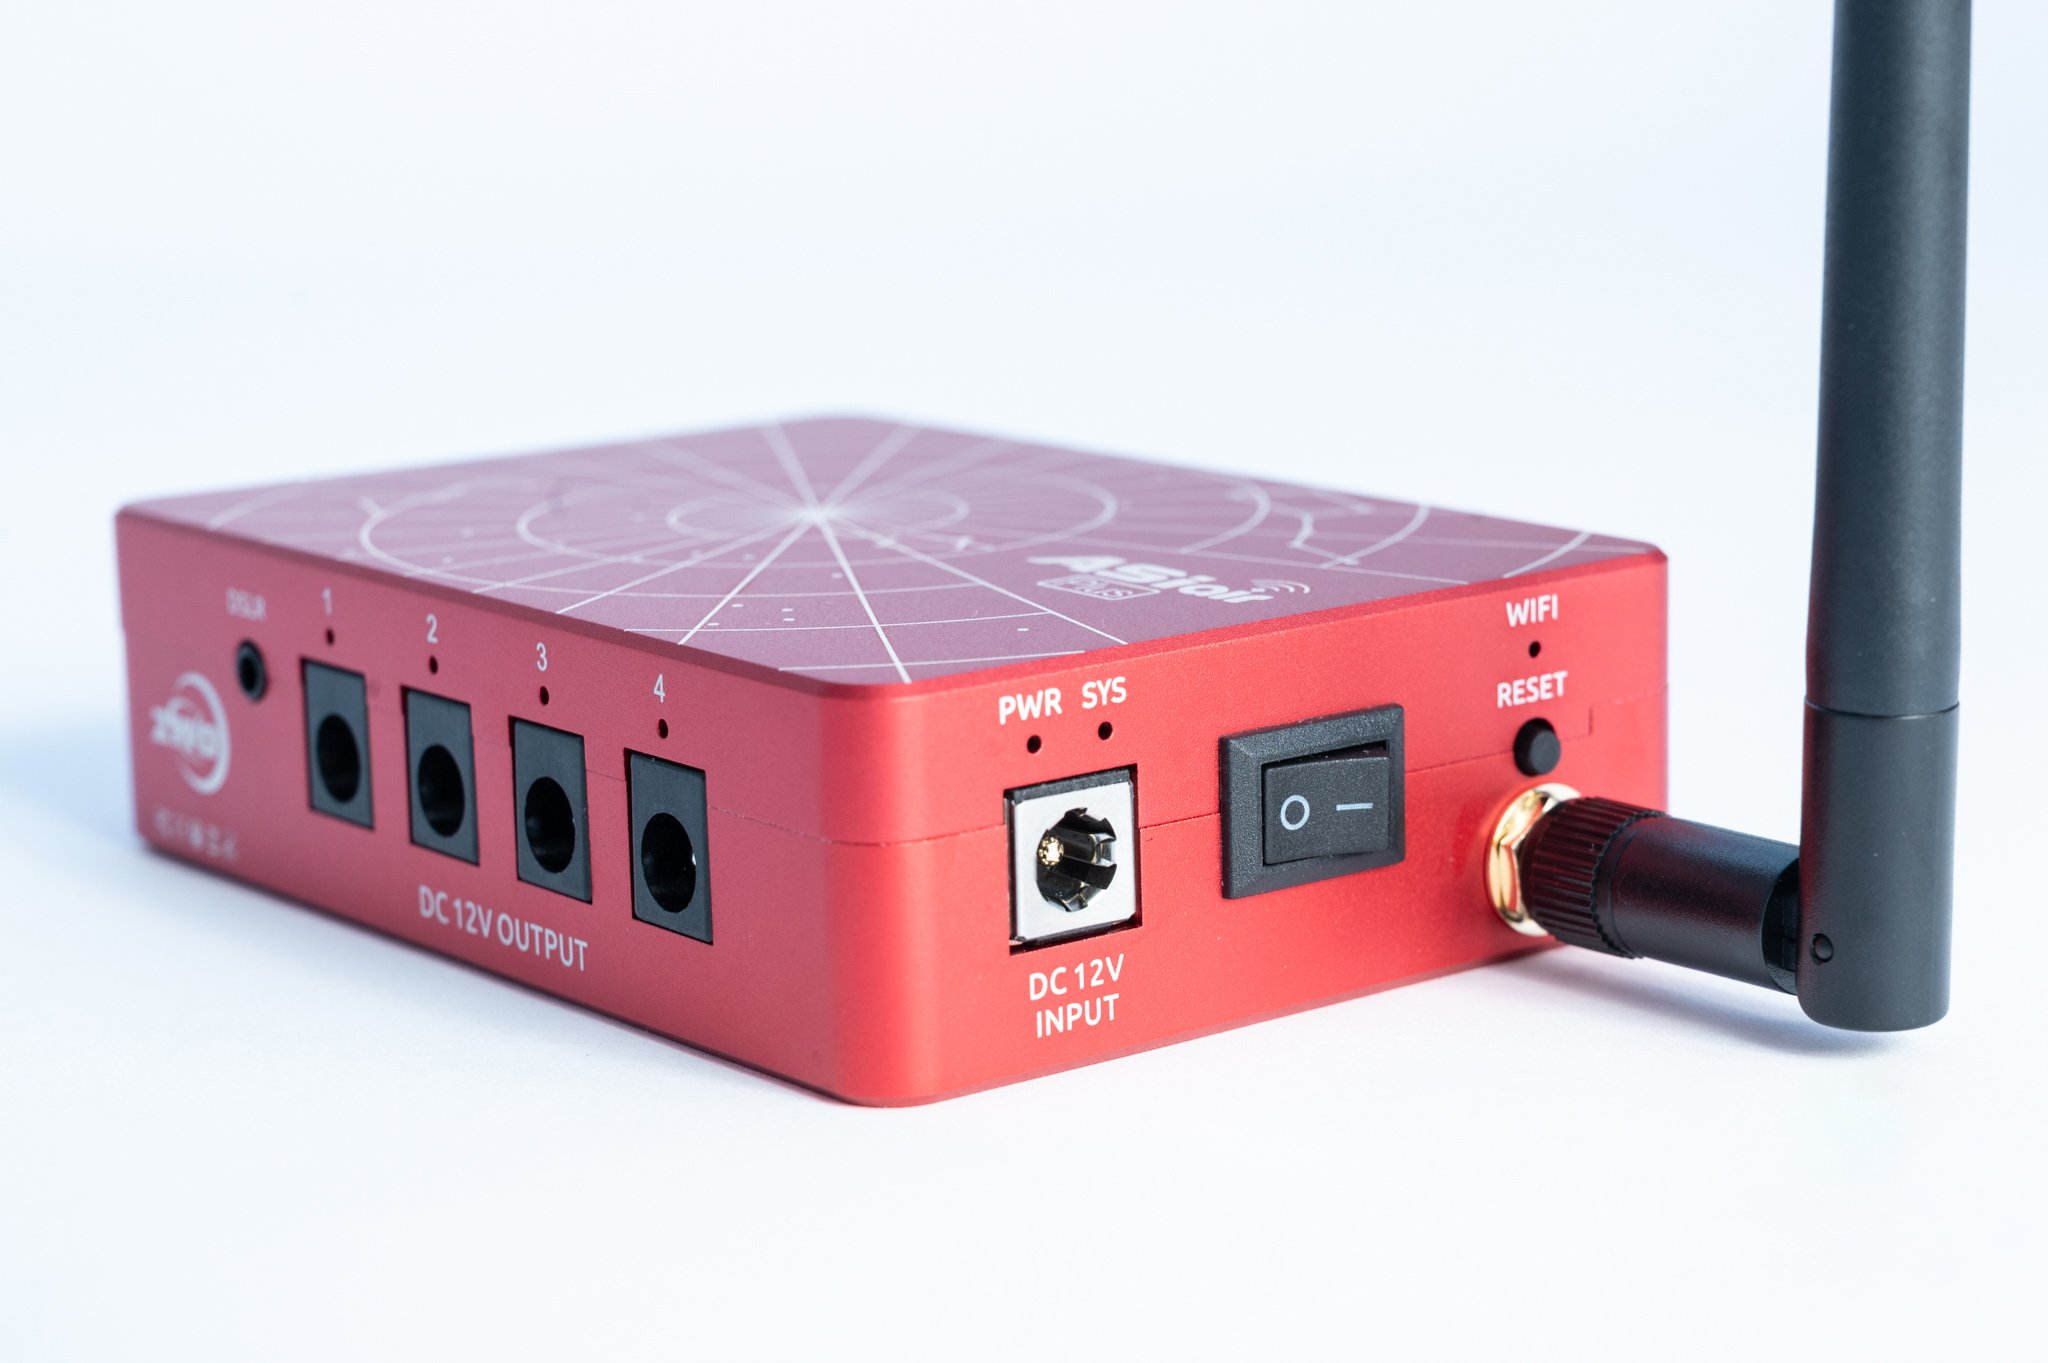
The ASIair Plus is equipped with a lightweight power management module that provides four 12V DC power outputs on one side of the body. Each power outlet is fitted with a 2.1 * 5.5mm centre positive jack (which seems to be the most common standard for power sockets in astrophotography). The individual ports can be enabled or disabled from within the ASIair software. Each port is able to provide up to 3A, so can be used to power accessories such as cooled cameras, dew heaters or low power mounts. When dew heaters are fitted the ASIair is able to vary the voltage output to control the heating level of the dew heater. While each outlet is rated at 3A, however, the maximum input current to the ASIair is 6A, so powering 4 devices at 3A each is not practical. Each outlet has a small red LED indicator that illuminates when the outlet is enabled in the software.
There is also a DSLR shutter release port (2.5mm audio jack socket) should your camera not be fully compatible with the ASIair USB control.
ASIair Plus Power Outlets and DSLR Shutter Port
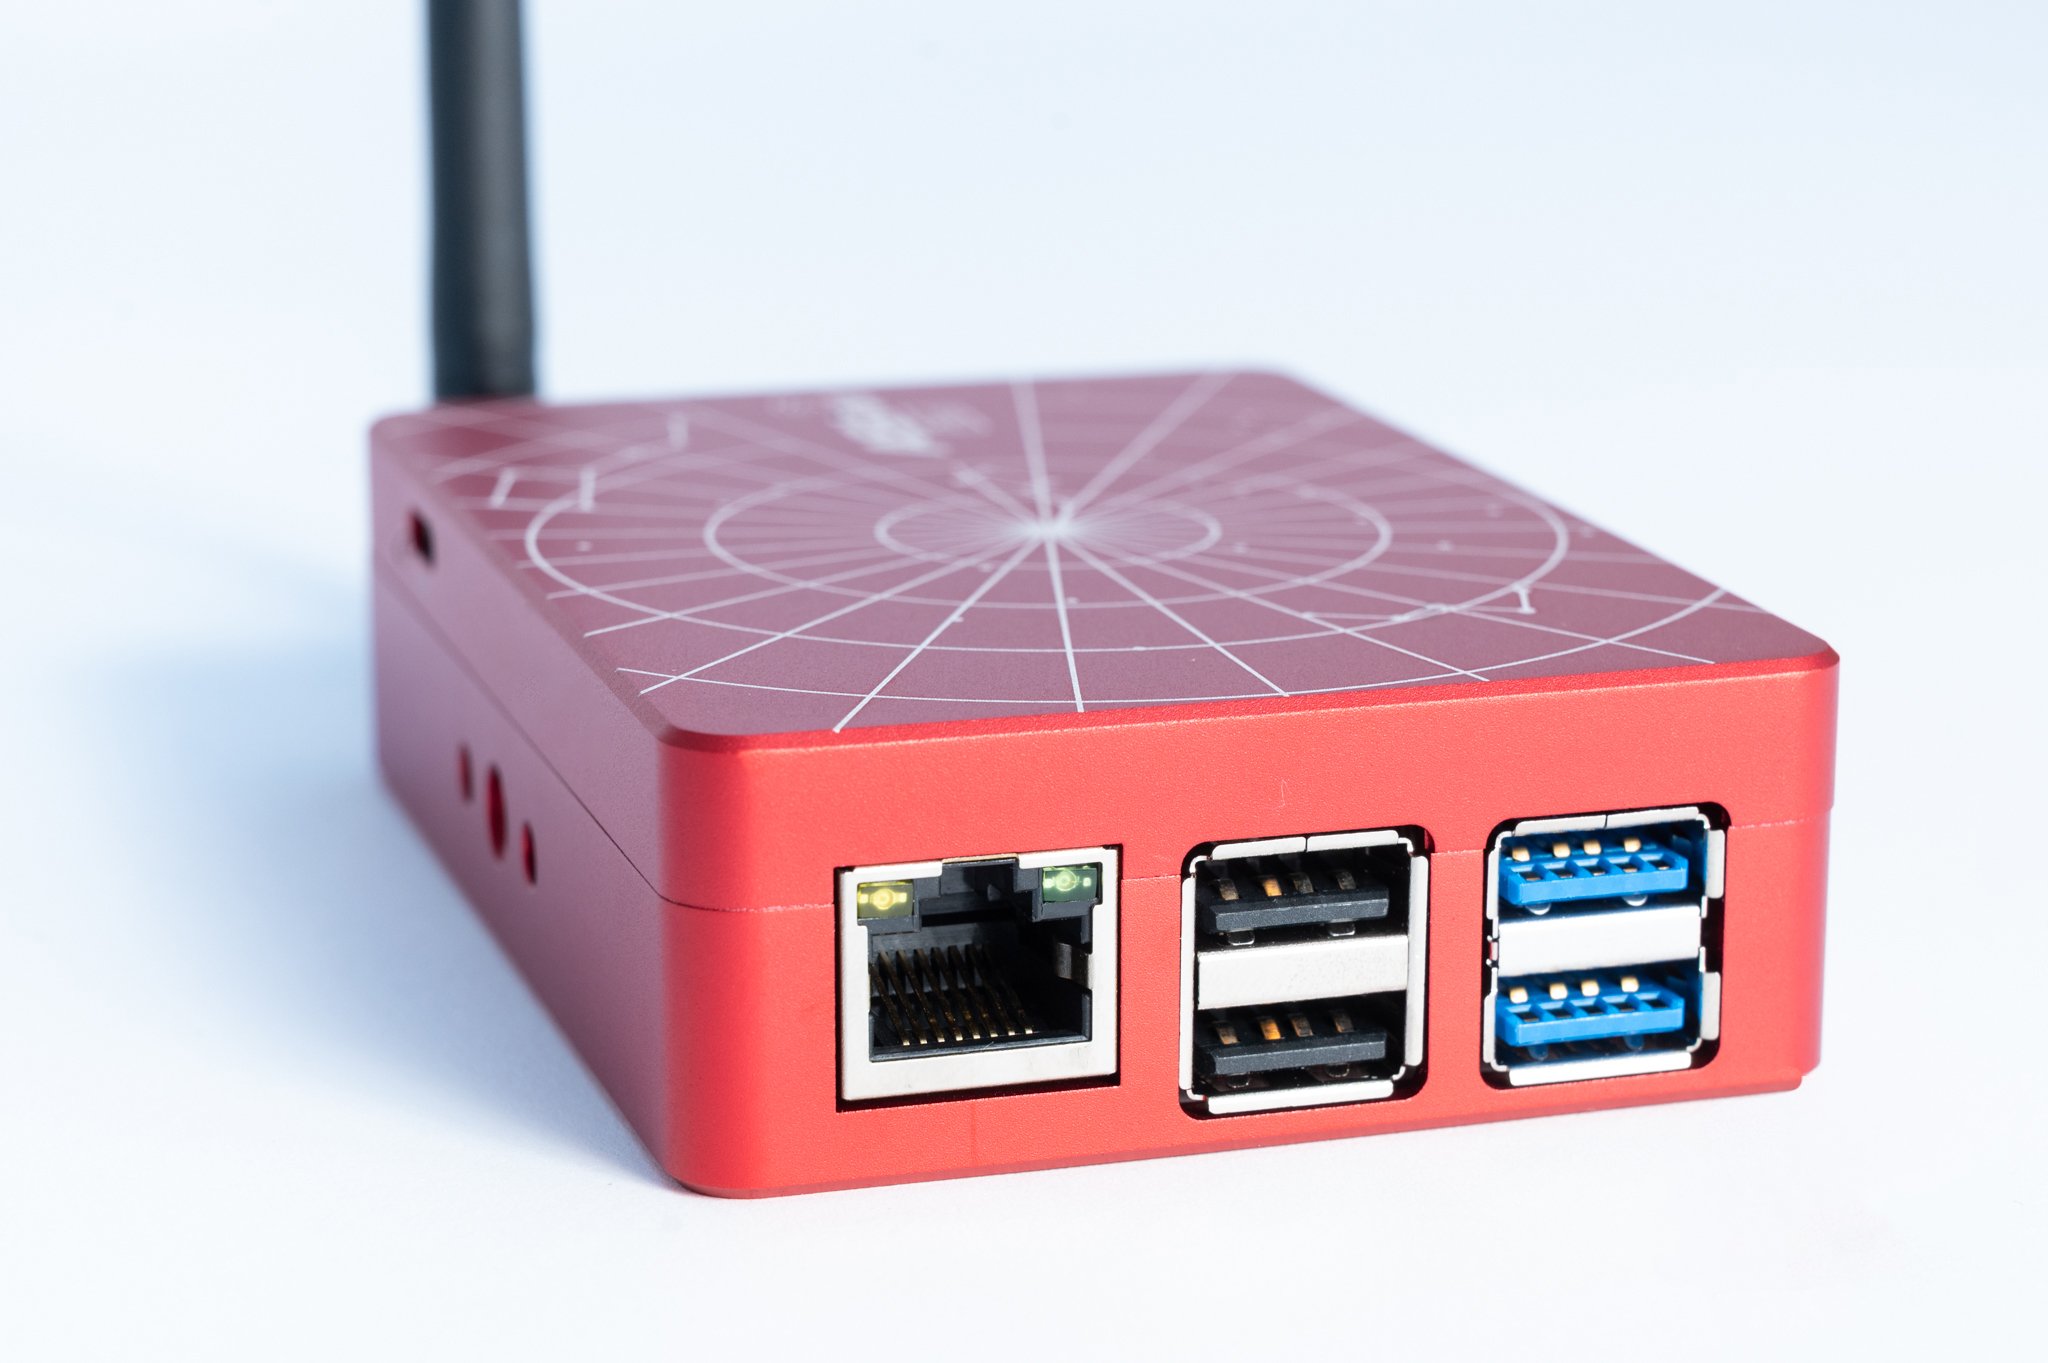
In addition to the power outlets there are two USB 2.0 (black) and two USB 3.0 (blue) ports on the end of the ASIair for connecting cameras, mounts and other accessories like guide scope cameras, electronic autofocusers, filter wheels, etc. The system supports the use of powered and unpowered USB hubs should you need more USB ports. Next to the USB ports is an RJ45 Gigabit Ethernet socket should you wish to hardwire the ASIair into an existing network. This enables you to access the device anywhere within your router's WiFi range.
ASIair USB and Ethernet Ports
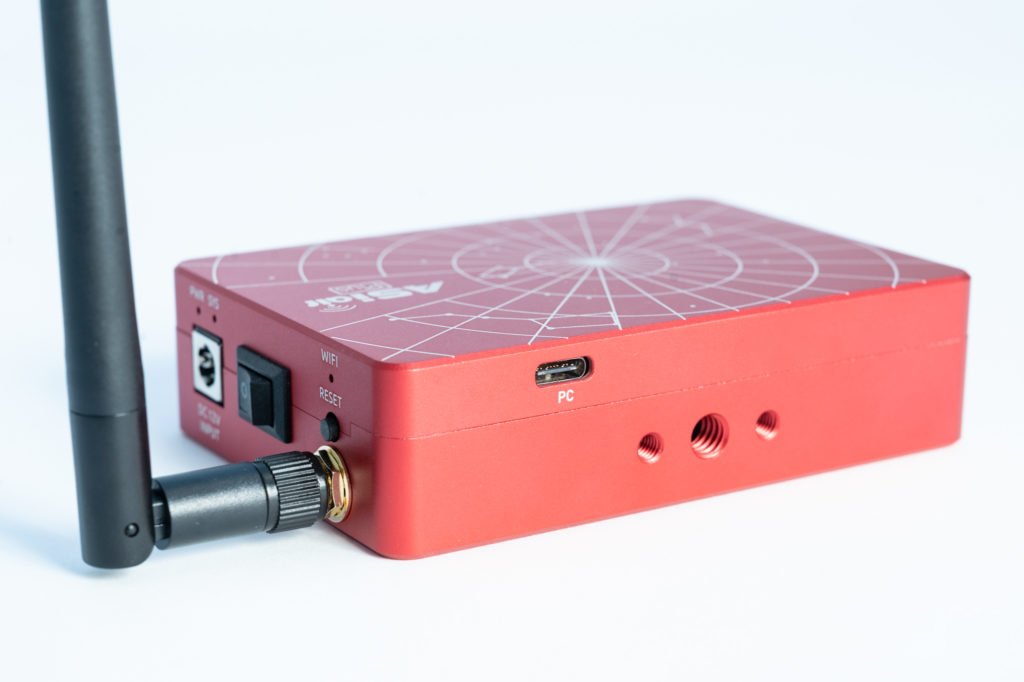
On the side of the ASIair, opposite the power outlets, there is a USB-C port for connecting to a computer in order to transfer data from the 256GB internal memory to the computer. Also shown are the mounting bracket screw holes and ¼” screw hole.
USB-C socket for connecting the ASIair to a Computer
Finally, there is the power input, again a 2.1 * 5.5mm centre positive jack, supplying 12V DC to the ASIair at up to 6A. Alongside this is the ON/OFF switch and the WiFi antenna
ASIair Power Input, ON/OFF Switch and Wifi Antenna
There are LED indicators above the DC Input socket showing power and system status. Similarly an LED above the WiFi antenna illuminates when the WiFi is active. Finally there is a Reset button.
The built-in WiFi antenna provides an increased WiFi signal compared to previous generations of the ASIair, making the connection between your device and the ASIair Plus more stable and with greater range, up to 20m. Previous ASIair models were criticised for their poor WiFi performance, with frequent disconnection and short range, The WiFi supports both 2.4GHz and 5GHz Access Points so you can connect from your smart device. Additionally, the ASIair can operate in Station Mode, where it can be connected to an existing WiFi network such as a home LAN. Station Mode is restricted to 2.4GHz band but both Access Point and Station Mode can be used at the same time to provide maximum flexibility.
Given the reputation of the previous generations of ASIair having poor WiFi, I thought I would test how the new ASIair Plus 256GB fared now that it has an integrated WiFi aerial. With my set up running in the back garden I had no issues getting inside my house even though I was at least 15m away and through several walls in my home. I also set the ASIair to connect to my home router using its Station Mode. Connection was simple and reliable, and I could access the ASIair over the home LAN from any location in the house or garden. This ability to connect to the LAN is useful as I can access the ASIair from different tablets, phones and Mac computers (at the same time) from within the house, leaving the imaging equipment outside to continue with the image acquisition
This version of the ASIAIR has been redesigned with eMMC storage; there is 256GB of storage space with 244GB of free space for saving images and videos. With the eMMC, the ASIair Plus' I/O speed is up to 2.5x faster than the previous ASIair Pro with an average read speed of 85MB/s and average write speed of 52MB/s.
Functionality
The ASIair really does provide just about everything that an astrophotographer would need to set up and control a quite sophisticated telescope or DSLR based rig. There are a number of functions available including:
Preview mode where you can select the exposure and see the resulting image,
Polar Align function, using either Polaris/South Celestial Pole or the new All Sky Polar Align option for where you can’t see these pole stars
Autorun allowing you to plan multiple images of one or more sky objects, including the acquisition of light, dark, flat and bias frames
Planetary imaging with high speed video recording
Live stacking including calibration frames
Focus allowing automatic or manual focus options
Auto Guiding
Goto function with integrated Sky Atlas and Today’s Best options
Power management and dew heater control
Software
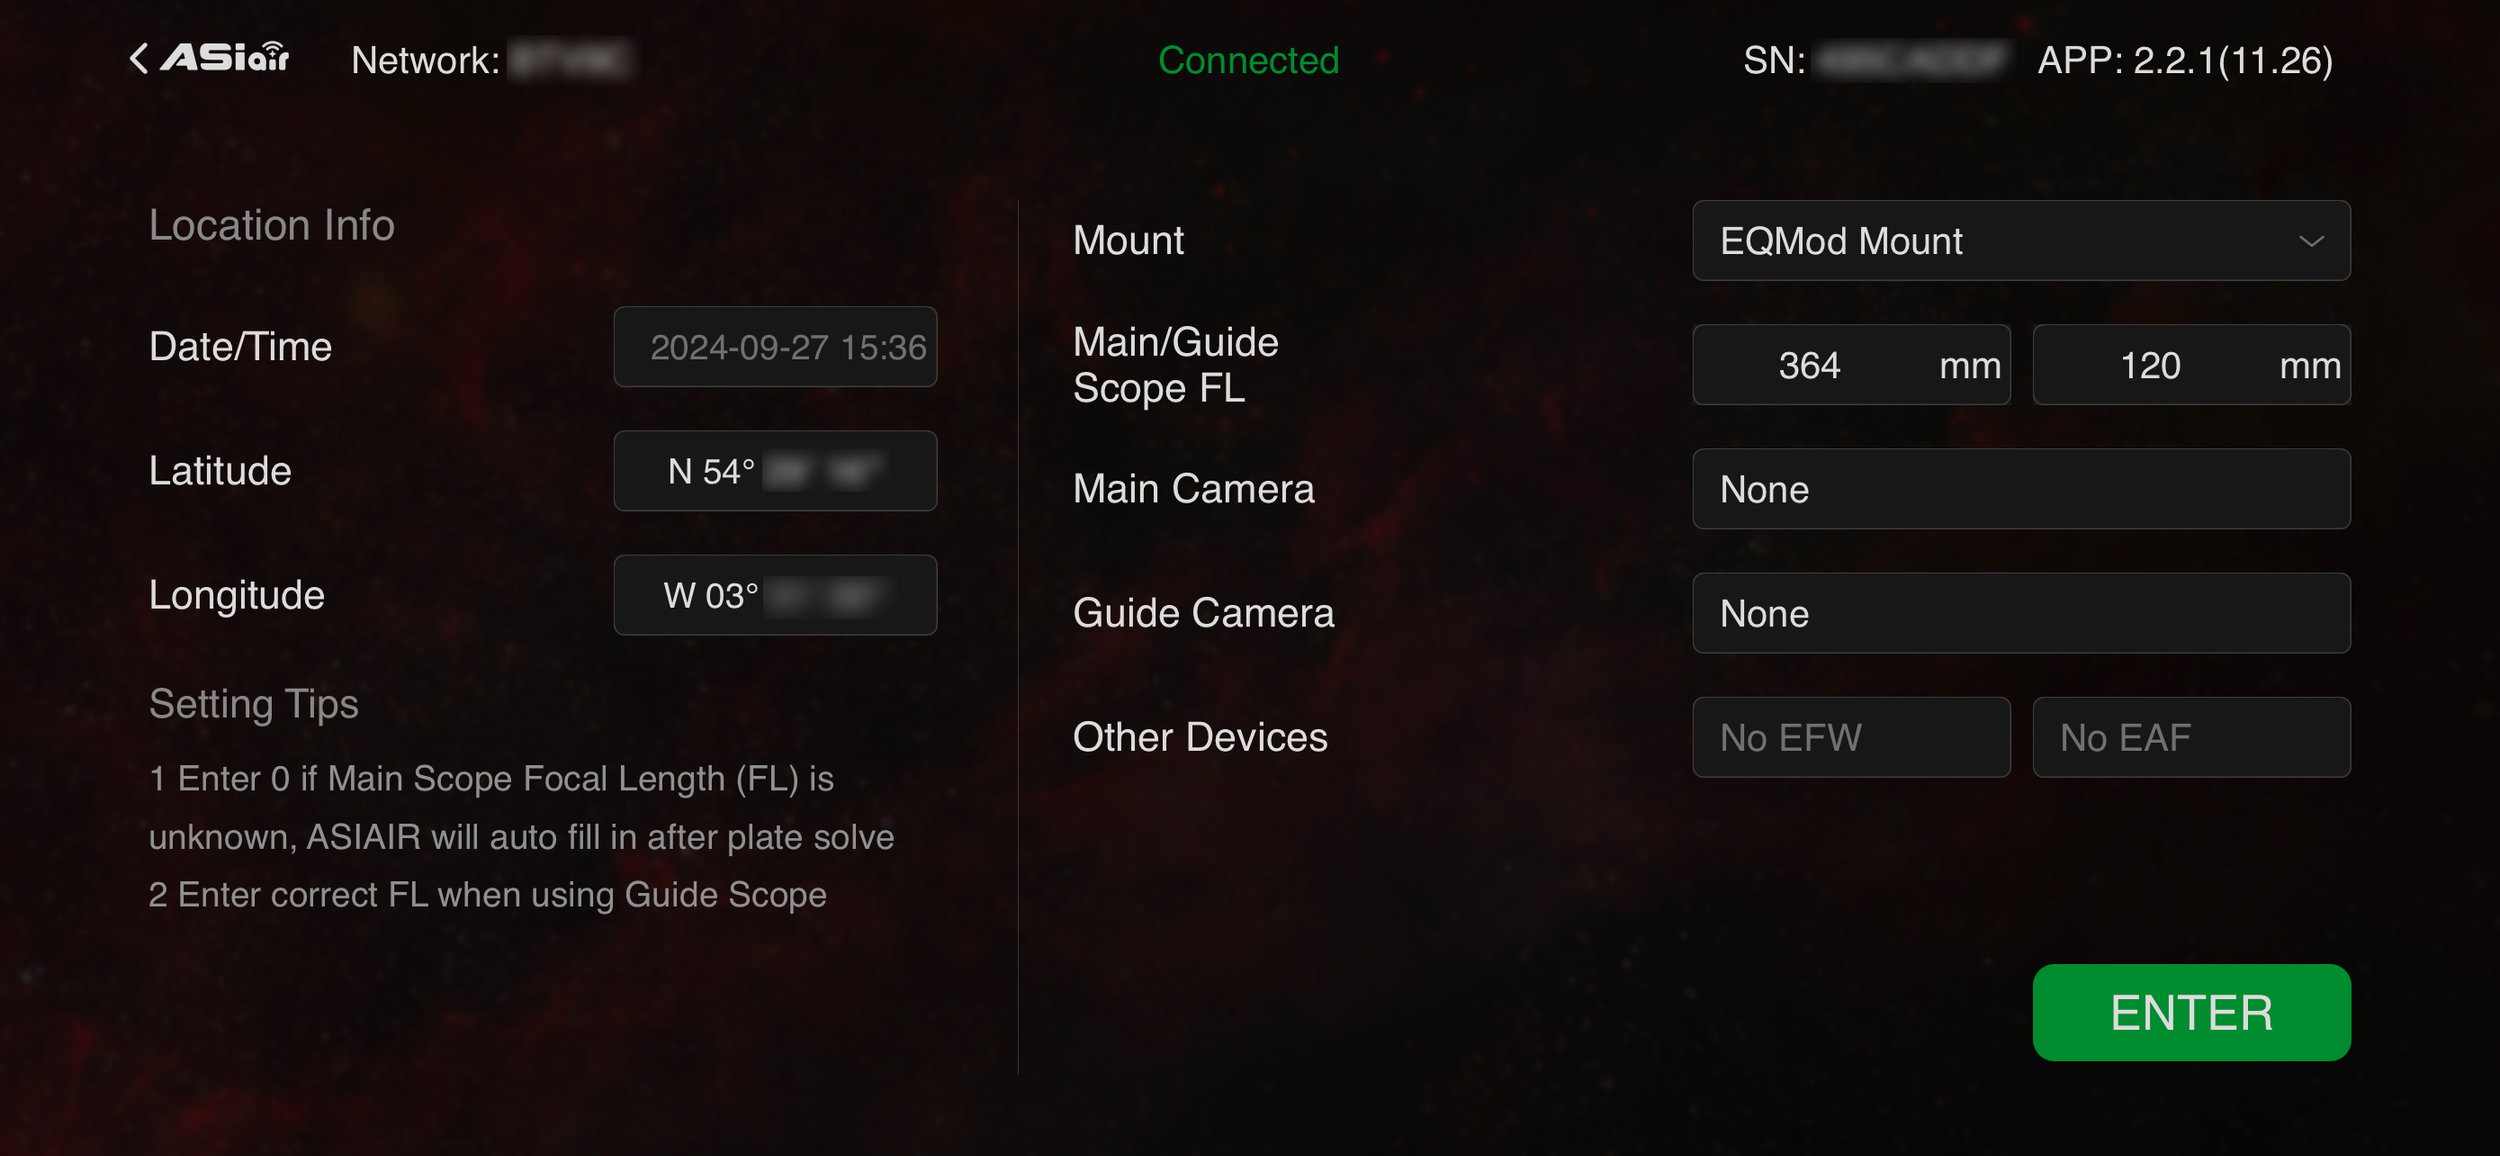
The ASIair is controlled via a free app that runs on iOS or Android smart devices. It can also be run natively on M series Macs or on Windows using the Bluestacks Android emulator. On power up the ASIair app loads a splash screen with the option to Enter Device, once selected a second screen is shown displaying the information required by the ASIair.
ASIair Splash Screen
Main settings screen: Check that the date and time and coordinates of your current location (shown on the left hand side of the screen) are correct. These are generally provided by the smart device GPS/WiFi positioning systems but are sometimes not loaded properly. On the right hand side select the mount type (my Star Adventurer GTi needs to be set as EQMod Mount) and select the focal lengths of the Main Scope (if known) and Guide Scope (if fitted). If you don't know the focal length of the Main Scope you can enter 0 and the ASIair will calculate it automatically. You must enter the correct focal length for the Guide Scope however.
Here my Nikon 100-400mm zoom lens has been identified as zoomed to 364mm.
Select the Main Camera and Guide Camera (where fitted) from the drop down lists provided.
Additionally if you have other devices like an Electronic Filter Wheel (EFW) or Electronic Auto Focuser (EAF) you can select them on this screen. They can always be added later so it doesn't matter if you choose them at his stage or not. Once everything is correct press Enter to go to the main screen.
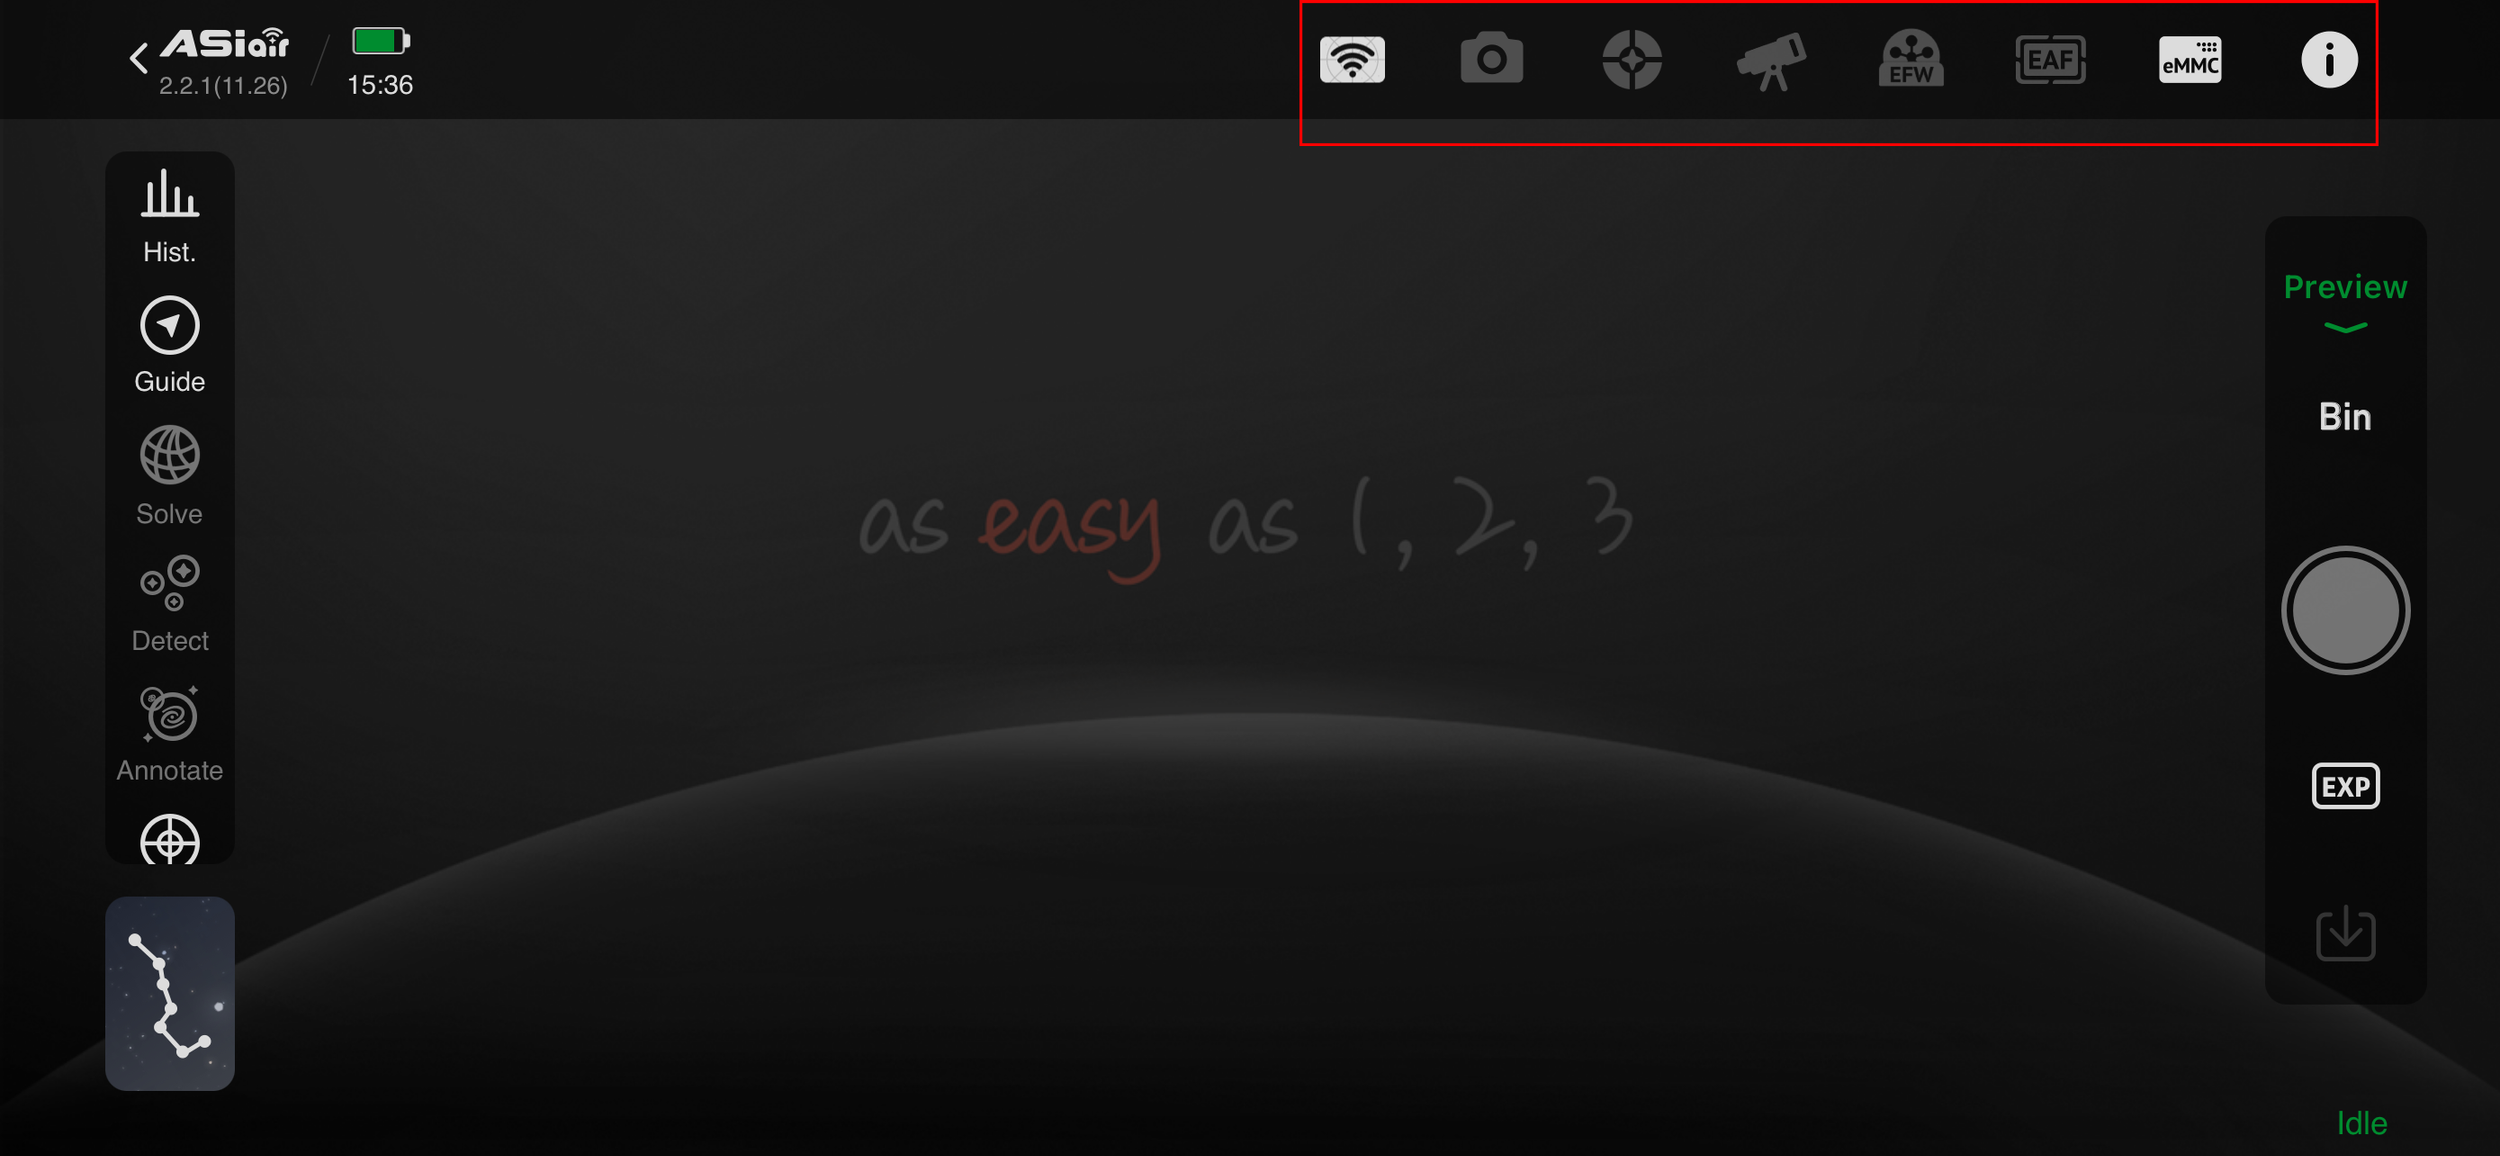
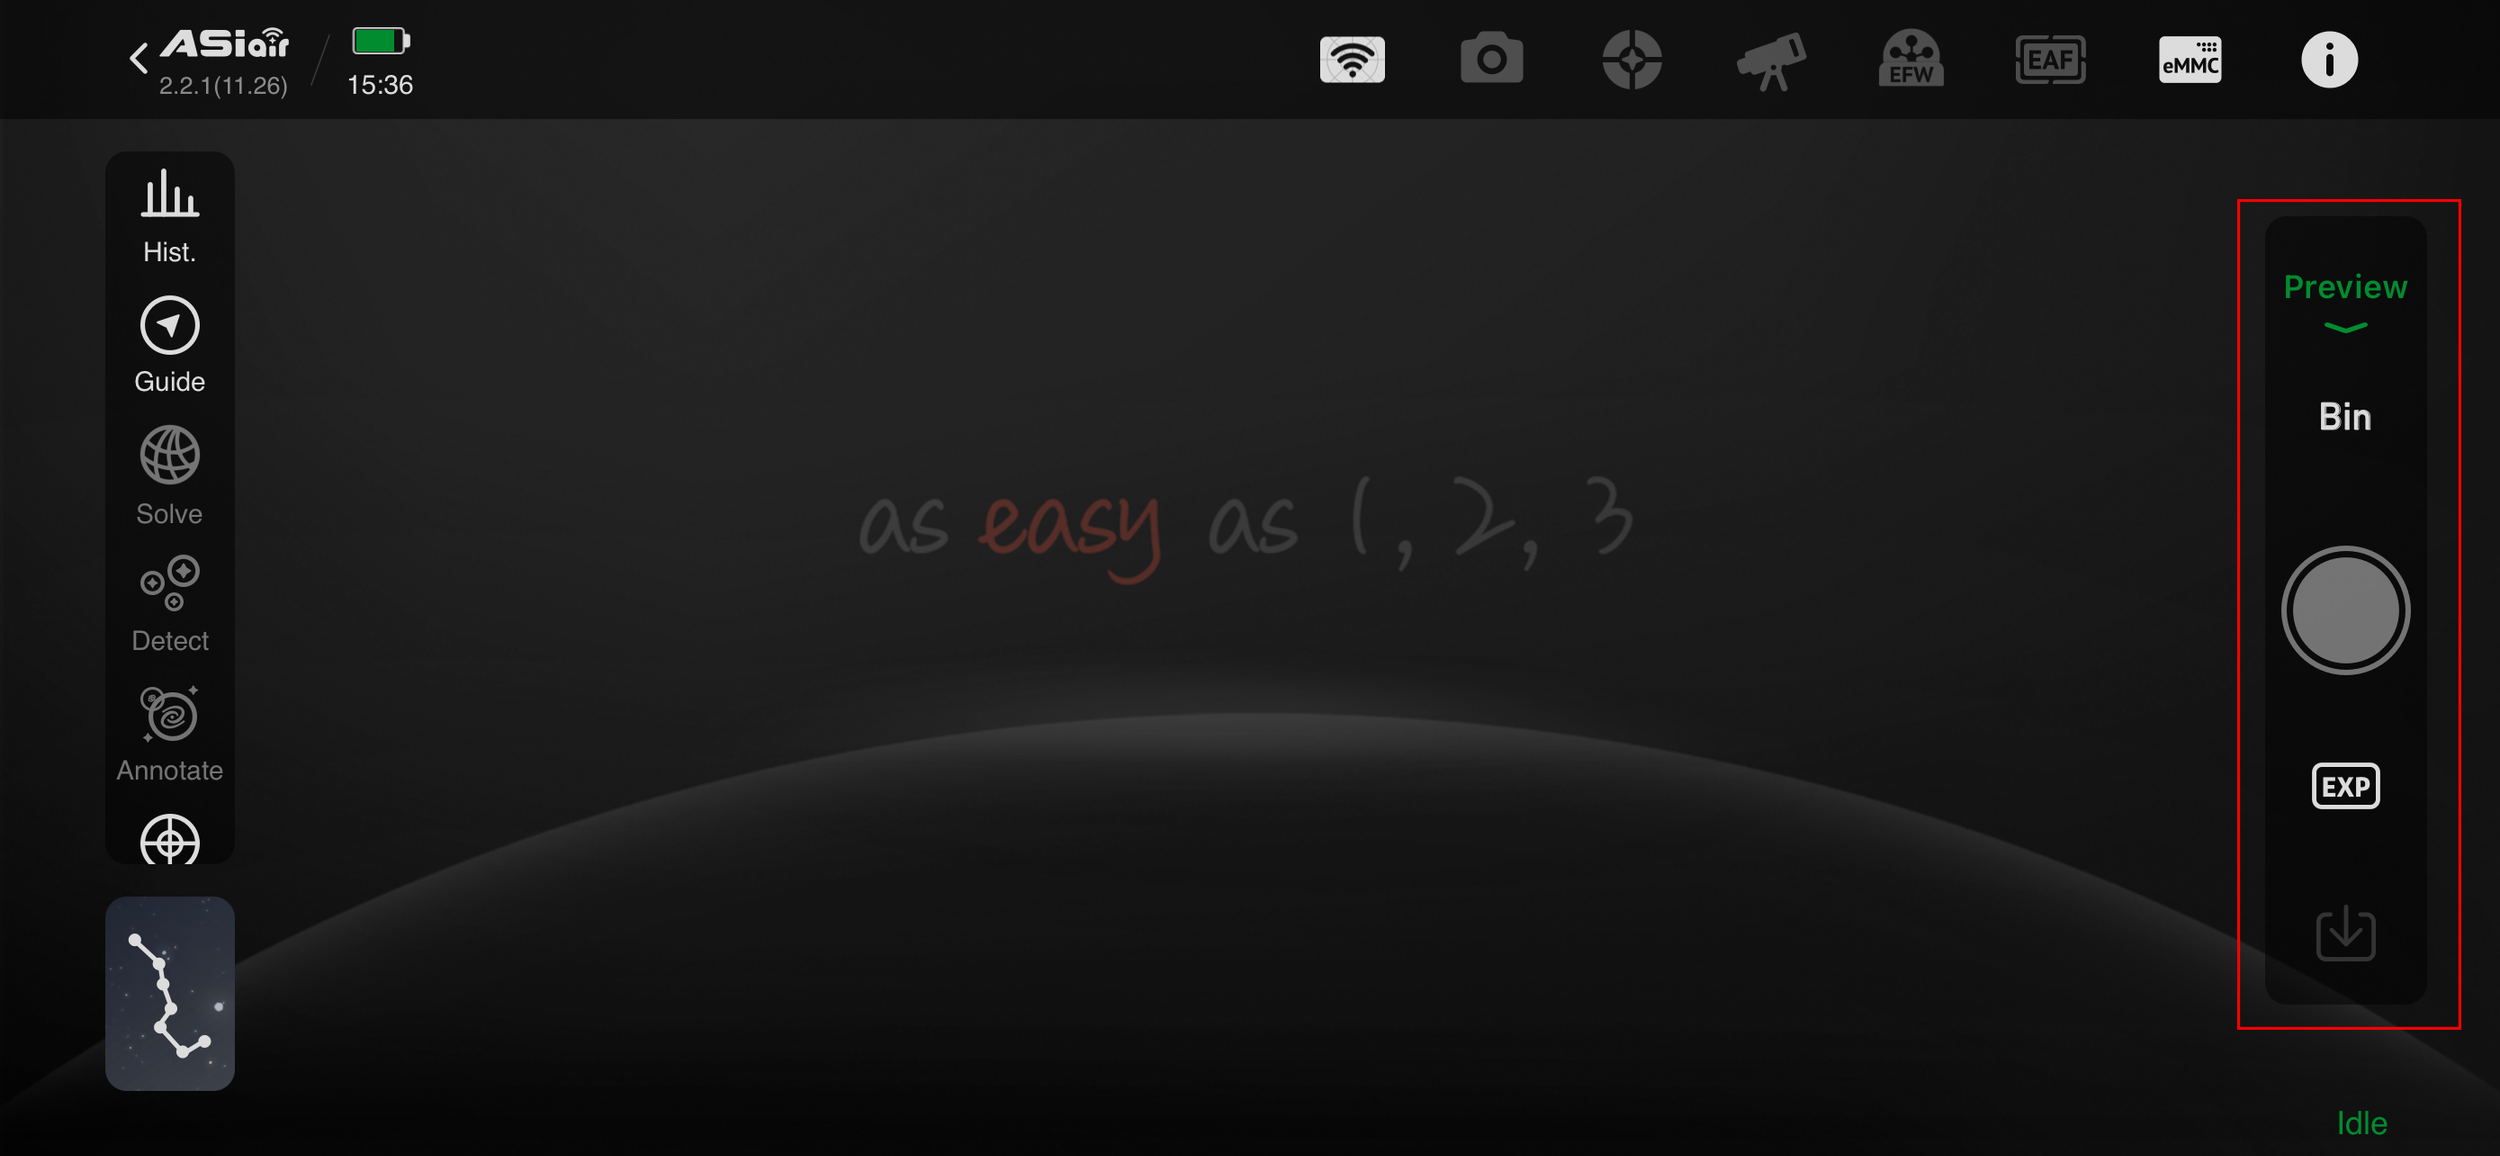
The ASIair Home Screen interface is broken down into a series of screens and icons as shown below.
ASIair Main Screen
Across the top are a set of icons that get you into the basic setup screens for each piece of equipment. The WiFi icon is actually the ASIair’s main window providing access to power management features. Next comes the camera settings, then guide camera settings (including dithering options), mount settings, filter wheel settings (with current filter selected), focuser settings, and last are the storage settings and info screen.
Note: The following images are screenshots from an iPhone so not all options are fitted into one image and need to be scrolled on the actual device
ASiair settings menu showing network settings, input power and temperature
ASIair setting menu (cont) allowing the power outlets to be named and enabled
ASIair settings menu (cont) allowing personalisation and device switching as well as restart and shutdown.
ASIair Main Camera settings allowing the camera type to be selected along with its gain (ISO for DSLRs), lens/scope focal length and any custom file naming requirements
ASIair Guide Camera settings allowing the guide camera type to be selected along with its gain and guide scope focal length
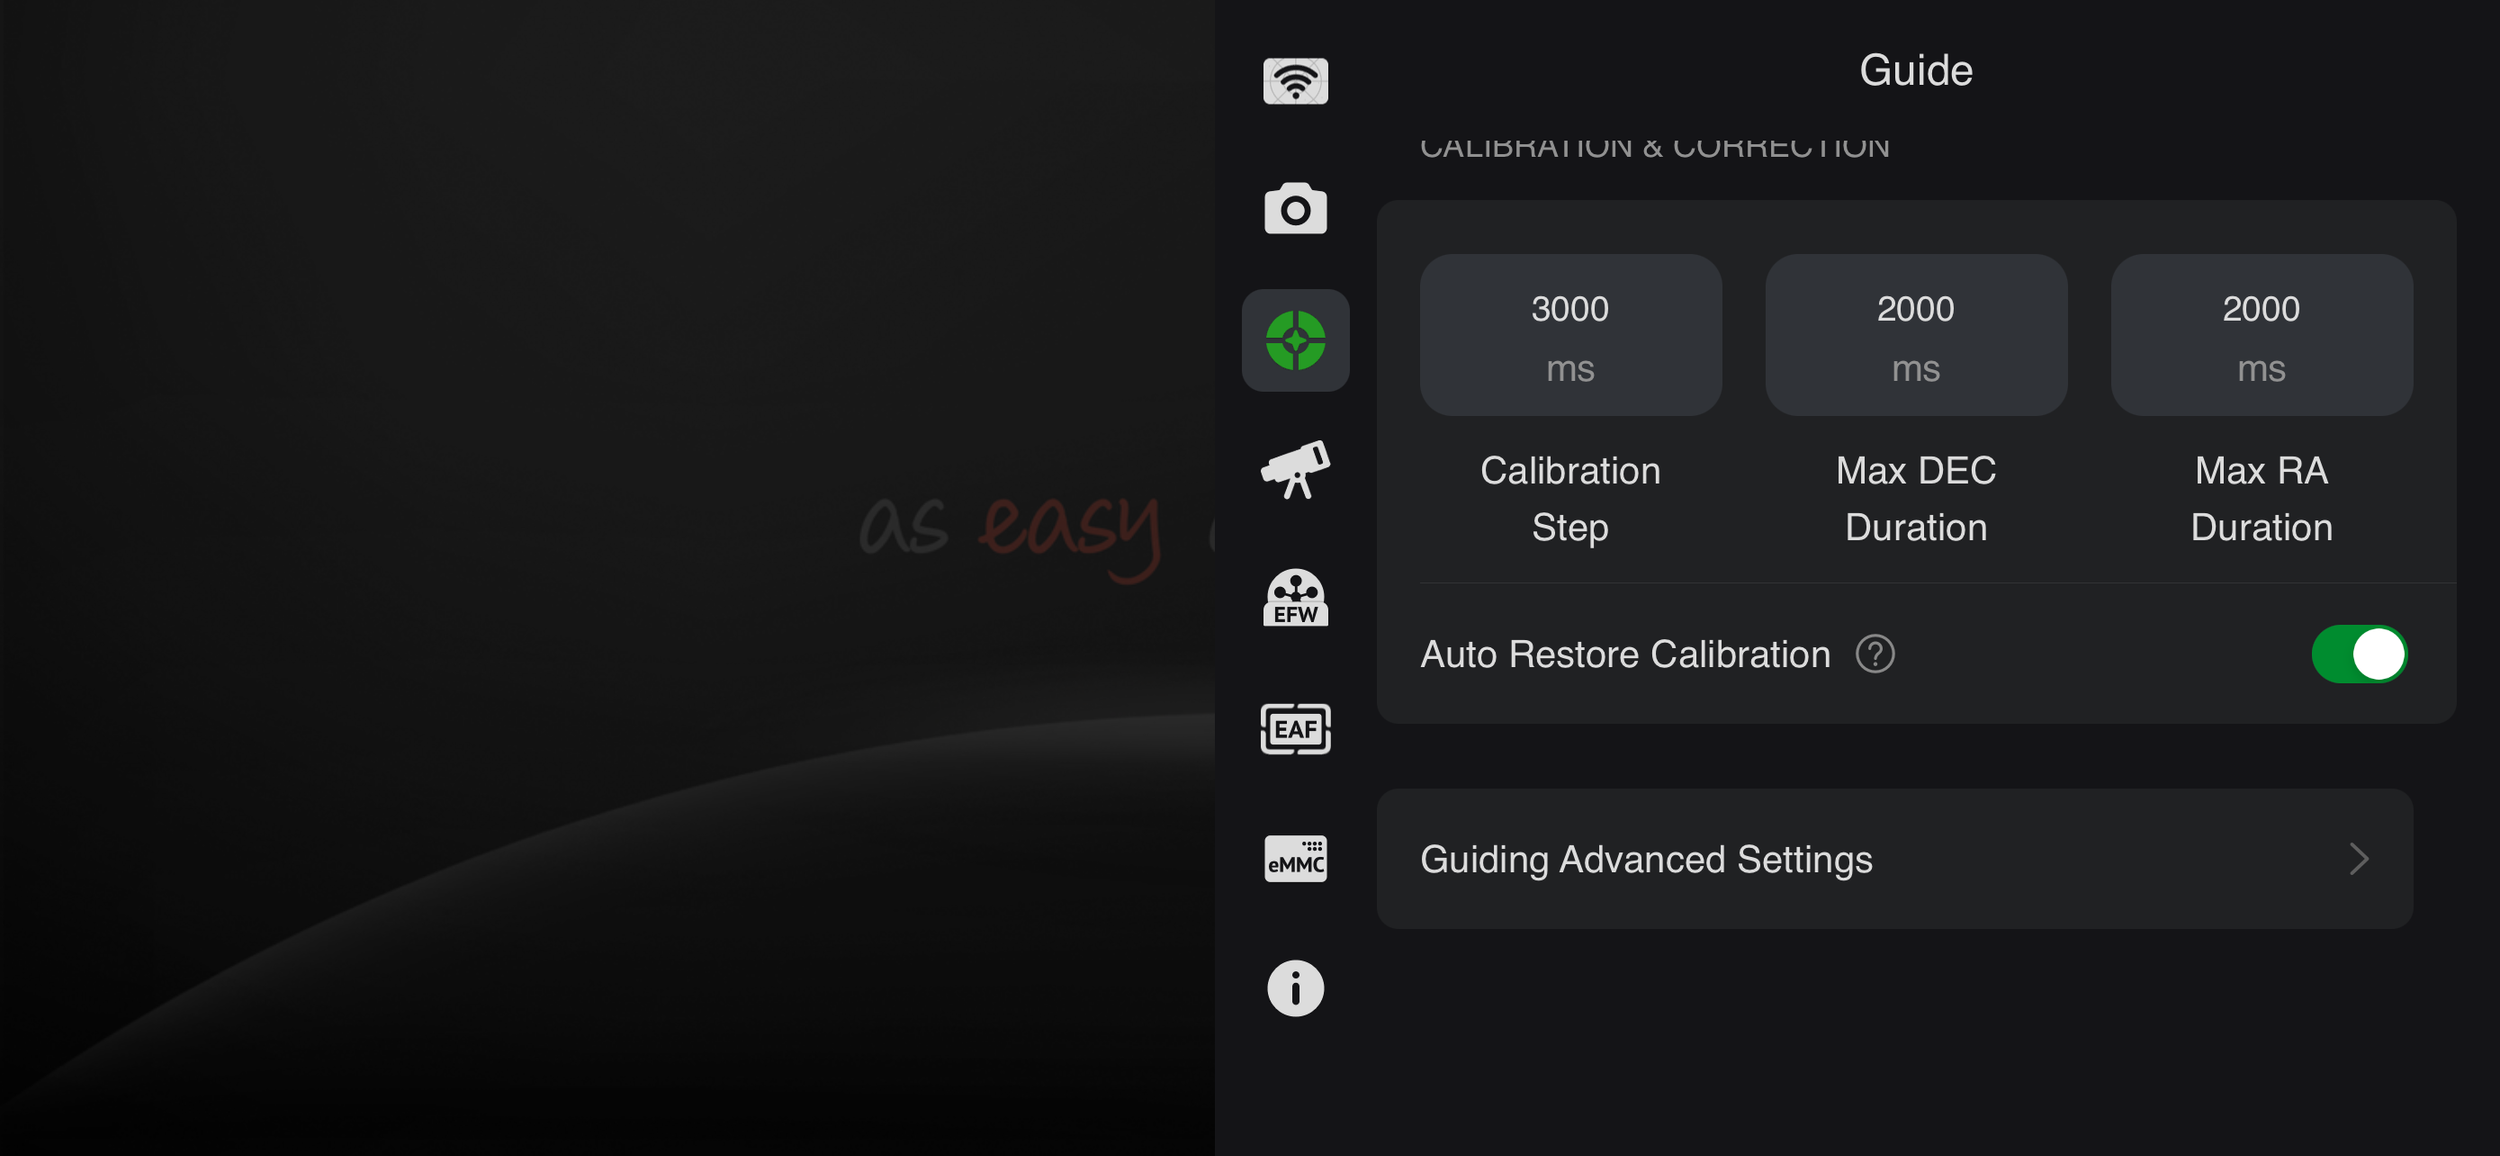
ASIair Guide Camera settings (cont) allowing guiding parameters to be chosen as well as advanced settings like dithering
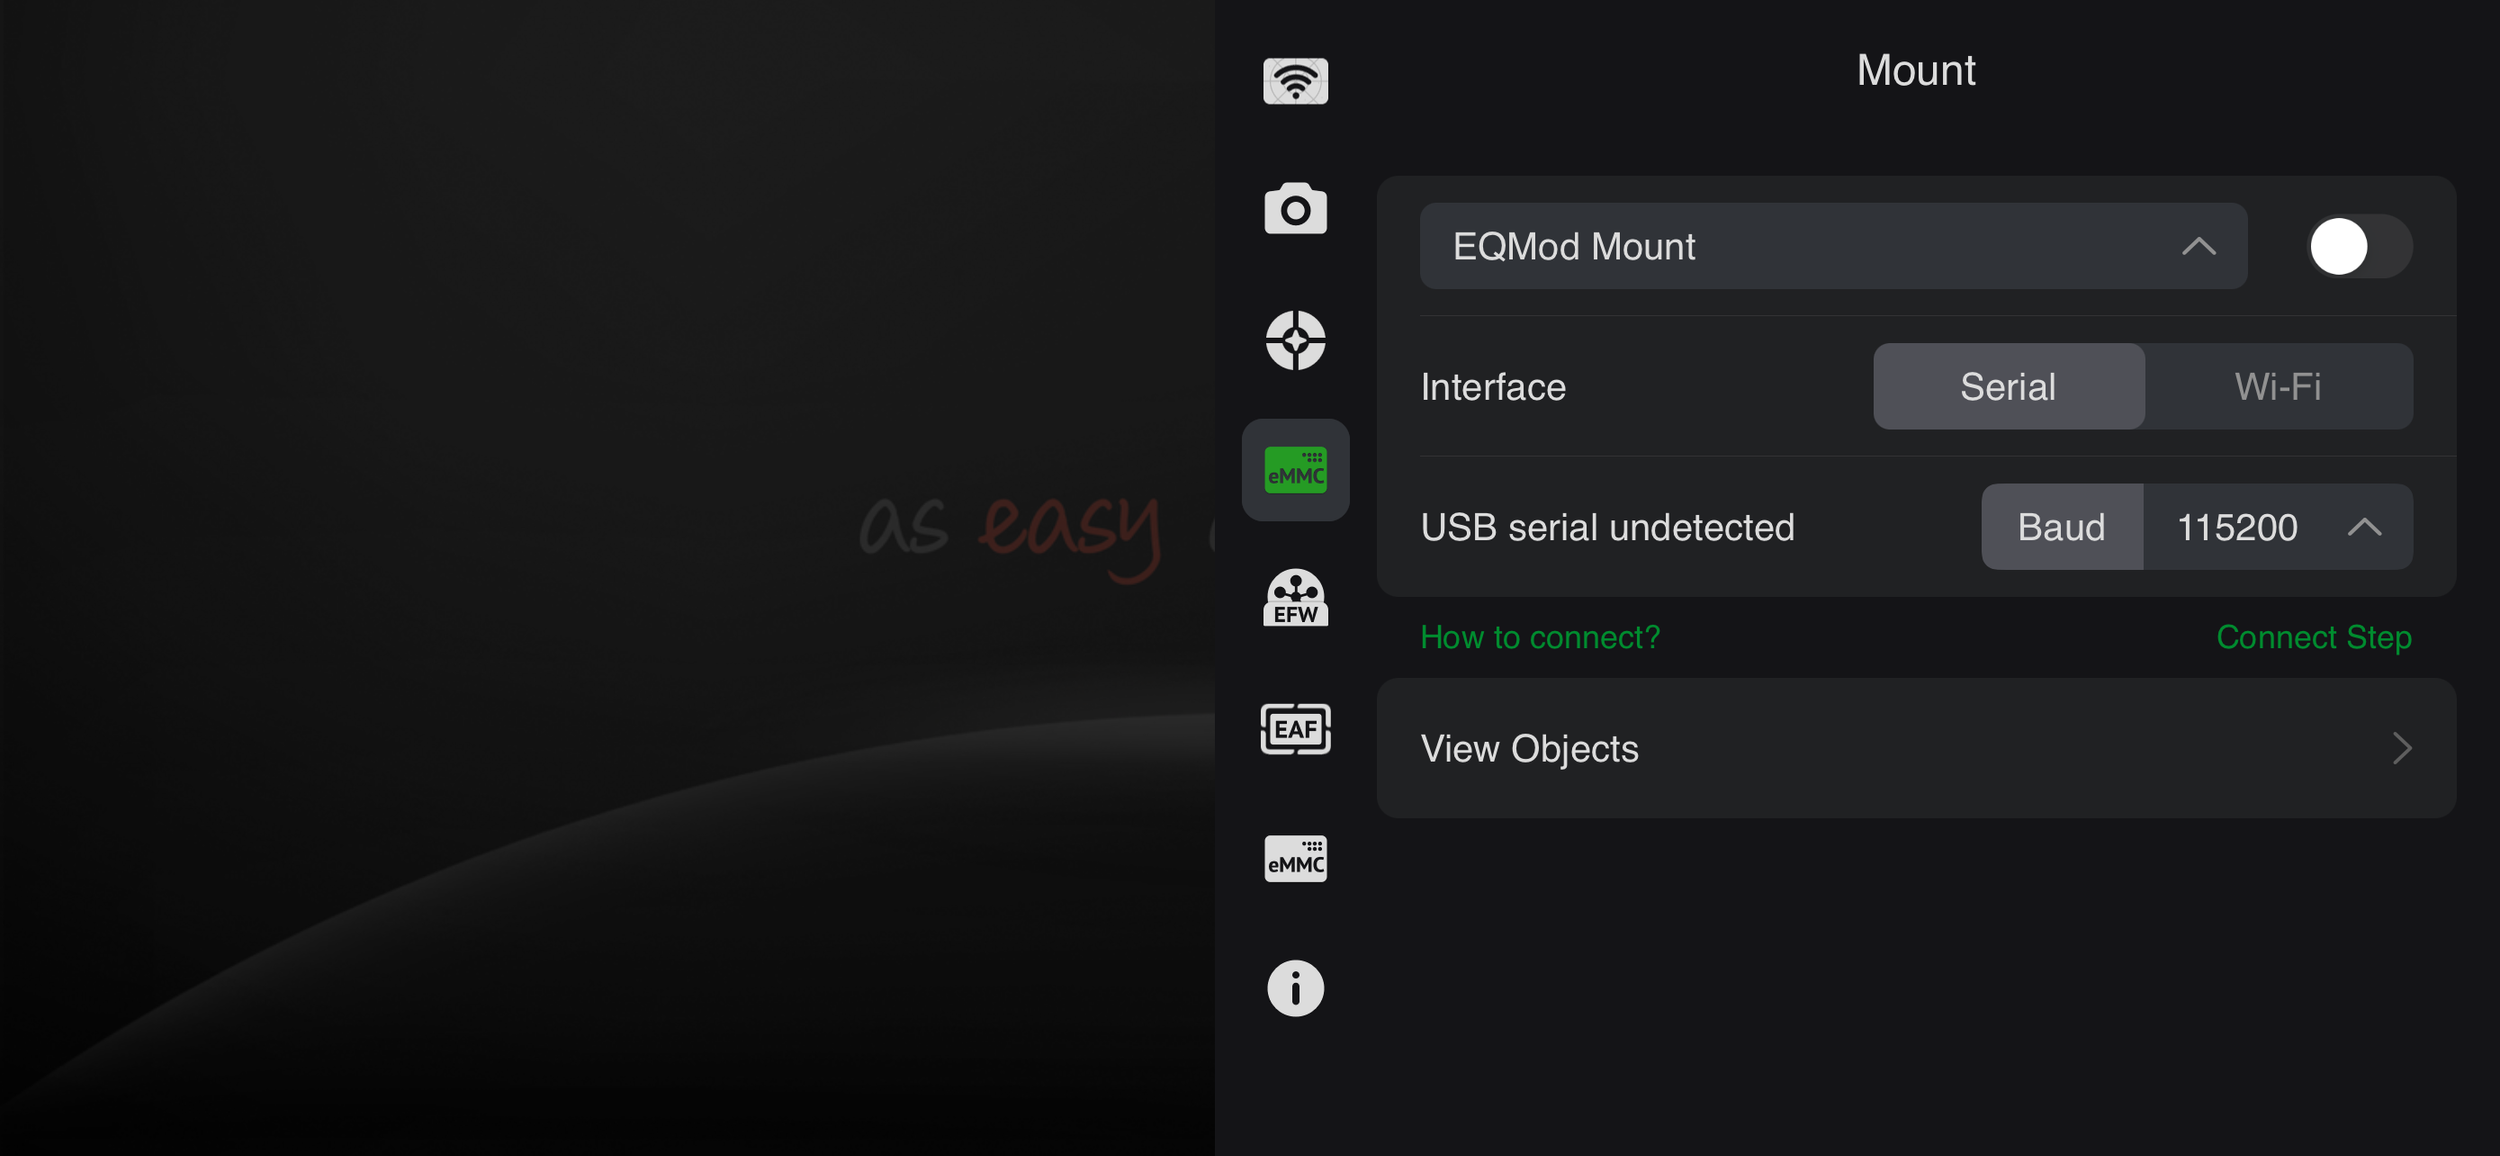
ASIair Mount Settings
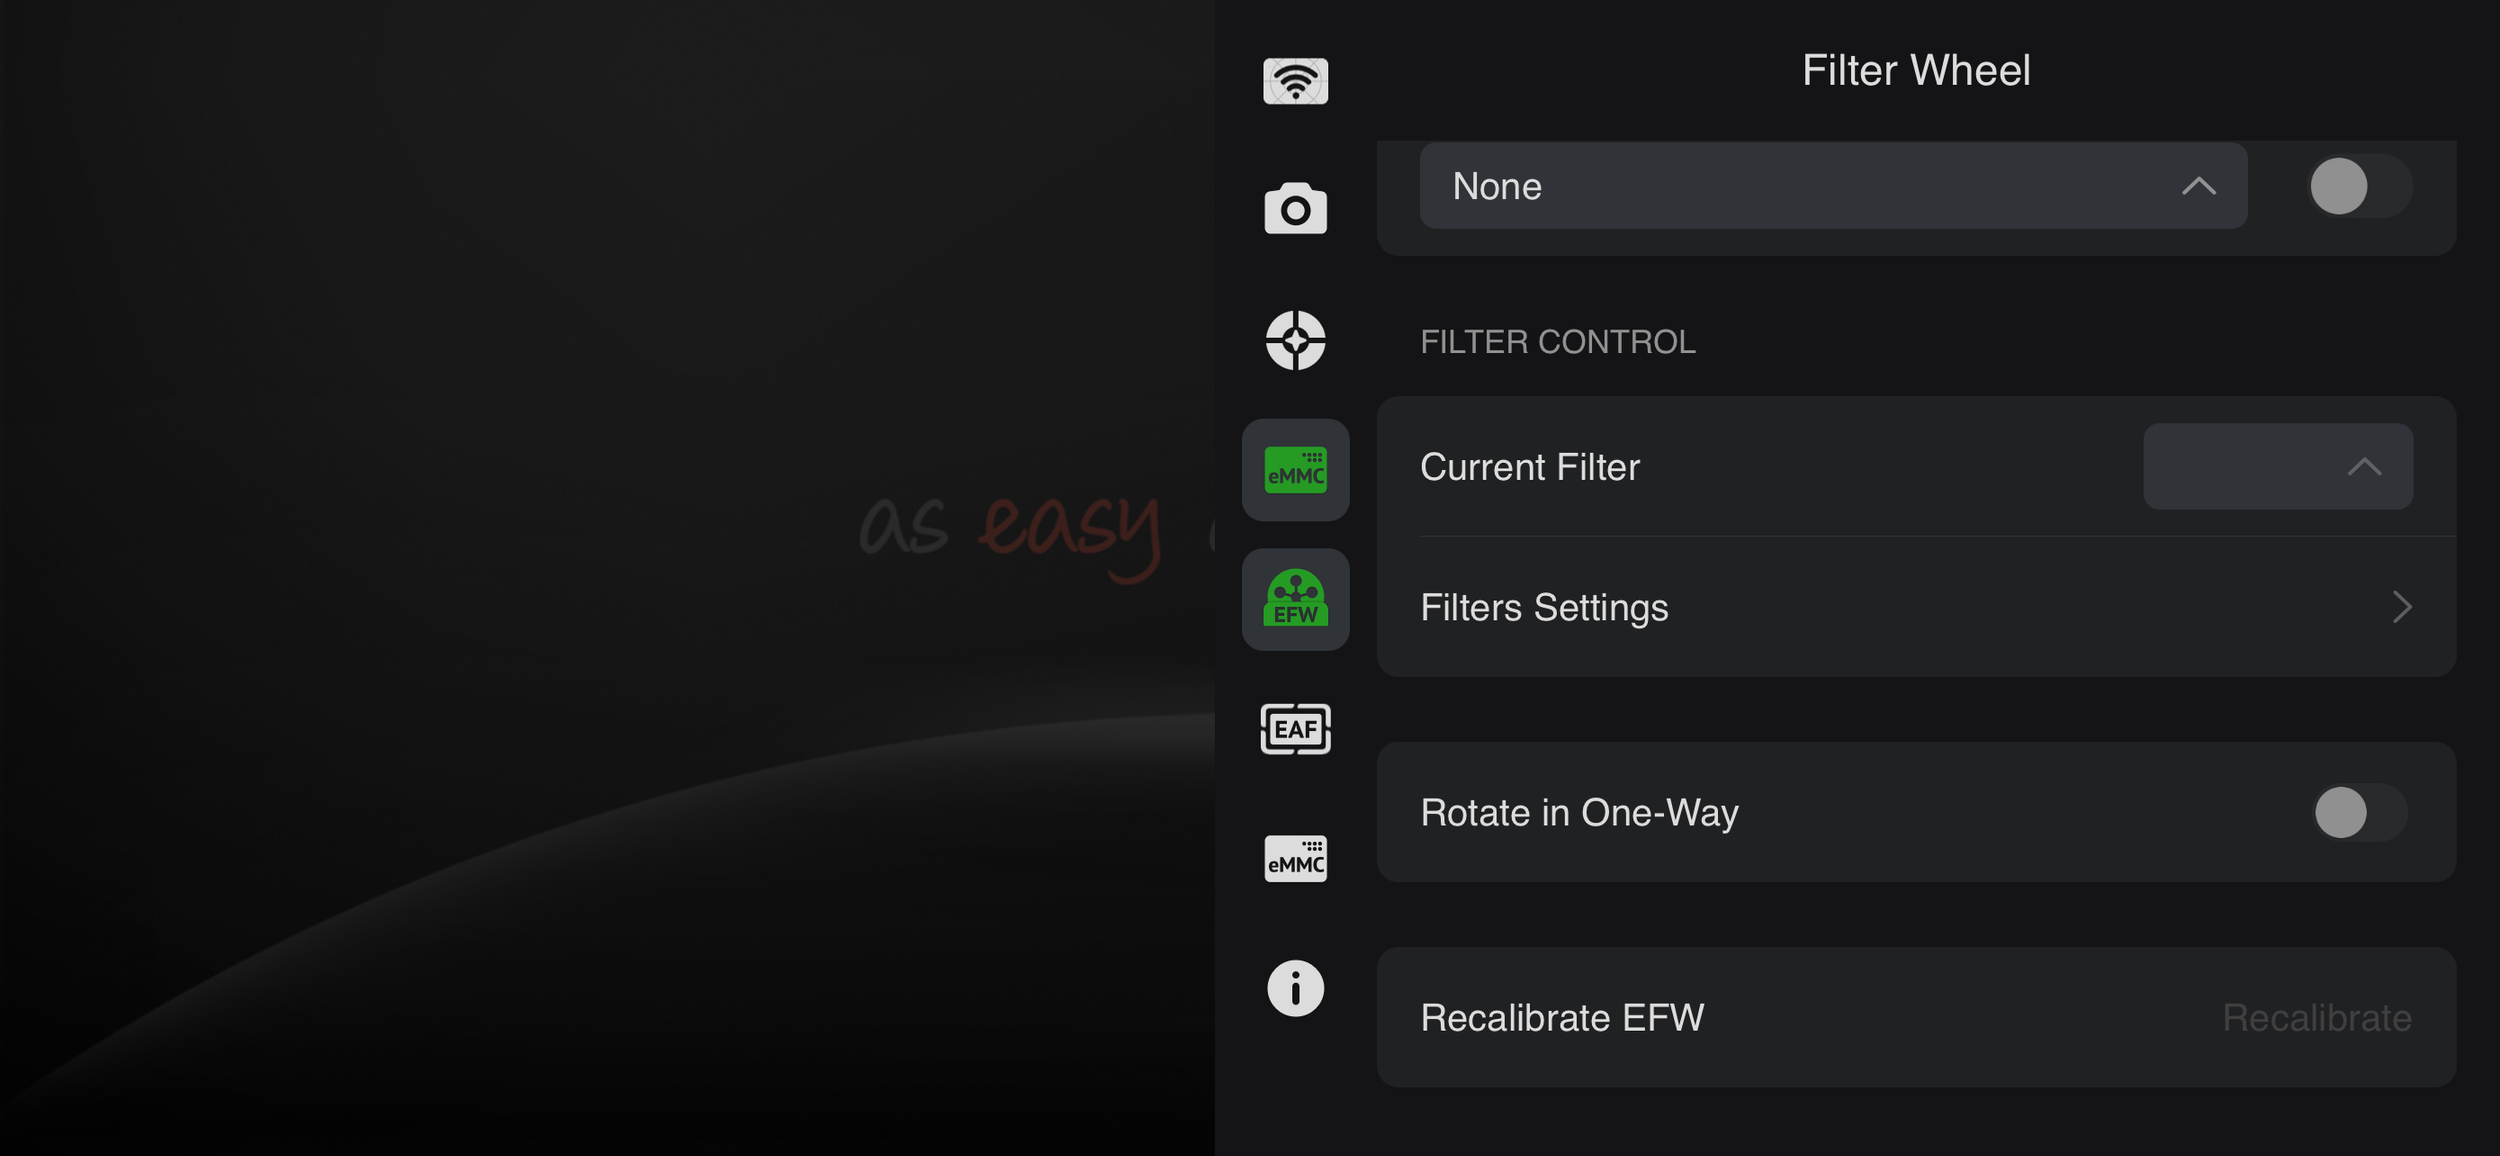
ASIair Filter Wheel settings
ASIair Electronic Focuser settings
ASIair eMMC settings
ASIair About screen - note the option for All Sky Polar Align (within experimental features) for whenever Polaris is not visible.
ASIair Display Options
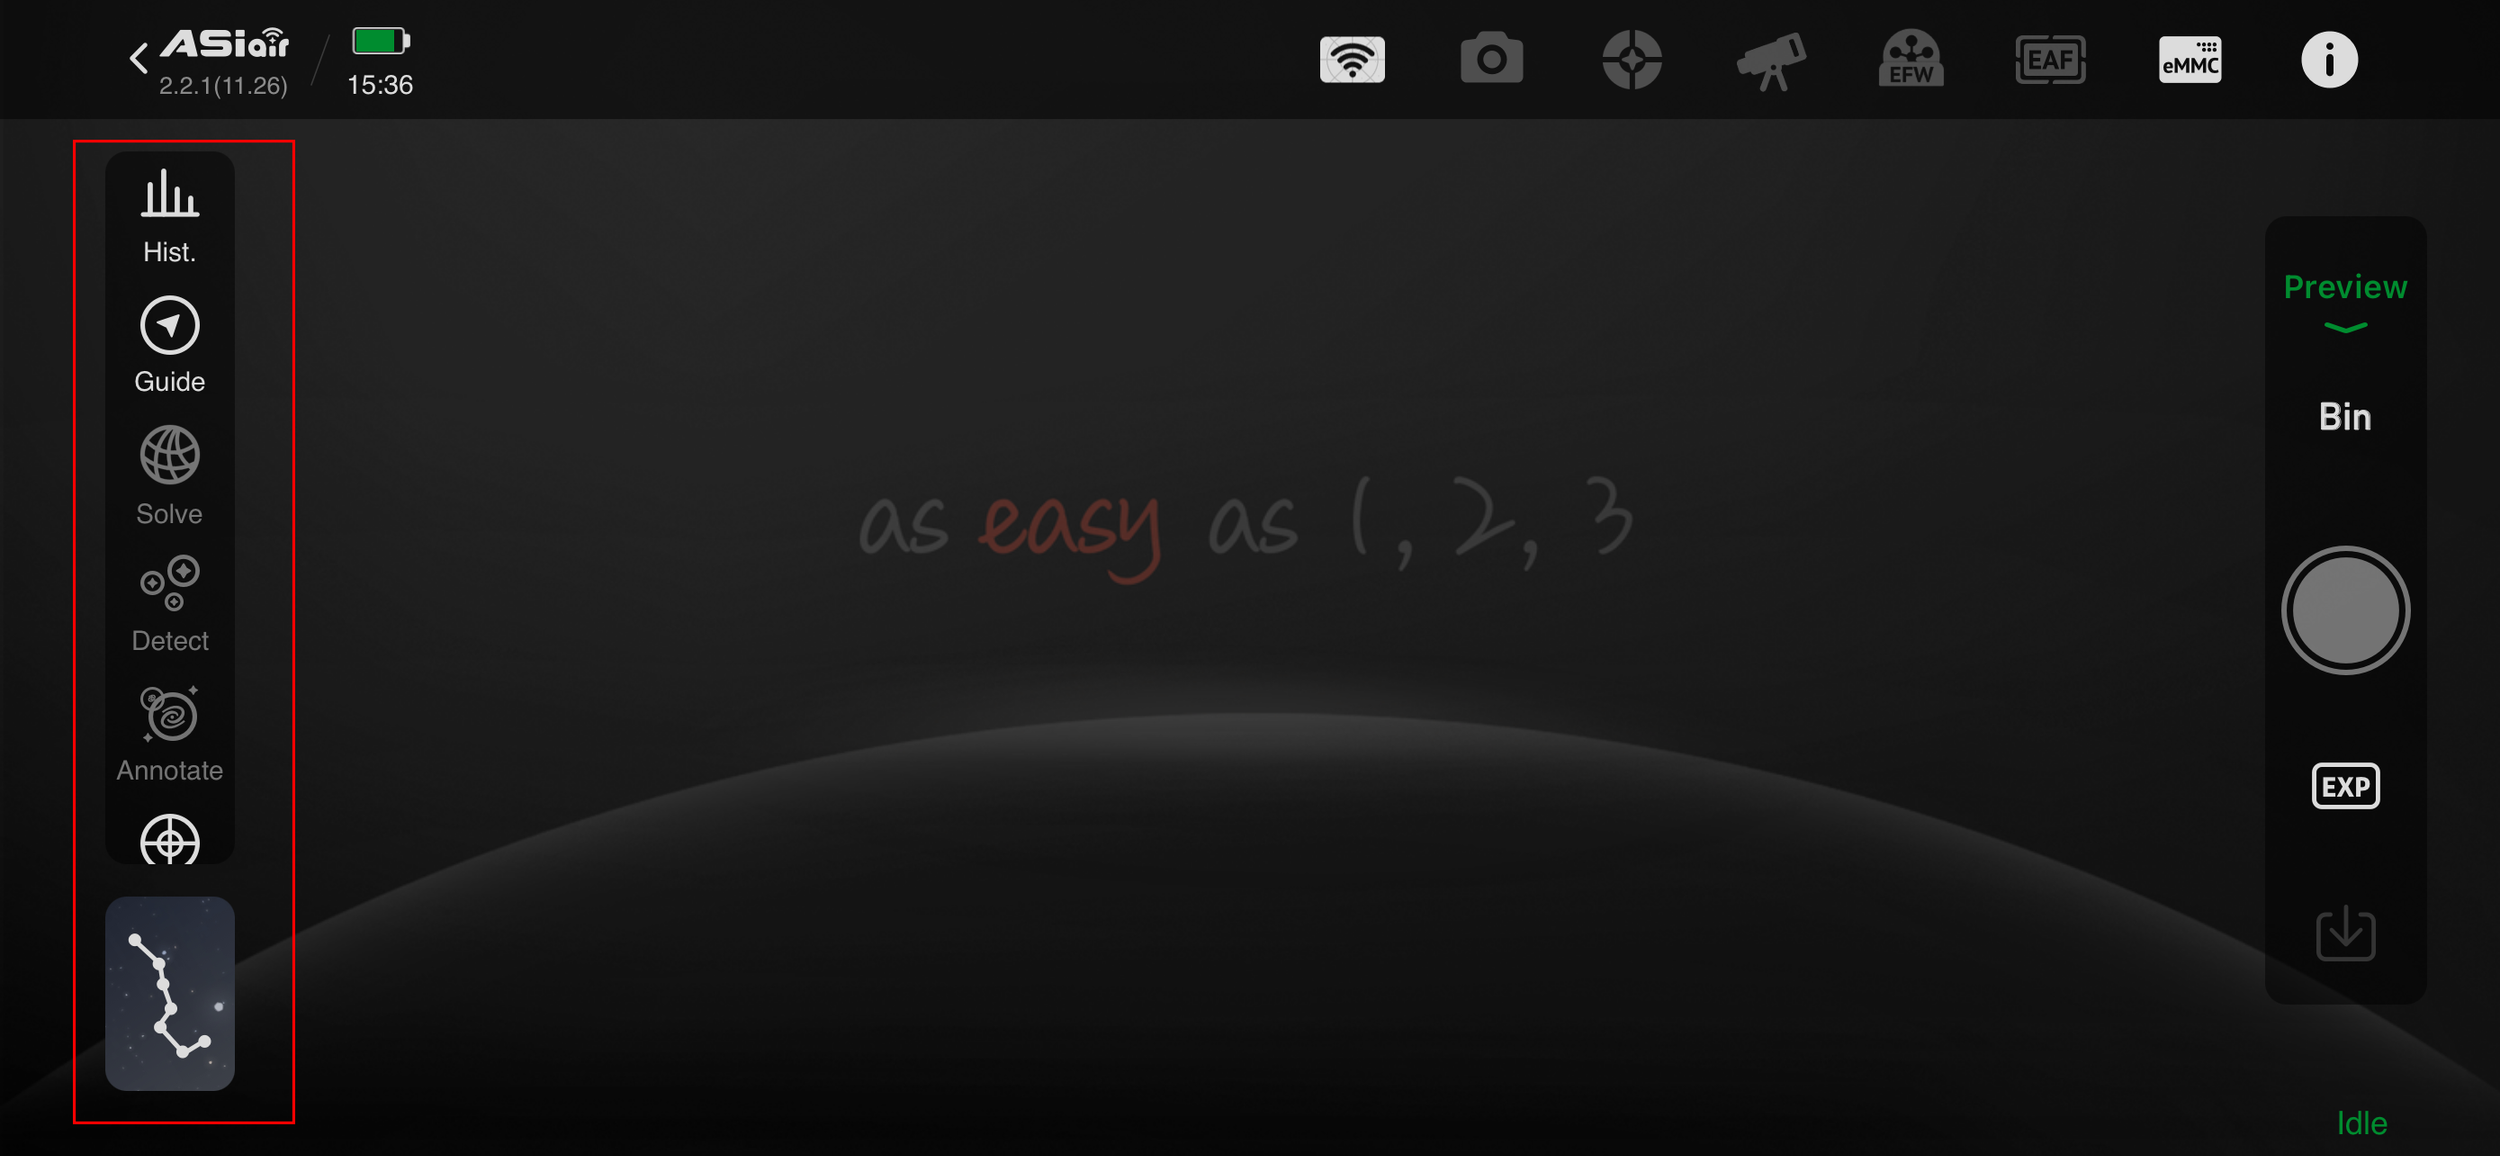
The icons down the left side of the main window turn on and off the histogram (which shows at the bottom of the image), the guide window (to be discussed in a future post once my guiding equipment arrives), a button to plate solve the displayed image, and a few additional tools like detect and annotate (which labels selected objects in the image ). At the bottom you have a Big Dipper icon that takes you into the Star Atlas where you can select targets and slew the telescope.
ASIair Actions menu
Finally the menu on the right hand side of the screen controls which mode the ASIair is in - in this case Preview.
Pressing the Bin icon allows you to choose pixel binning options, while EXP allows the exposure time (in seconds from 0.0001 to 1000 seconds per exposure) to be selected. Pressing the central button takes the exposure. In Preview mode images are not automatically saved, so the download icon sat the bottom of the menu allows you to manually save the image.
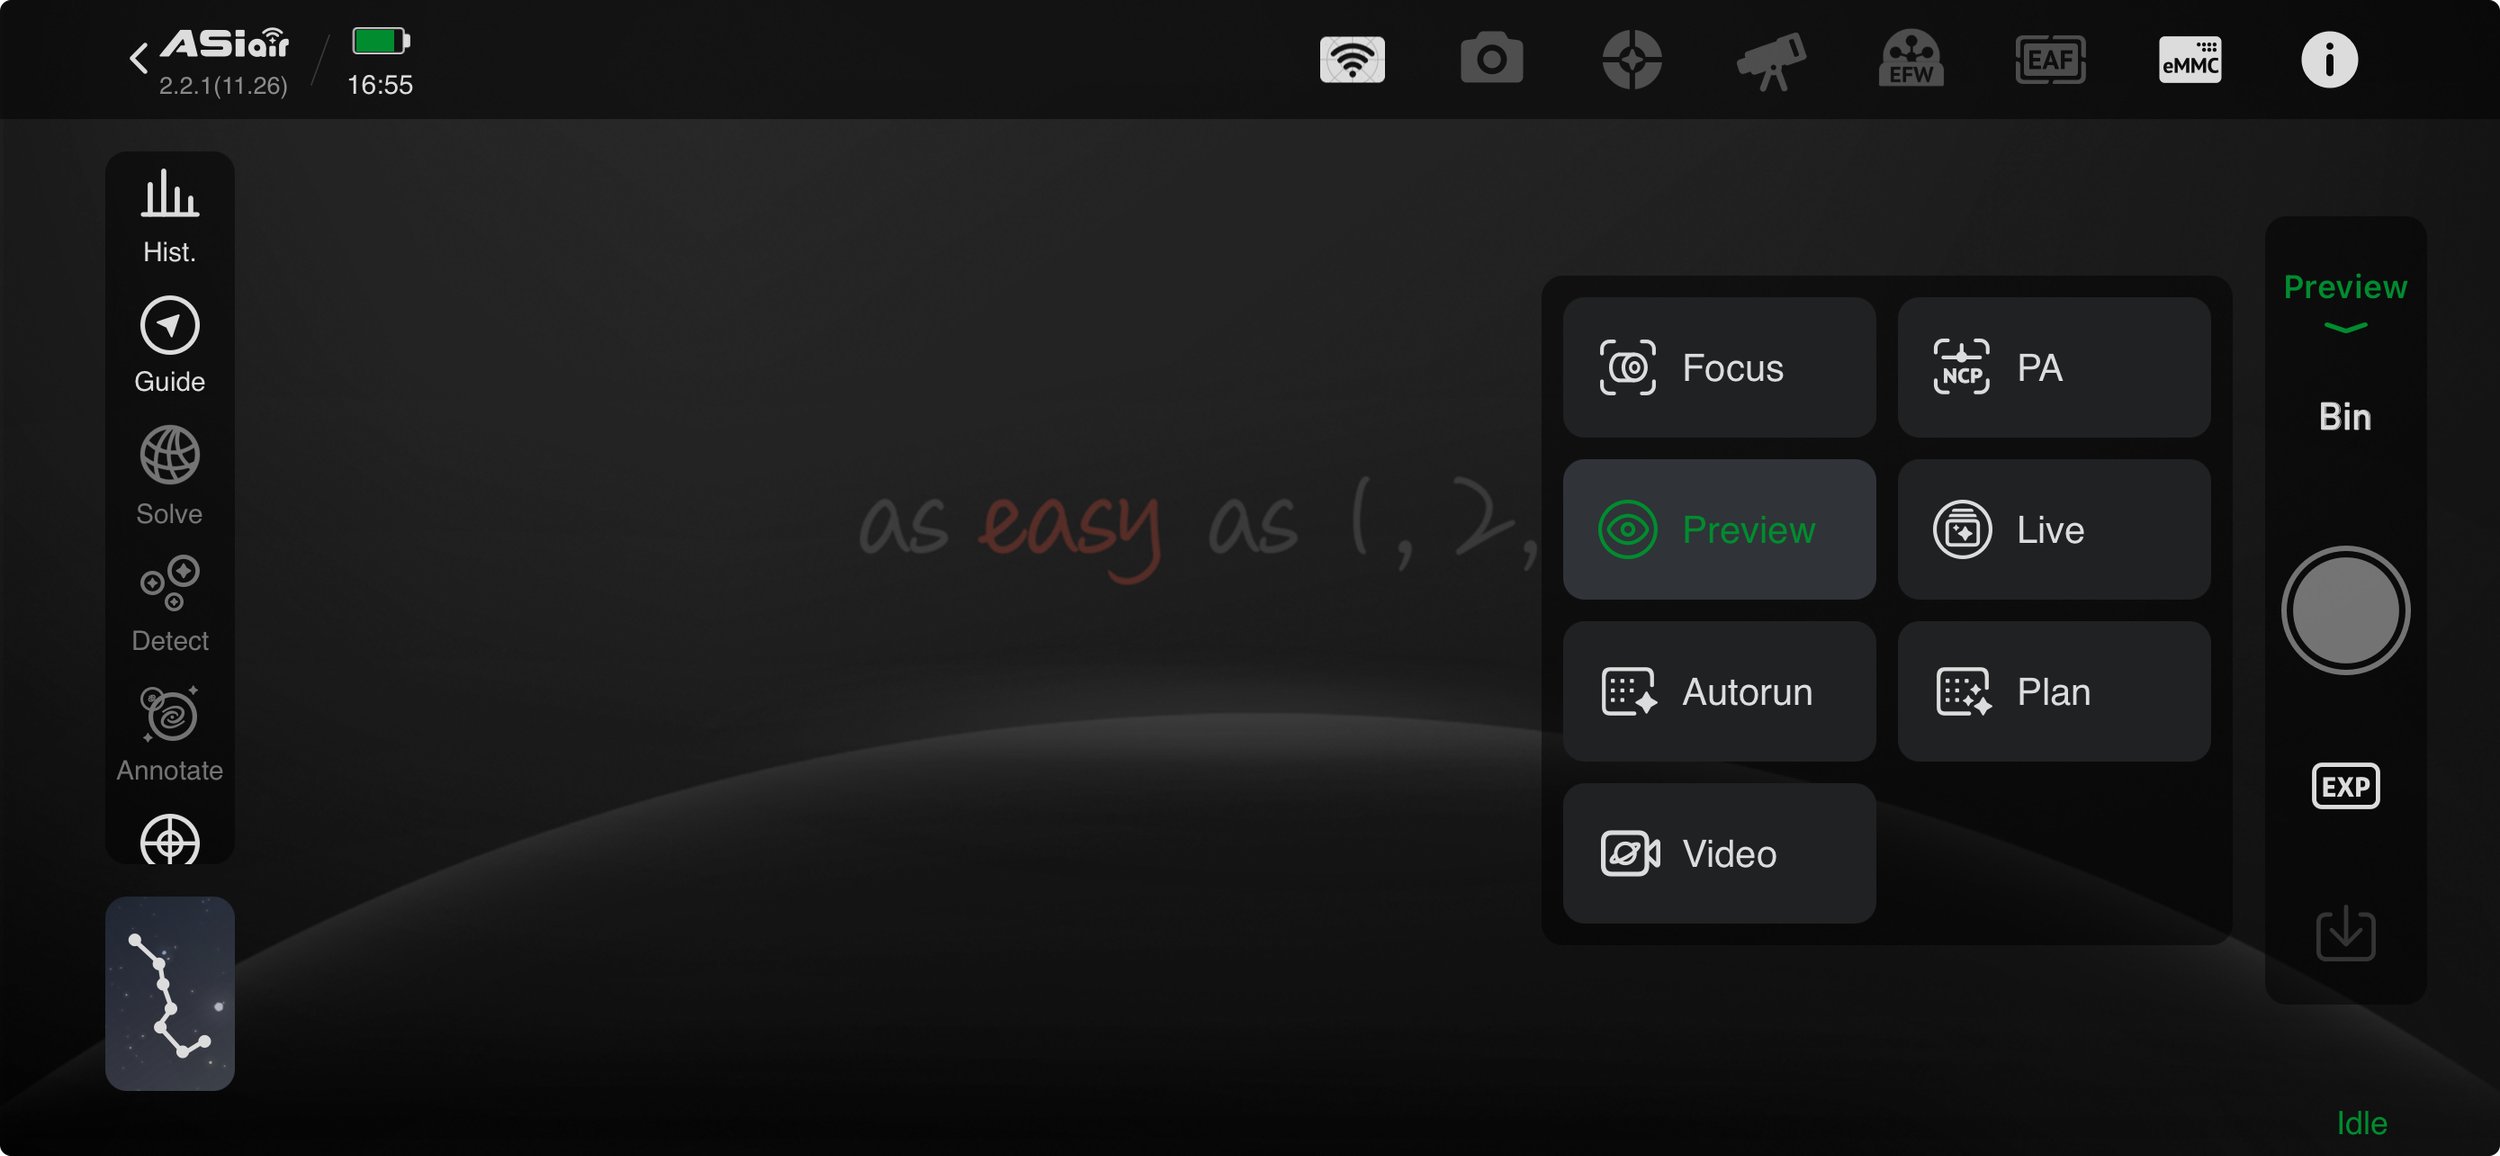
Pressing on the Preview option brings up the mode menu:
ASIair Mode Menu
In addition to Preview, the mode menu offers the choice of Focus, Autorun (for running a predefined sequence of lights, darks, floats and biases), Video, Polar Alignment (PA), Live stacking or Plan (for adding multiple targets). The “shutter button” executes each of the captures modes.
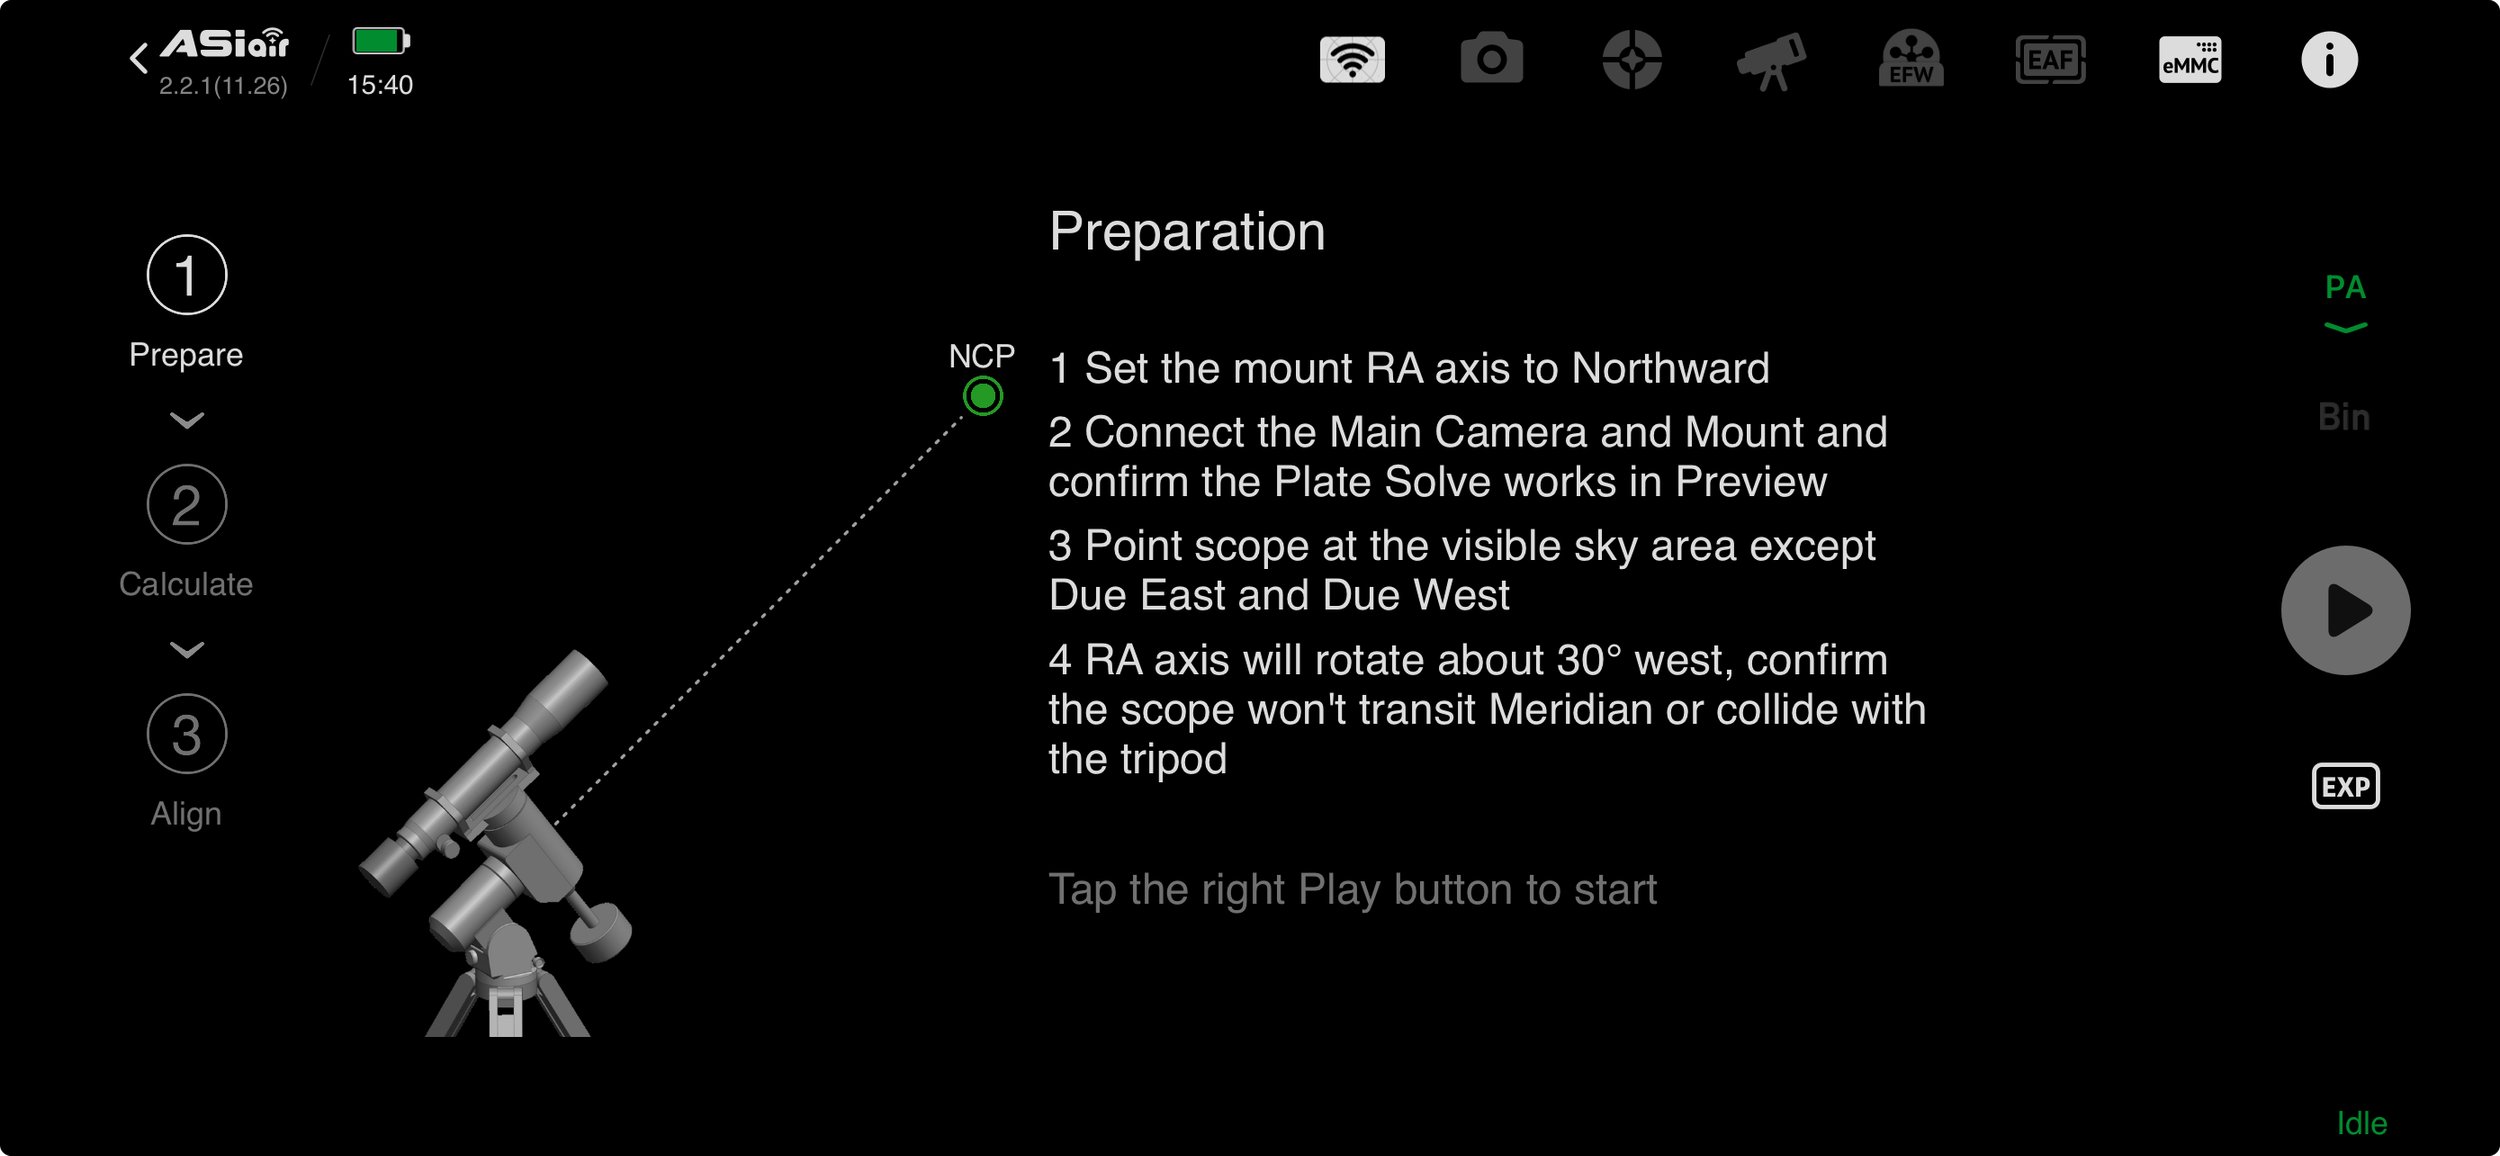
Polar Alignment
ASIair All Sky Polar Alignment
The ASIair walks you through the steps necessary to properly align the mount with the North or South Celestial Poles. It asks you to point the camera towards the respective pole and then to rotate the RA axis by a set amount (either manually or automatically depending on your mount setup). The ASIair takes images before and after the rotation and plate solves to confirm the where the mount is facing. It then determines how far away you are from the pole and prompts you to manually adjust the altitude and azimuth controls on your mount, showing a crosshair with circle indicating how far off target you are. Each time you adjust the alignment the ASIair will take another image and recalculate your position. This is extremely straight forward but I found that, as you get closer and closer to perfect polar alignment, you can tend to overshoot your movements, so aiming for perfection can be frustrating. Nevertheless. on my first attempt at using the Polar Alignment function I was able to get within 5 arc seconds of the pole in under 2 minutes.
A recent addition to the ASIair is All Sky Polar Alignment. This is invaluable for locations where you can’t actually see the celestial poles, due to buildings or trees etc. blocking the view. The process is exactly the same was normal polar alignment except you can point the camera anywhere you can see the sky and the sequence of plate solve, rotate, plate solve is the same until you achieve the required alignment. I can even point directly due south and get a good polar alignment from my location in the UK.
Focus
I am still waiting to obtain the ZWO Electronic Auto Focus system for use with the ASIair. These seem to be difficult to get hold of at the moment so I will also leave this to another post.
Autorun
In order to automate a night’s imaging, you have to set up a sequence. A sequence is basically a list of actions you need the ASIair to do for the evening. To access the Autorun schedule select Autorun from the mode menu and click on the three lines immediately under the Autorun text. This brings up the shooting schedule entry box where you can set up the shooting parameters including whether to group images, perform a meridian flip and enter delays before and during the shooting cycle. Click on the + box to add the particular shooting settings including how long to expose for, and how many frames to take, whether to take lights, dark, flats and bias frames, and any binning requirements. You can add multiple shooting settings and instruct the ASIair to do a series of Lights followed by a series of darks for example.
ASIair Shooting Schedule
ASIair Shooting Settings
A status bar along the bottom of the screen shows the estimated duration of the sequence, number of frames to be taken and also the remaining time until the meridian is reached if the meridian flip option is selected.
Plan
Plan is effectively the same as Autorun except that you can set up shooting for multiple targets in one session. Select the Plan option from the ASIair Mode Menu and click on the three lines immediately under the Plan text. This brings up the Add Target menu. Click on the + box to select your first target and select, either from the Tonight’s Best screen or search for your chosen target. Once the target is chosen you can go to the Shooting Settings menu and enter the particular shooting settings including how long to expose for, and how many frames to take, whether to take lights, dark, flats and bias frames, and any binning requirements.
ASIair Plan Menu
Select the target from Tonight's Best, or...
Select a target using the search function
Once the first target is selected click the + button to enter shooting parameters
Select the type of frames, exposure, number of frames and any binning requirements
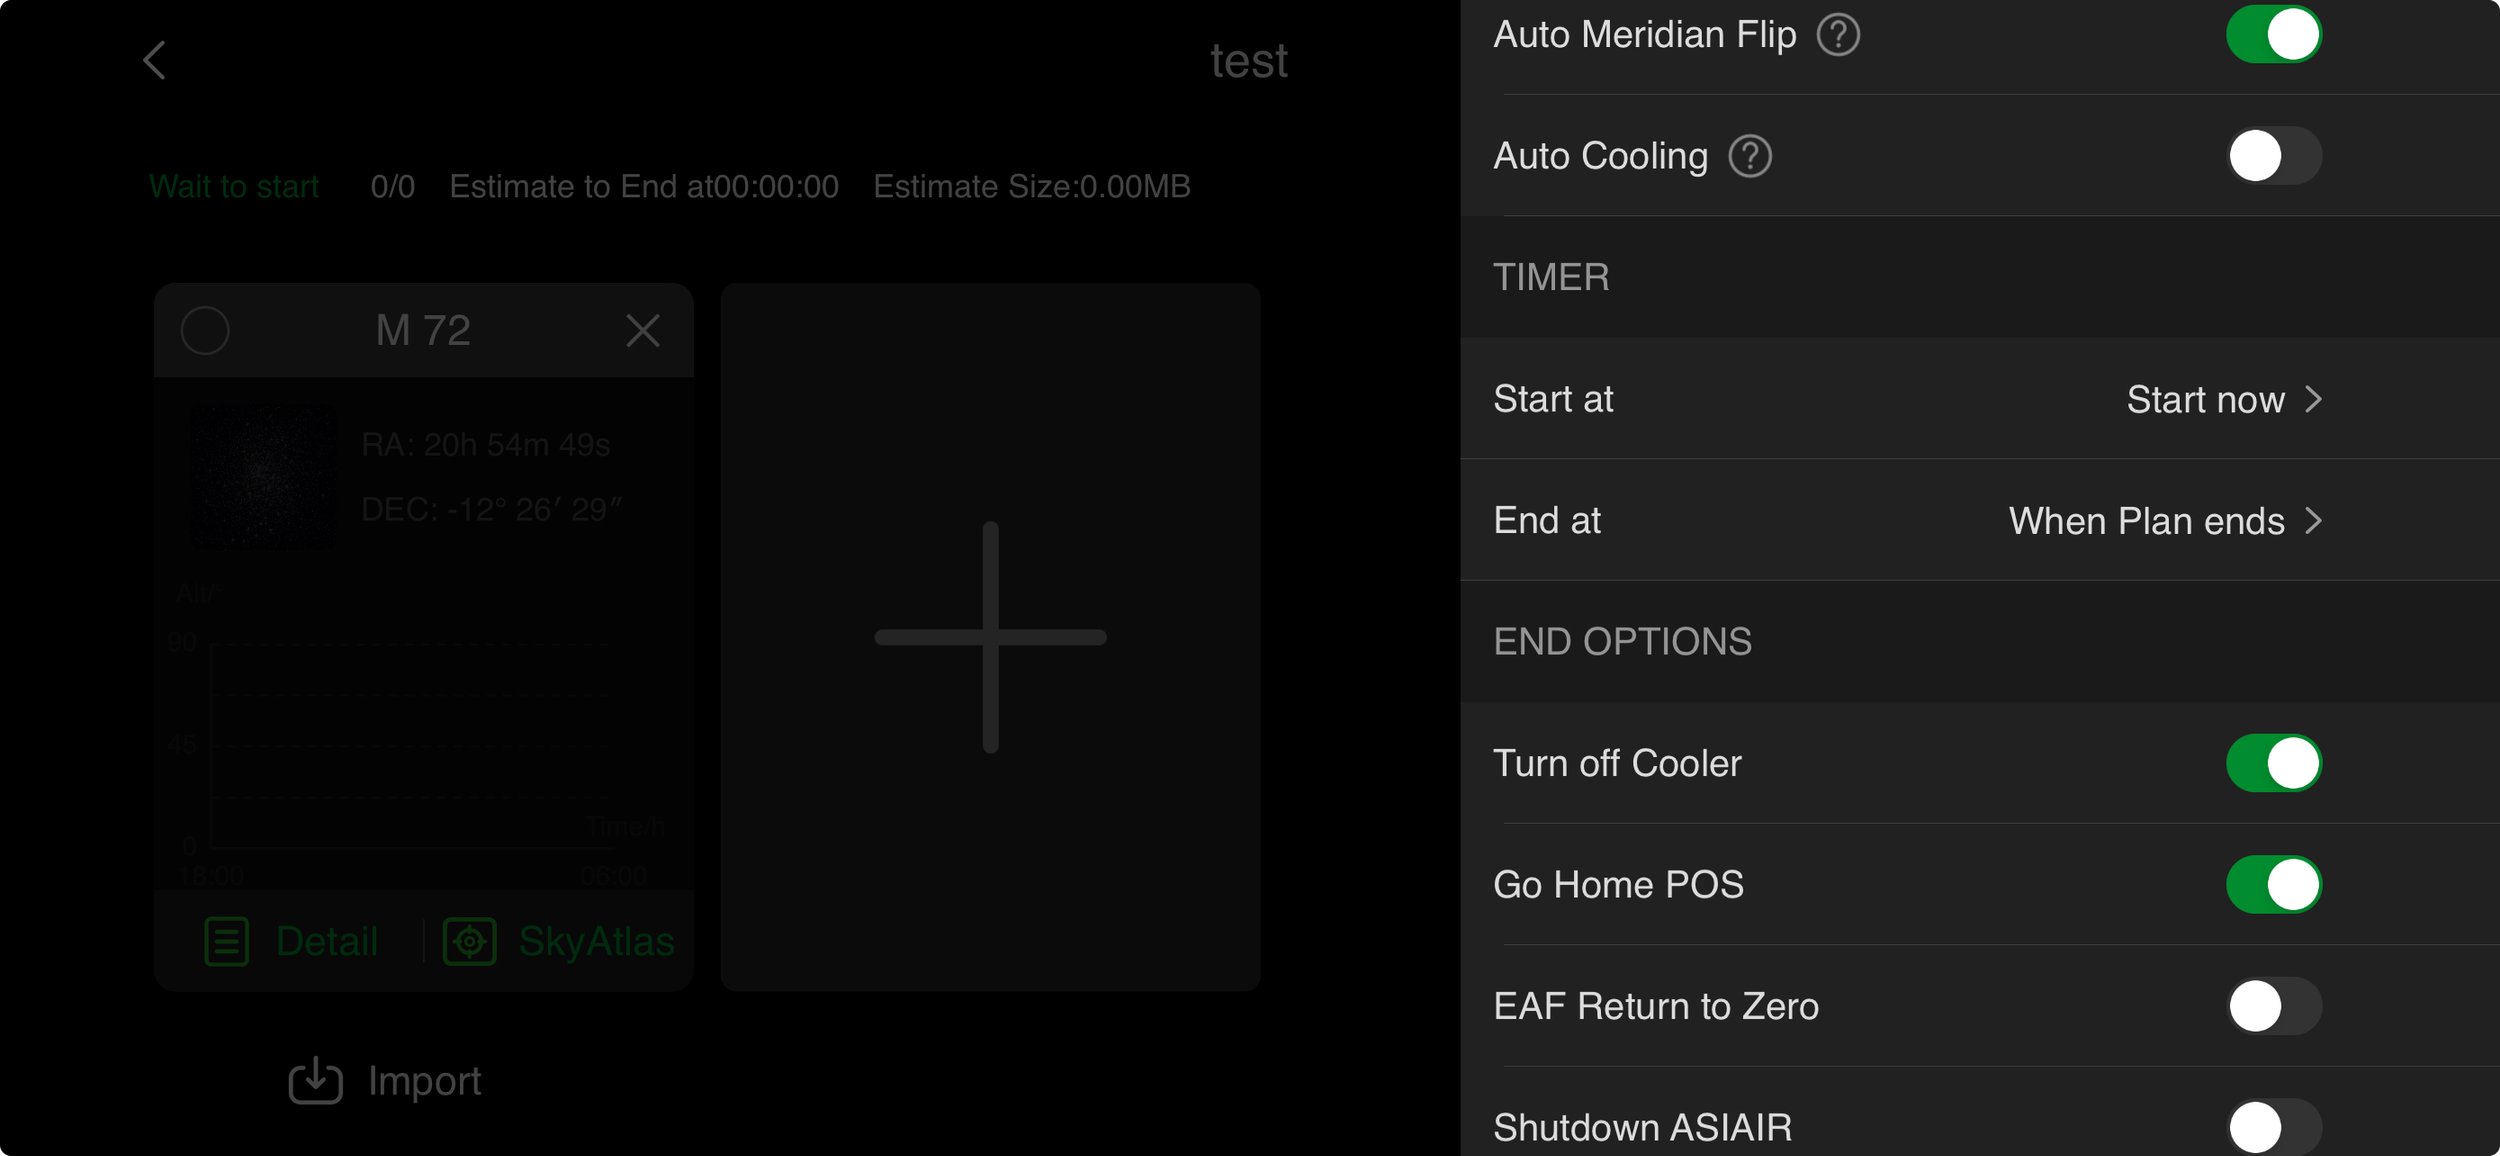
Once the first target is set up, the ASIair will prompt for subsequent targets until you have completed the setup. Click on the settings icon (gear wheel in the top right corner) to fill in the parameters for the selected plan, including meridian flip, camera cooling, start and stop times, and what to do after completion of the plan. You can set the Start time to any time required (maybe a specific time when an object rises or becomes visible, from Stellarium for example) or to start immediately. Stop time can be set to a specific time, when the plan naturally completes or at Astronomical Morning just prior to to the sun beginning to rise. Here I have the system set to shut off the camera cooling and return to the home position. I don’t shut down the ASIair as I like to keep the dew heaters powered to prevent condensation and water marks forming on the camera lens.
Plan settings
Video
The video option is only available when a video capable camera is connected. My Nikon Z7ii isn’t supported in video mode so I will discuss this at a later date.
Live
The ASIair is now able to do live stacking of images as they are captured. This feature stacks lights, darks, etc as they are acquired to provide a quick display of the integrated image data. The sequence doesn’t remove the need for post processing though as it is limited to about 20 of each frame type. In Live stacking mode you must acquire any dark and bias frames first then these are automatically combined with the Light frames as they are taken. The resulting image provides confidence that the appropriate data is being collected especially for dim objects as you can see the target emerging from the noise as successive images are stacked. The ASIair can be instructed to save the individual images for stacking and processing on a computer as necessary.
Select Live from the ASIair Mode Menu
Enter the details for Light, Flat, Dark and Bais frames including exposure, binning and saving information.
Summary
The new ASIair Plus is an extremely well refined package. The system is simplicity itself to set up and use, especially for a relative beginner like myself. It is truly a plug and play system without the need to download and configure multiple software packages, drivers, etc.
The only drawback with this system is that for certain functionality you are tied to ZWO specific hardware when using the ASIair Plus. In particular the only astronomical cameras supported are the ZWO ASI range (Canon, Nikon and some Sony DSLR/Mirrorless cameras are supported though). Similarly, only the ZWO EAF electronic autofocuser and ZWO Filter Wheel are supported, so if you already have cameras, filter wheels and autofocusers from other manufacturers the ASIair may not be the best choice for you. Mount wise you have a lot more choice as most of the popular mounts, including my Sky Watcher Star Adventurer GTi, are fully supported. This is obviously a limitation put in place by ZWO and it is in some ways understandable to allow them to capture more business and from a system support viewpoint. By limiting the hardware that can be used it reduces the amount of drivers needed, configurations supported and potential incompatibility issues. As I’m starting to building this kit from scratch I have chosen equipment that can work seamlessly with the ASIair Plus so it’s not a major problem for me.
To conclude then, if you are happy to commit to the ZWO infrastructure, the ASIair Plus 256GB is a remarkable little box that does just about everything you might want to do with your astrophotography gear. It has made my start into my astrophotography journey so much easier and more fun. I have more ZWO equipment on order to expand this system and will provide follow up progress reports as I start to integrate it into my rig.
I wish you all Clear Skies

